Even if you don’t have access to the original Brushes app, you can make movies of your iPad drawings and sketchnotes again thanks to the new WorkVisual app. As the developers say in no uncertain terms, the Exporter tool is in alpha release. It’s not an easy process, but it’s possible!
A lot of the setup only needs to be done once, and after you get your workflow underway it goes faster. Keep in mind that these instructions will only be useful until the alpha software changes. Also note that the WorkVisual Exporter only works on the Mac at the moment.
THE DEMO MOVIE
I used an old diagram I drew a while ago so that I could test a movie with tracing for this demo. Read on for the long and detailed instructions on how to get your iPad drawing into a file you can open in your favorite video editor.
After following Steps 1-4 below, I imported the .mov file and still frame into Final Cut Pro X, sped the movie up, and added the title that looks like a piece of tape.
A. THE EASY PART: Drawing on the iPad
- Open a new drawing in WorkVisual and set up your layers.
- Create 3 layers and don’t reorder them. This is very important. Because of a bug in the Exporter, the movie will show layers in the order they were created, so if you reorder them, your movie will not look right.
- Import a picture if you are tracing. It gets placed on a new top layer. Drag it to the bottom. Because of a bug that this time works in our favor, the imported picture will be invisible to the Exporter, so it doesn’t matter that you reorder this one layer.
- Set opacity on the picture layer down low enough that you can see it but it won’t get in your way. (Ignore this step if you didn’t import a picture.)
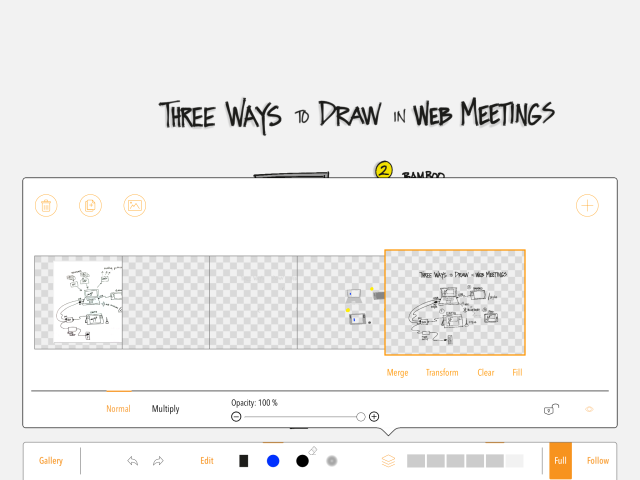
What the layers look like when the drawing is finished.
- Start to draw or write.
- Use the top layer for your outlines, text, and other top-level content.
- Use the second layer down to color in shapes you have drawn.
- Use the third layer down to add shadows or airbrushing under the colors and shapes.
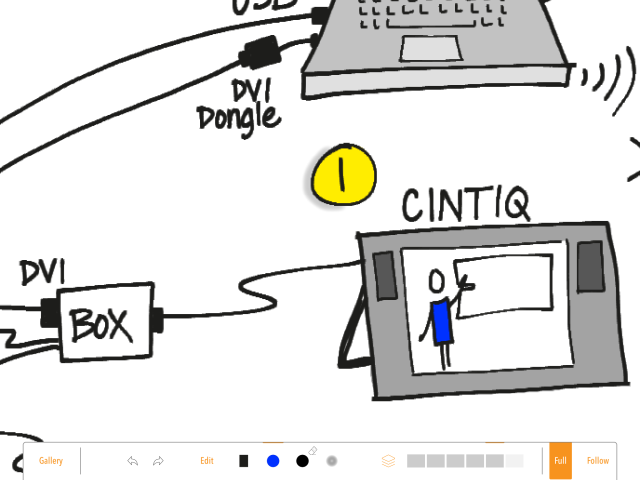
Detail of the drawing. The outlines are on the top layer, the colors on the next one down, and the shadows on the one under that. The bottom layer is the tracing (set to 0% opacity and invisible at the moment) and the other one is a rogue layer that sneaked in there.
- When you’re done, go back to the Gallery to send yourself the file you need.
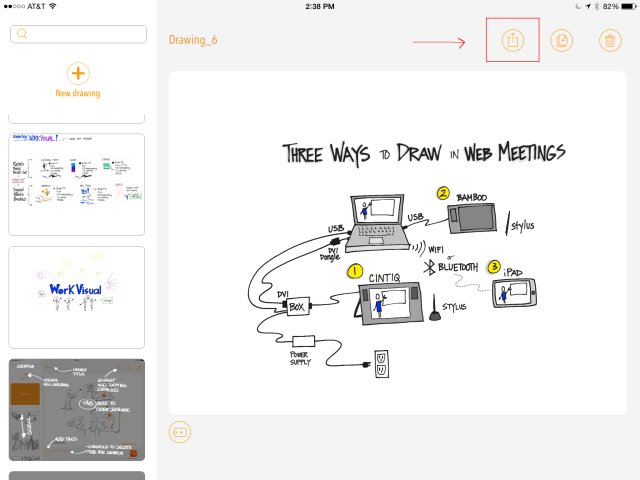
- Tap the Share button.
- Choose Export for Mac Tool.
- Mail it to yourself (mail needs to be set up on your iPad and you need a wifi or cell connection.)
Gallery and share button.
B. THE HARD PART: Creating the Video File on the Computer
There are four main steps: Install the WorkVisual Exporter; install or identify a program to handle your image sequence; export your image sequence; turn the image sequence into a video file.
Step 1. Install the WorkVisual Exporter.
- Download the WorkVisual Exporter in exchange for leaving your email address for update notifications.
- While you’re there, you may wish to look through the workflow description on the same page. It’ll help the rest of this post make more sense.
- The download link gets emailed to you, so check your email, click the link, and save the file where you can find it again.
- Go find the file and double-click to open it. It’s a .zip file, so this will unzip the Exporter.
- Double-click the Exporter to launch it. If your computer asks you if you really want to open it, search your soul and do as your conscience dictates. If you decide not to open it, you’re done but you can’t make a movie. Otherwise, read on.
- If you wish, you can drag the application icon to your Dock, or place it in your Applications folder so you can find it again later.
Step 2. Install (or identify) a program to handle your image sequence.
Leave the Exporter alone for a moment while you get the second piece of software you need: the one that will turn the image sequence into a movie. There are a lot of choices for how to do this, ranging from free to expensive.
Things to know:
- Beware of the free tools you might find by doing a web search. Image and video converters are notorious for containing malware. Not all free tools do, but use common sense when making your selection, and do a search on the name of the tool to find reviews and comments.
- Photoshop can apparently convert images into video, but each frame becomes a new layer. The Exporter generates a LOT of frames. I don’t know how many layers Photoshop can handle before it goes nuts, but I’d be careful.
- Adobe Media Encoder can also do this, although I found it frustrating when I tried it and eventually went with QuickTime Pro 7.
- I gather that Adobe After Effects can also do it, though I don’t know how to use it.
- It’s possible that Final Cut Pro X does it, which would save a step, but I haven’t figured it out yet. Final Cut Pro 7 used to do it but that was a while ago.
- Most tools want you to only open the first image in the sequence. Don’t select and open all of the images, or it won’t work.
I chose to use QuickTime Pro 7, which is very old but still available and still functional. Please note that although QuickTime is built into OS X, the function that we need isn’t. You can have QuickTime 7 installed right along with the one that comes with OS X. If you don’t have QuickTime Pro already, you can buy it for $30.
Installing QuickTime Pro:
- Check your Utilities folder to see if you already have QuickTime Player 7. (Look in Macintosh HD > Applications > Utilities).
- If you don’t have QuickTime Player 7, you can download it here (free and necessary in order to upgrade to Pro).
- Double click the download file and follow the instructions to install it.
- Once you have QuickTime Player 7, open it by double-clicking it.
- If you already had QuickTime Player 7, check to see if you have the Pro version by choosing Registration from the QuickTime Player 7 menu (upper left, next to the Apple menu). If you see a code in the box, you are good to go. No code? Just installed it? Read on.
- If you need to get QuickTime Pro, you can buy it here.
Here is a good, if old, QuickTime overview for your reference.
If you prefer to explore other options, try searching on ‘convert image sequence to video’ or look at the article Convert an Image Sequence to a Movie by Andrew Noske.
Step 3. Export Your Image Sequence.
Now you’re set up, and you don’t have to do Steps 1 and 2 again for your next movie. From here down is the repeatable part.
- Go back to your email and look for the one you sent yourself with the drawing file attached.
- Download the attachment and save it in a new folder somewhere. Don’t skip the step of making a folder. You can thank me later. Also, don’t change the .workvisual part of the filename. You can change everything before the dot if you want.
- Go back to the WorkVisual Exporter that we launched and left running while we installed QuickTime Pro 7.
- Go to the File menu > Open, and navigate to the file you just downloaded. Open it.
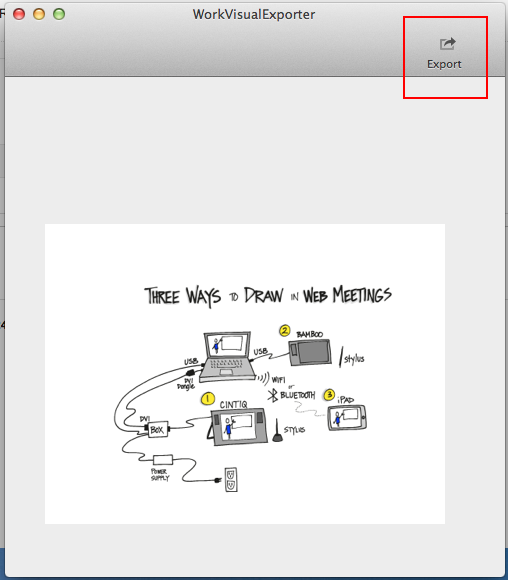
- The image shows up in your WorkVisual Exporter window.
My drawing in the Exporter window. The Export button is highlighted.
- To export the image sequence, click the Export button in the top right of the Exporter window.
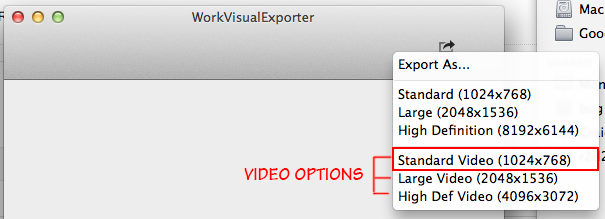
Video export options. Use the Standard one.
- The top three options will export a nice JPG for you, but that’s not what we want.
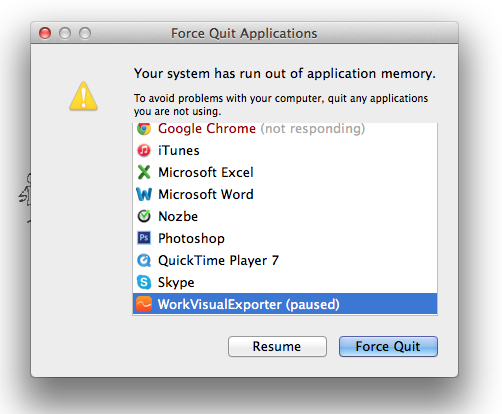
- The bottom three options export the image sequence for video. That’s what we want. Pick the standard definition. NOTE: Your computer can run out of application memory and crash if you use the large or high-def settings. Even a nice, new computer. USE WITH CAUTION. This is a bug and they’re working on it.
This is what you’ll see if you run out of application memory.
Force quit the Exporter, shut everything else down normally, and reboot.
- Make another new folder inside the other one and name it Image Sequence or something equally memorable. You want all your images to go into one folder that has nothing else in it.
- Save the file with whatever name you want but MAKE SURE YOU ADD .jpg to the end of the name. If you skip that, this will not work.
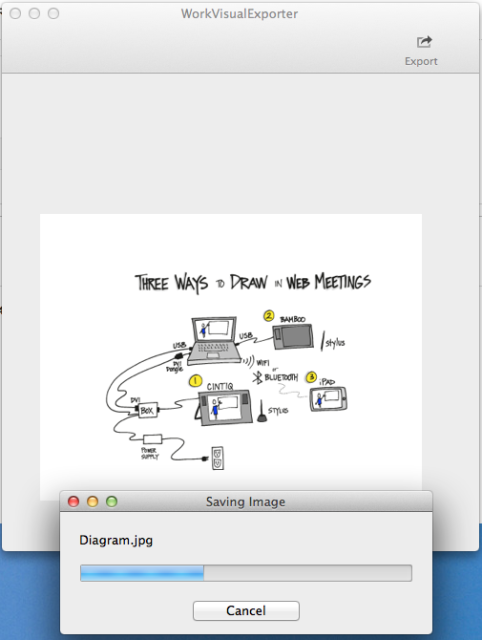
- You’ll see a “Saving Image” progress bar. Let it do its thing, go get some coffee, whatever. It’s best if you don’t try to do anything else with your machine while it’s exporting.
There it goes! Don’t mess with it. Just walk away.
- When you get back, there will be a bunch of .jpgs in the new folder, all neatly numbered in order. Don’t change the filenames.
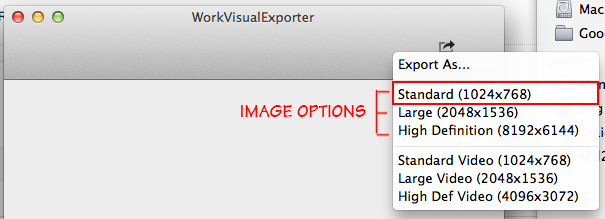
- It’s useful to export a still frame at the same size as your video, so go ahead and do that now using the first Standard setting. Remember to add .jpg to your filename. You’ll use this still frame in your video editor, adding it at the end of the video so that you have a nice hold for a few seconds when the drawing is done.
Choose the same size for the image as you did for the video.
Step 4. Turn the Image Sequence into a Video File.
To do this, we’ll use QuickTime Player 7 (even though we upgraded it to Pro, it’s still helpfully called Player). We just need to tell it which image to start with and what settings we want. If you chose a tool other than QuickTime Pro 7, you’re on your own here, but the process should be generally the same.
- Switch to QuickTime Player 7, or launch it if it isn’t open.
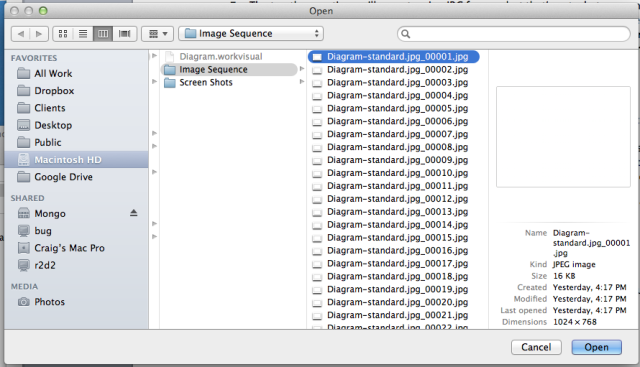
- Ignore the default window or close it if it’s in your way. Go to File menu > Open Image Sequence… and select the first image in your folder.
Only select the first image, not all of them.
- Set your frame rate. I used 30, which is a standard frame rate. (24 and 29.97 are good too.) If you want to learn more, read this article on frame rate or play with this demo.
- Click OK, then wait a bit while nothing appears to happen. After a moment, your video will open. It’ll look like a blank white screen. Click the Play button at the bottom of the window to preview your video. You’ll notice it’s pretty slow. You can fix this in your video editing program later.
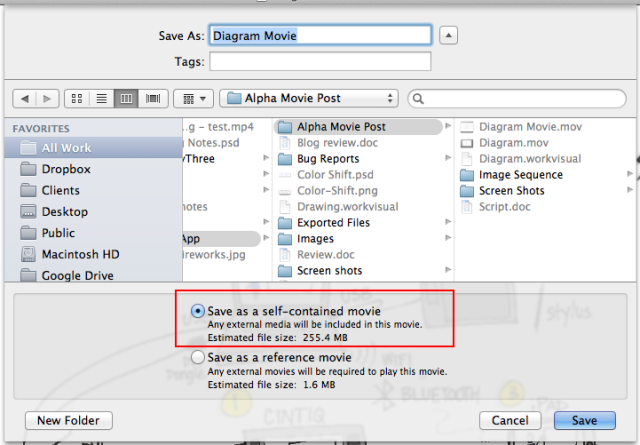
- Save the file as a self-contained movie and you are good to go. Ta da!
Choose self-contained movie.
If you want to fiddle with settings, you can choose File > Export… and play with different formats and different options for each one. The Save method described here results in a pretty large file size but you will get good quality.
The Other Part: Making a Whole Movie
I’m not going to cover this in detail because there are lots of great tutorials out there for making movies (one of my favorites is Izzy’s Final Cut Pro tutorial series).
- Open your favorite video editing program (I use Final Cut Pro X, but iMovie, Premiere, or any other program will work too).
- Import the video file and the still frame you created in the previous step.
- Add audio, a soundtrack, still images, or whatever else you wish.
- Adjust the timing so it’s faster or slower or whatever you need.
- Place the still frame at the end of the drawing sequence to give people a moment to absorb the finished drawing.
- Render it out and there you go!
If you try this process and discover something new, or if your experience with it is different, please share what you found!

