Tag Archives: scanscribe

Cleaning Chart Photos with CamScanner

One of the participants in last month’s Advanced Visual Facilitation workshop pointed me to a new (to me) app for cleaning photos, CamScanner. I’m pretty happy with the way it cleans charts, and like many of you I’m having trouble with ScanScribe as my laptop advances technologically and poor ScanScribe does not.

CamScanner is an iOS app (there is also an Android version). It can open photos from your phone or iPad’s camera, or you can take photos with the app itself. Once you get a photo in there, you can correct the keystoning (straighten the edges), drop the gray out of the background paper, brighten the image, and transfer it to your laptop for final clean-up or editing. To my delight, I discovered that I could even do the transfer to my laptop even while sitting on a plane with no internet access.

You can also create an account with CamScanner to get cloud storage for your documents, but I didn’t. You can do everything described below without creating an account.

Here’s the original photo I was working with, taken on my iPhone:

Original chart photo

A teaching chart from the AVF workshop (original iPhone photo).


And here’s the way it came out of CamScanner after less than a minute of work:

Cleaned chart image

The same chart cleaned up in CamScanner.


Get a Photo Into the App
Launch the app and either use the camera button to take a photo (I haven’t tried this with a chart so I don’t know what the results are like), or use the import button (the smaller button) to grab one from your photo roll. You can open a few at a time.

CamScanner screenshot

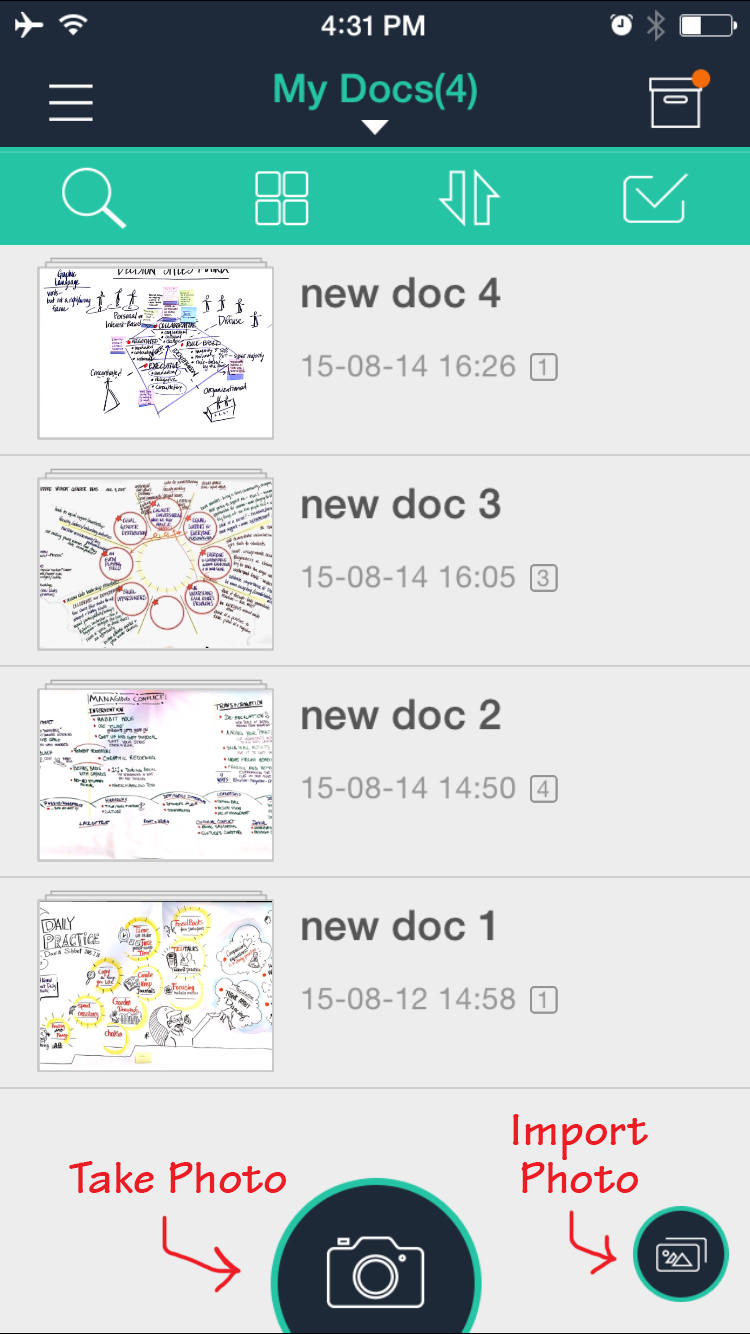
Adding a photo to CamScanner


Correct the Keystoning
If you added a single image, the app takes you to the keystoning correction right away. Match up the circles with the corners and middles of your chart and click the checkmark to save.

CamScanner screenshot

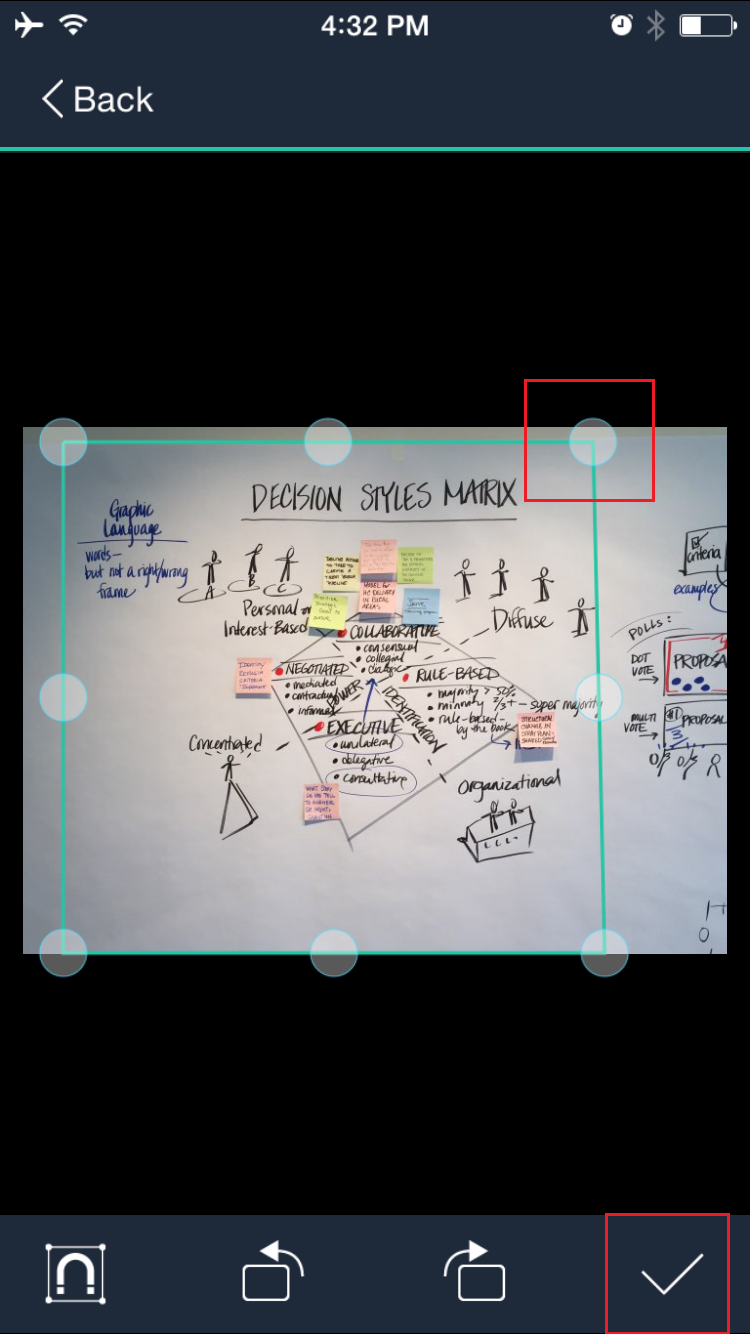
Correcting the keystoning


If you added several images, it looks like the app does the keystoning for you. Tap one of the photos you imported to look at it more closely. If the auto-correction is not quite right just tap Re-Edit (top right) to do it yourself.

CamScanner screenshot

The Re-Edit button


Correct the Color
After you do the keystone correction, the app applies Magic Color almost as if reading your mind. That’s the one that drops out the gray paper background. You can check it against the original by tapping the Original button, or play with the other settings, but Magic Color usually does the job. Sliders at the bottom let you adjust the magic, the brightness, and the saturation. Click the check mark when you like what you see.

CamScanner screenshot

The Magic Color button


Wait… Was That an OCR Button?
Yes, yes it was. There are several languages you can choose from, but don’t get your hopes up. I haven’t found the OCR to do very much with my hand-drawn charts.

Put Them on Your Computer
Hidden behind the More button, the app has several ways to share your photos (email, text, upload to social media, connect with apps like Dropbox, Evernote, and others, and so on).
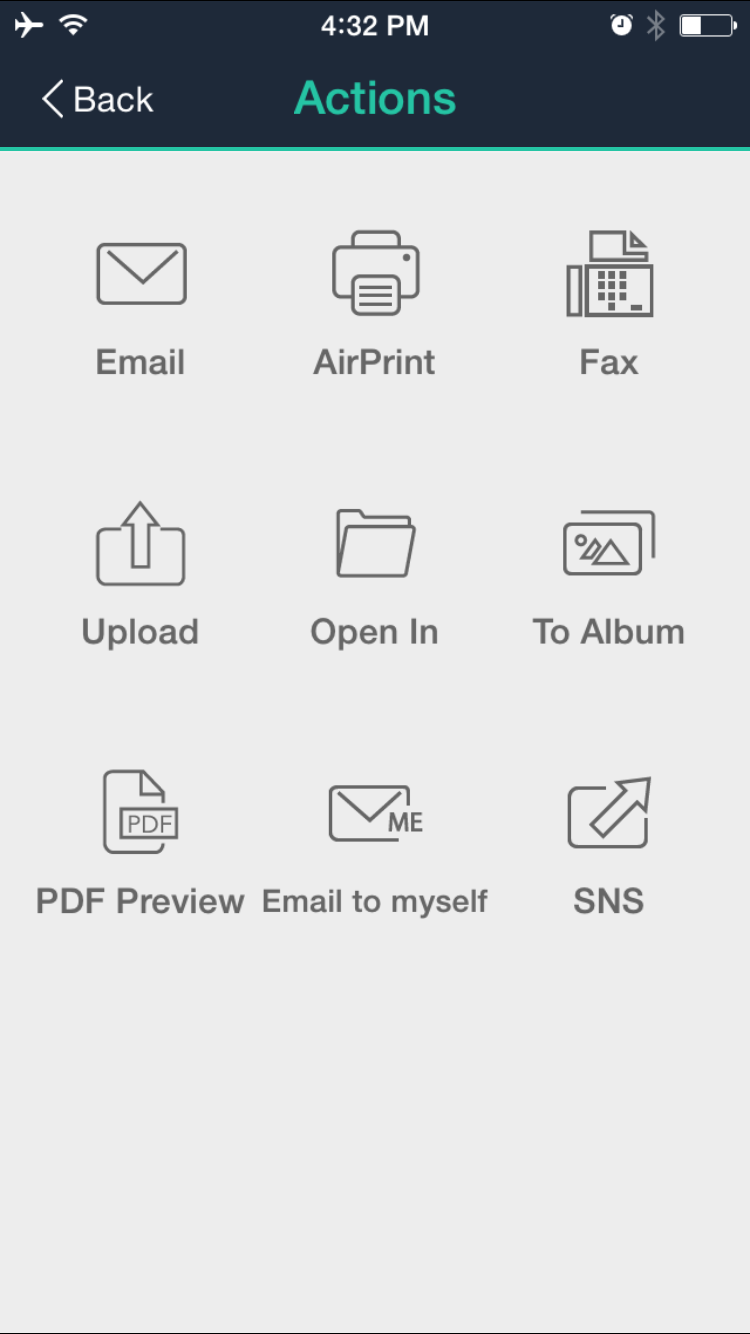
CamScanner screenshot

Sharing options


If you save them to your Camera Roll, you can use Air Drop to transfer them to your computer. I was utterly delighted to be able to do this on a plane, because I needed to clean one last chart to complete a project and Photoshop wasn’t cutting it. There was too much variation in the background. Since I had the photo on my phone already and plenty of time on my hands, I decided to give CamScanner a try. It did a great job, I saved it back to my phone, and then I used Air Drop to share the photo back to my laptop in about ten seconds.

Finish Up in Photoshop
CamScanner leaves a bit of garbage behind, but it was very easy to clean up compared to trying to do the whole chart in Photoshop.

And there you go! I definitely recommend it for speeding up your chart cleaning if you’ve lost ScanScribe.

What else have you found to quickly clean charts? I’d love to explore more options.

Cleaning Chart Images with ScanScribe

The instructions below come from David Sibbet of The Grove and were updated by Cynthia Derosier of Good Juju. I’ve just edited them a little and am reposting them for convenience. If you’re looking for another method of cleaning chart images, I have previously posted instructions for cleaning chart images with Photoshop

Cleaning Up Your Charts

Once you’ve taken photos of your charts, you can run them through a program called ScanScribe to drop out the shadows and the gray or yellowish background that results from photographing paper charts. It’s quick and easy, once you get ScanScribe set up. It’s not like most applications — it’s really a script, so you have to be prepared to fiddle a little bit, but once it’s working it’s a great tool for the job. Like David, I haven’t used it’s other features, but I know it’s capable of more than just whitening images. ScanScribe is available for Mac and Windows platforms.

David Sibbet says, “The best program [for cleaning chart images] is still ScanScribe, a never-released piece of software from Xerox [now Parc]. The interface isn’t very intuitive, but it does a great job keeping your yellows intact. You can change the exposure settings: 4 or 7 seem to work best. You can also correct for keystoning under the edit function. TIFF files work best. These are the only functions I’ve ever used and it seems to work very well.”

Using ScanScribe

  1. Download ScanScribe from the Parc site: http://www2.parc.com/isl/groups/pda/scanscribe/
  2. Save it to a spot on your computer where you will be able to find it (perhaps make a ScanScribe folder inside your Applications or Programs folder).
  3. Double click on the Scan app. This will launch a terminal program that then opens the software, so don’t be alarmed when the new program opens.
  4. Under EXECUTION, open “SCANSCRIBE.” 
  5. Go to “Options” set your Automatic FB/BG Color Processing on Image Load/ background sensitivity to 4 (or 7 — you can experiment).
  6. Under FILE open the folder where you have your chart pictures. It doesn’t have menus that open automatically so you have to go through each click manually.
  7. Open your file. It may take a little while to process, during which time it can look like nothing is happening. After a bit, your photo should open. When it opens, the photo will be magically whitened! (If not, see the notes below).
  8. To adjust for keystoning, go to Edit/Keystone Unwarp. This gives you a box that you can change by using your cursor on the corners. Drag corners to where you want them to be on the photos. Then click the button in the window frame that says “run Keystone” and the picture will unwarp.
  9. Save As a TIFF file if possible, or a JPG if you can’t work with TIFFs.

Notes

Cynthia reports that she had a very large TIFF file and had to reduce its file size in order for the program to work. If you load the photo and have done all the steps correctly but still see no change, you may need to reduce the file size. Cynthia noticed that the script at the bottom indicated the computer was out of memory for a TIFF file, but did not run out of memory for a JPG of the same size.

I have noticed that ScanScribe can have difficulty opening files if they are too deep in my computer’s file system — that is, if they are inside a lot of nested folders. I think this is because all the folder names get added to the path name for the image, and perhaps the long path name exceeds some limitation in ScanScribe, but that’s just a guess. To get around the issue, I created a folder inside my Pictures folder called “For ScanScribe,” and I just drop all the photos in there that I want to clean up. ScanScribe remembers the last folder it opened images from, so this is a handy way to avoid having to click through your folders to find your images. I just save the edited versions right back into that same folder, and then move everything to where I actually want it when I’m done to keep the folder clean.

If you have additional questions, please check the ScanScribe discussion forum