With many face-to-face events (wisely) being switched to remote events right now, I’ve seen a lot of questions go by on Facebook from graphic recorders who are being asked if they can work their magic remotely. You can! Even if you’ve never done it before, you can. I’ve got you.
The screen shots in this post were made using Concepts on an iPad. If you have a different drawing app, a non-iPad tablet, or you’re using a drawing tablet with your computer, the basic points are the same; just find the equivalent tools in the application that you have. Check the bottom of the post for a list of common applications and links to their tutorials.
Here’s the list of what you need to know.*
- Set up three brushes and an eraser.
- Choose a simple and limited color palette, and save the palette for quick reference.
- Set up three layers, name them, and don’t panic when you get them mixed up.
- Set aside 2-6 hours just to practice.
- Get a headset that’s comfortable and reliable.
- Ask for a 30-minute tech check sometime before the meeting begins.
Those are the basics. Everything else is optional for the moment.
There is a little more detail to each of those steps, of course. Let’s take a look.
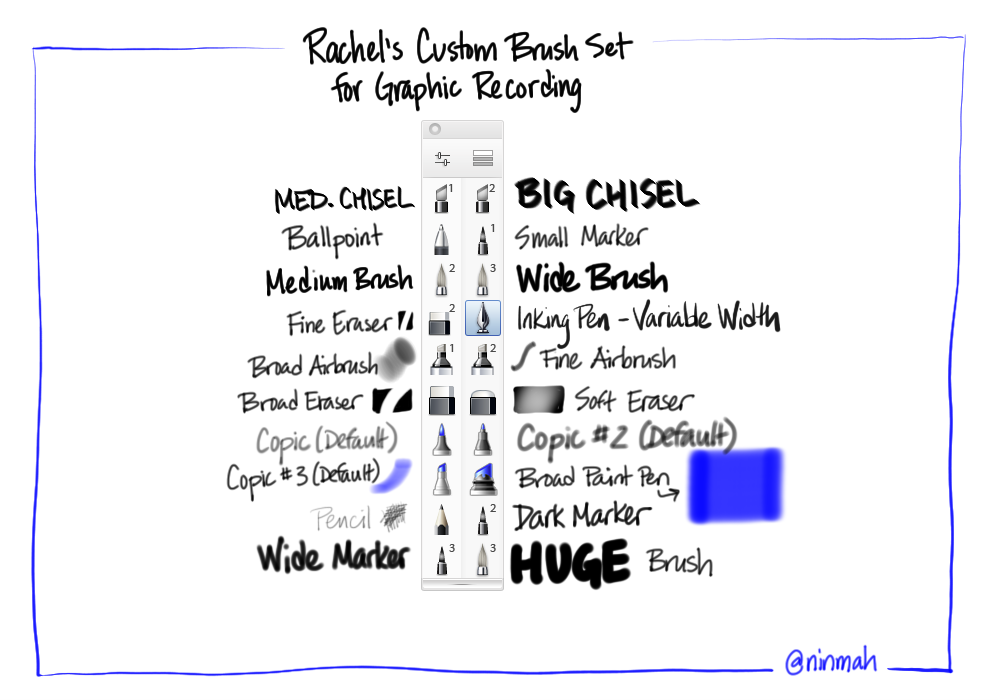
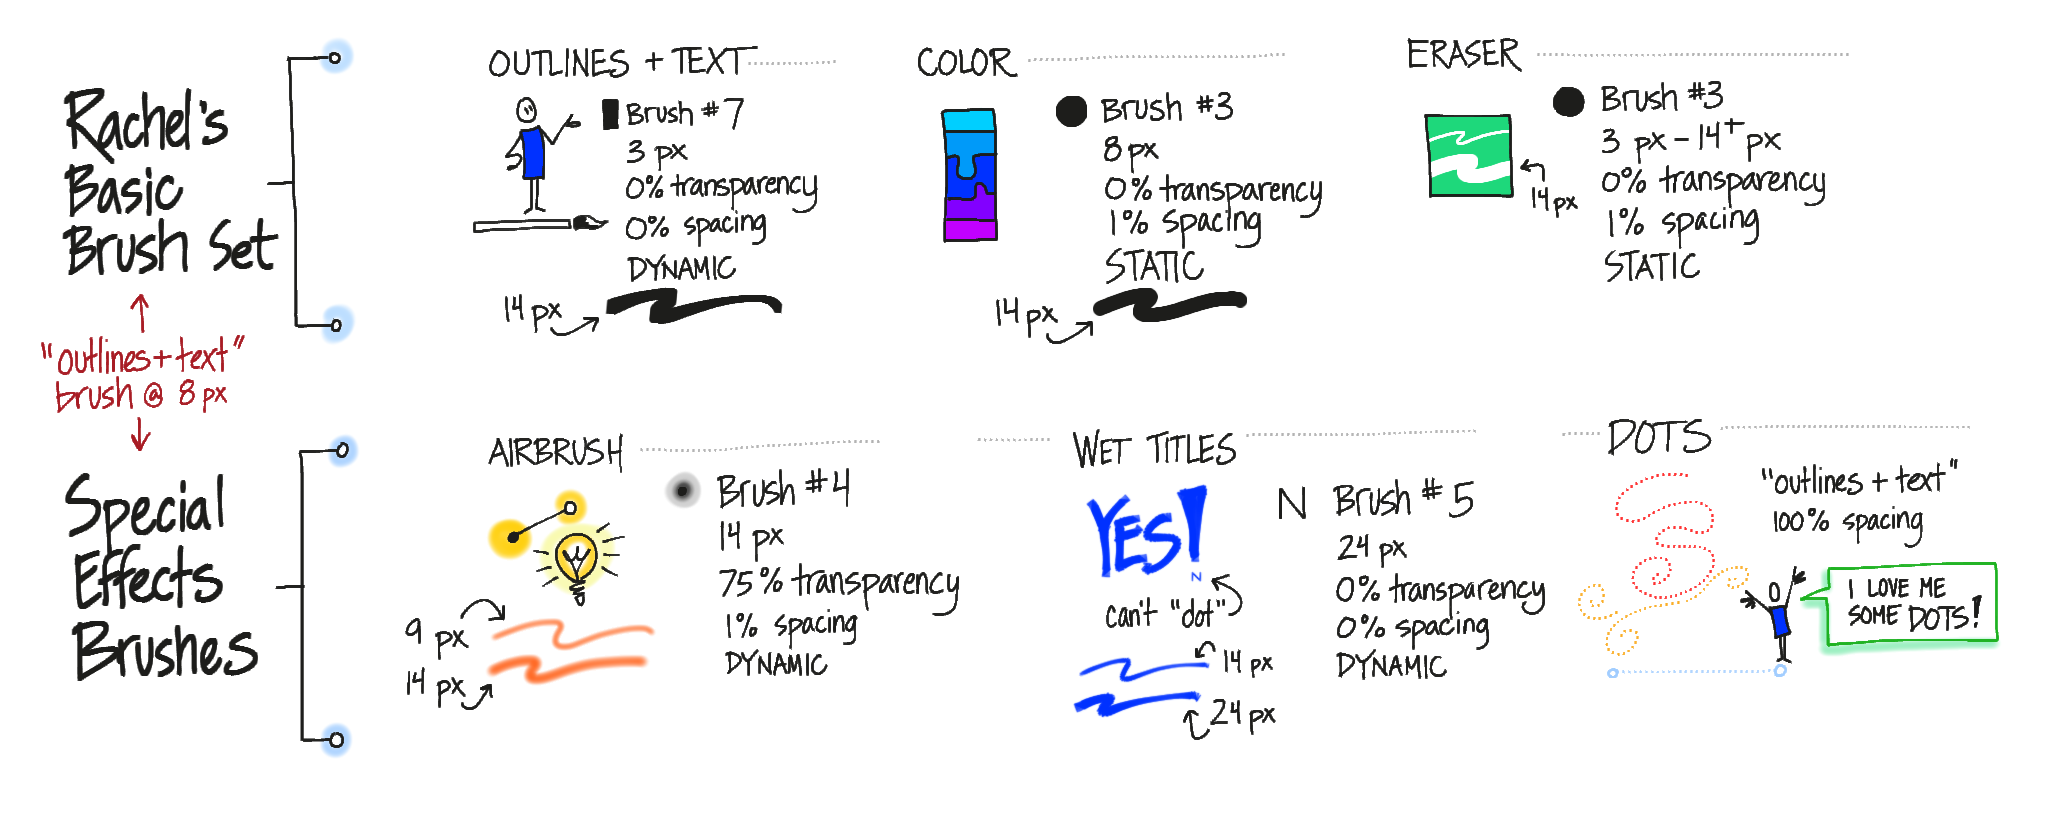
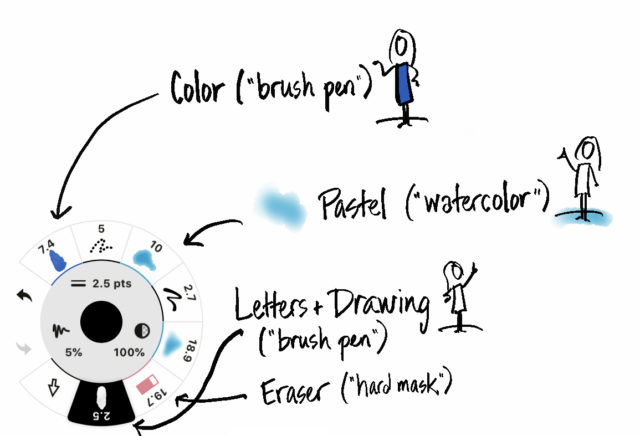
1. Set up three brushes and an eraser.
I use a small solid brush for most of my lines and letters; a larger solid brush for color fills; and a slightly larger watercolor brush for shadows and pastel effects. My eraser is usually sized in between the two solid brush sizes.
If you want to do solid titles rather than outline & fill, you will also want a larger brush for the titles (or know how to quickly switch between a large and small pen size for your single lettering brush).
Pro tip for neat lettering: With the canvas at 100% zoom (that is, fully zoomed out so you can see the whole page), make a mark like the upright of a capital letter (like P or R or I or D) at the scale (size) you want to write in. Zoom in to a comfortable level for writing, note where the upright is, tap undo to get rid of it, and start writing where it was, at the scale that it was. Zoom out now and then to check your orientation.
I set my brushes up in advance and save them for easy access. Ideally, you will be able to see them all at the same time and just tap to switch.
Can you use more? Sure. Do you want to? Eventually. This week, stick to three. Trust me.
2. Choose a simple and limited color palette, and save it for quick reference.
This one is so important that it’s worth looking up a tutorial for how to do it in your tool if it isn’t obvious. My most basic palette has black, a pastel blue, a pastel grey, a bright blue, and red. Sometimes I swap in another color for the two blues for different recordings. I also have white in my palette, but I use it rarely, and sometimes I include a yellow for glow and highlight effects.

I use black for lettering and for outlining my icons. Red is for emphasis. Light blue is for pastel effects and light gray is for shadows and fills (shadows are done with the pastel brush and fills with the color fill brush). Bright blue is for splashes of color in icons and titles.
Like the brushes, you want to be able to see all the colors in a permanent or flyout palette and just tap the one you need. Can you use more colors? Of course. Eventually. This week, keep it simple.
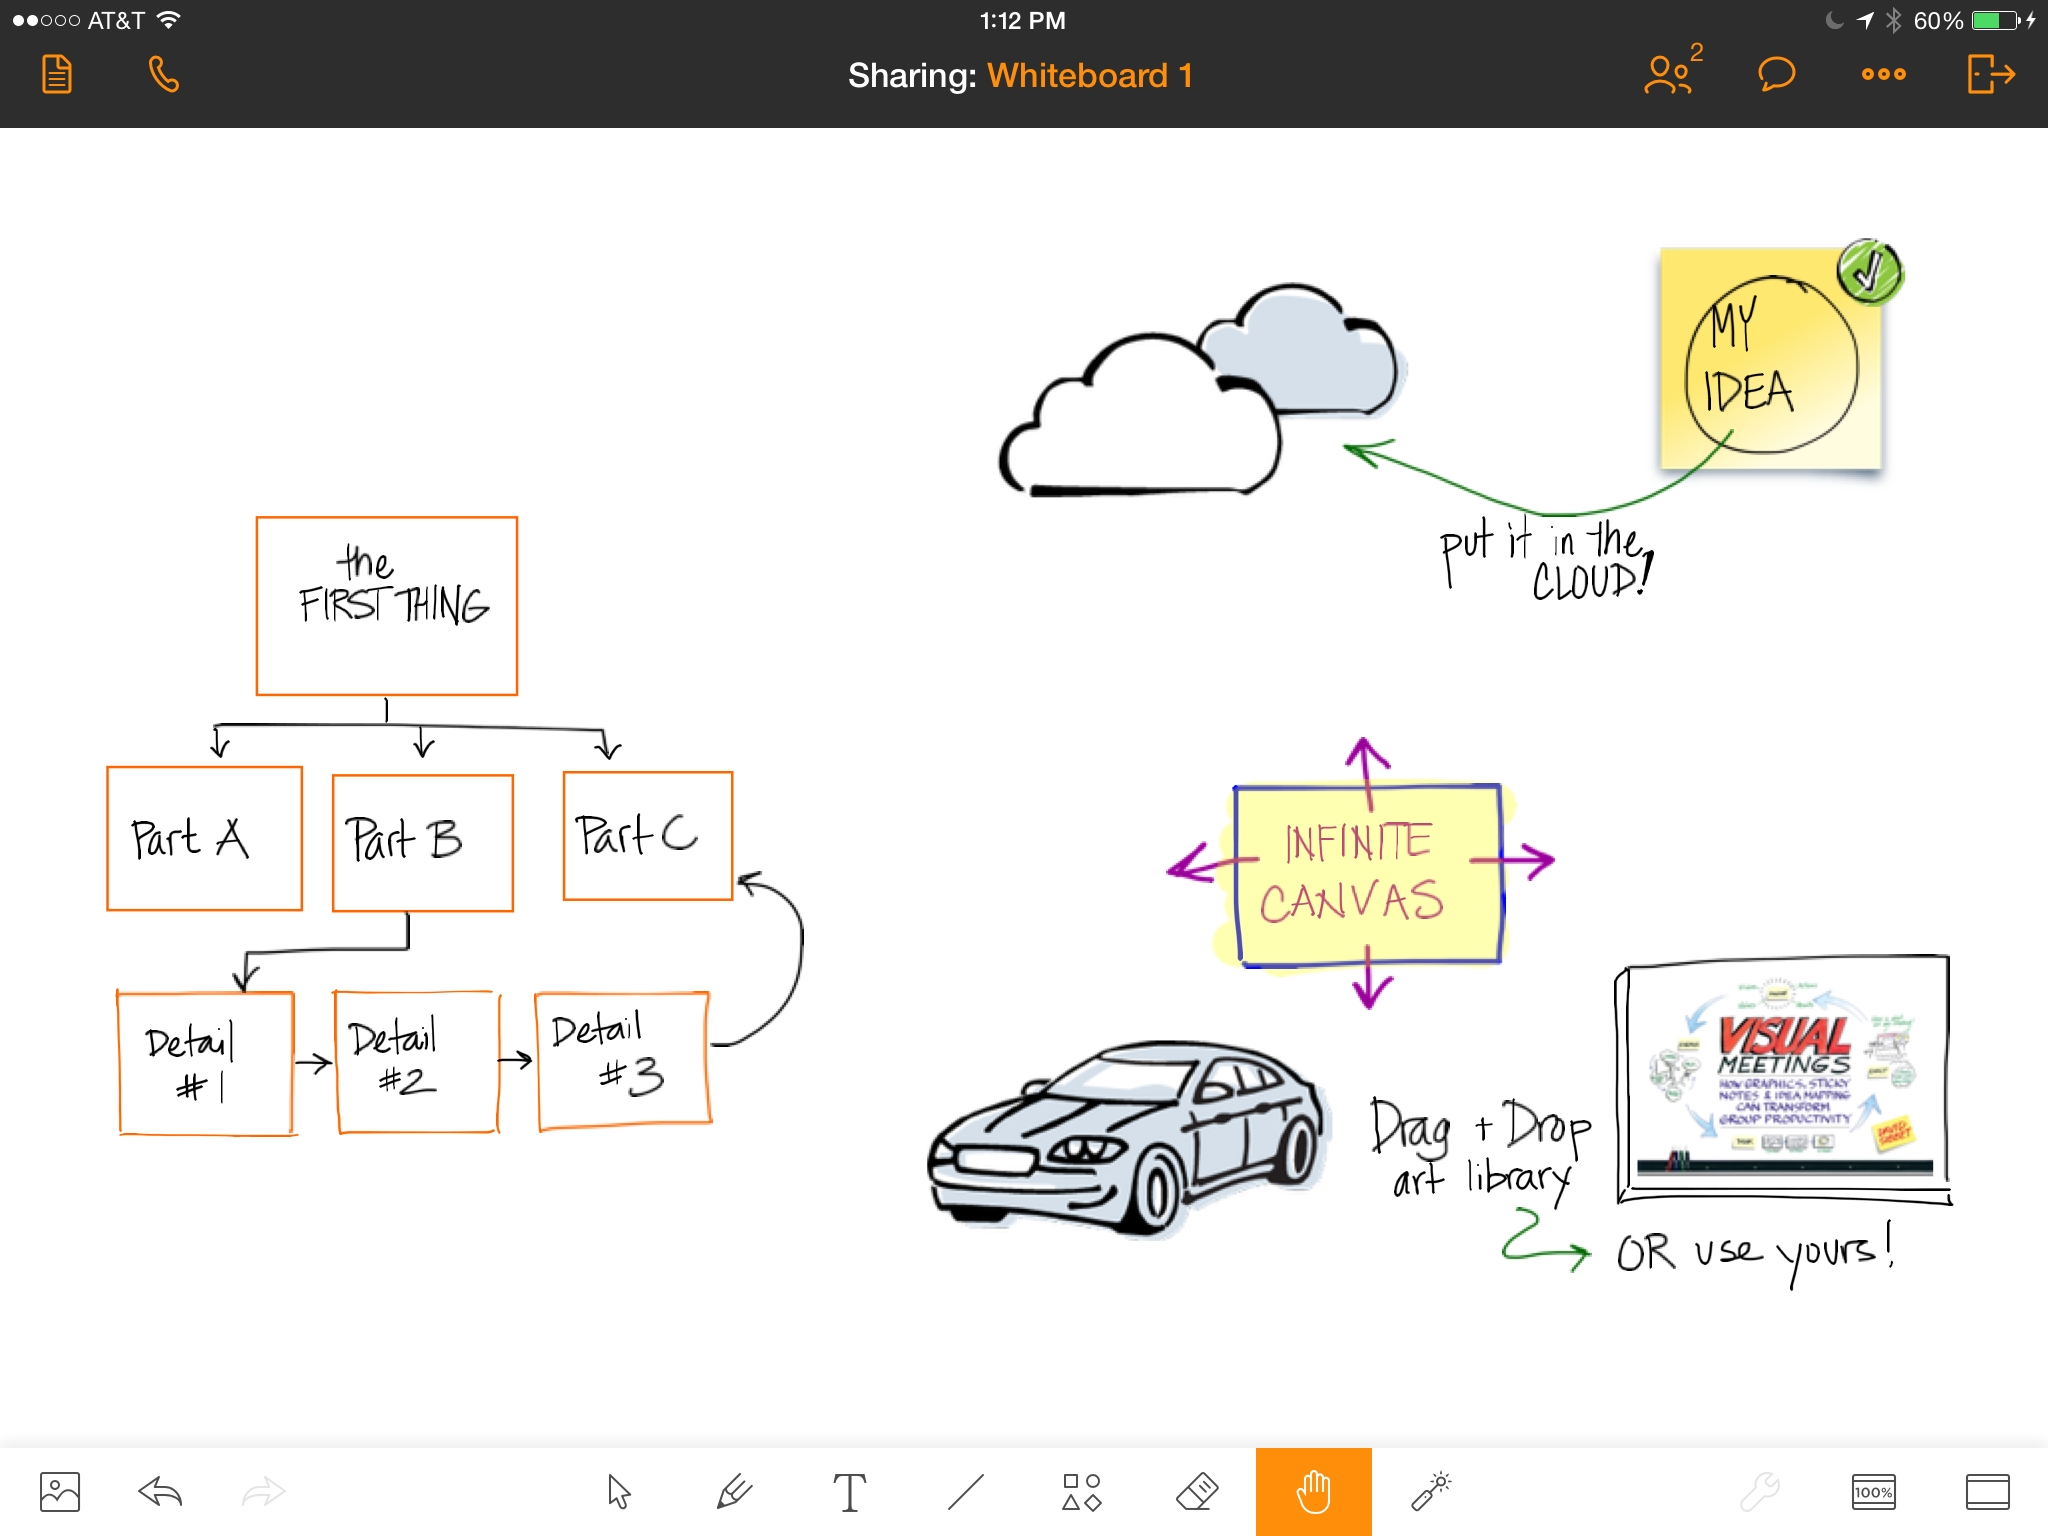
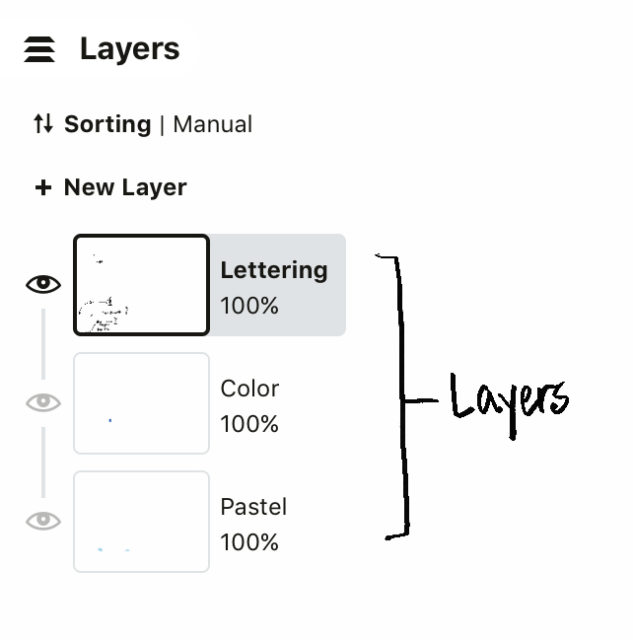
3. Set up three layers, name them, and don’t panic when you get them mixed up.
From bottom to top, the layers are: pastels, color, line-work. Or whatever names will remind you of those classifications. That way, your letters and outlines are on top, colors slip neatly behind the outlines, and you can gaily sweep pastels behind icons and letters with no fear of messing up the clarity.
You will mix up the layers at some point and put your outlines on your pastel layer or vice versa. If it’s the pastel on the outline layer, it’s immediately obvious and you can hit ‘undo’ and fix it. It’s harder to notice when you start writing on your pastel or color layer. Don’t stress when you do notice, and don’t undo a lot of writing. Just make a new layer, drag it to the bottom of the stack, and start using that for your pastels or colors as needed. There are no layer police and you will be fine.
4. Set aside 2-6 hours to practice.
And you can guess which end of that scale I’d rather you were on, right? The more you practice, the calmer you will be; the calmer you are, the better your work will be. It will take a while to get the hang of zooming in to write and zooming back out to check sizing, of switching pens and colors, of working with the layers. Don’t stress.


Here’s a practice regime that I use when testing a new drawing app:
- Set up layers, pens, and colors. Take time to mess with the settings until you understand how they work — up to 30 minutes.
- Write your name, draw some icons or people, practice the stuff that makes your work yours — about 15 minutes. This is not the most valuable practice activity, so don’t spend the bulk of your time here. This is just a warm up.
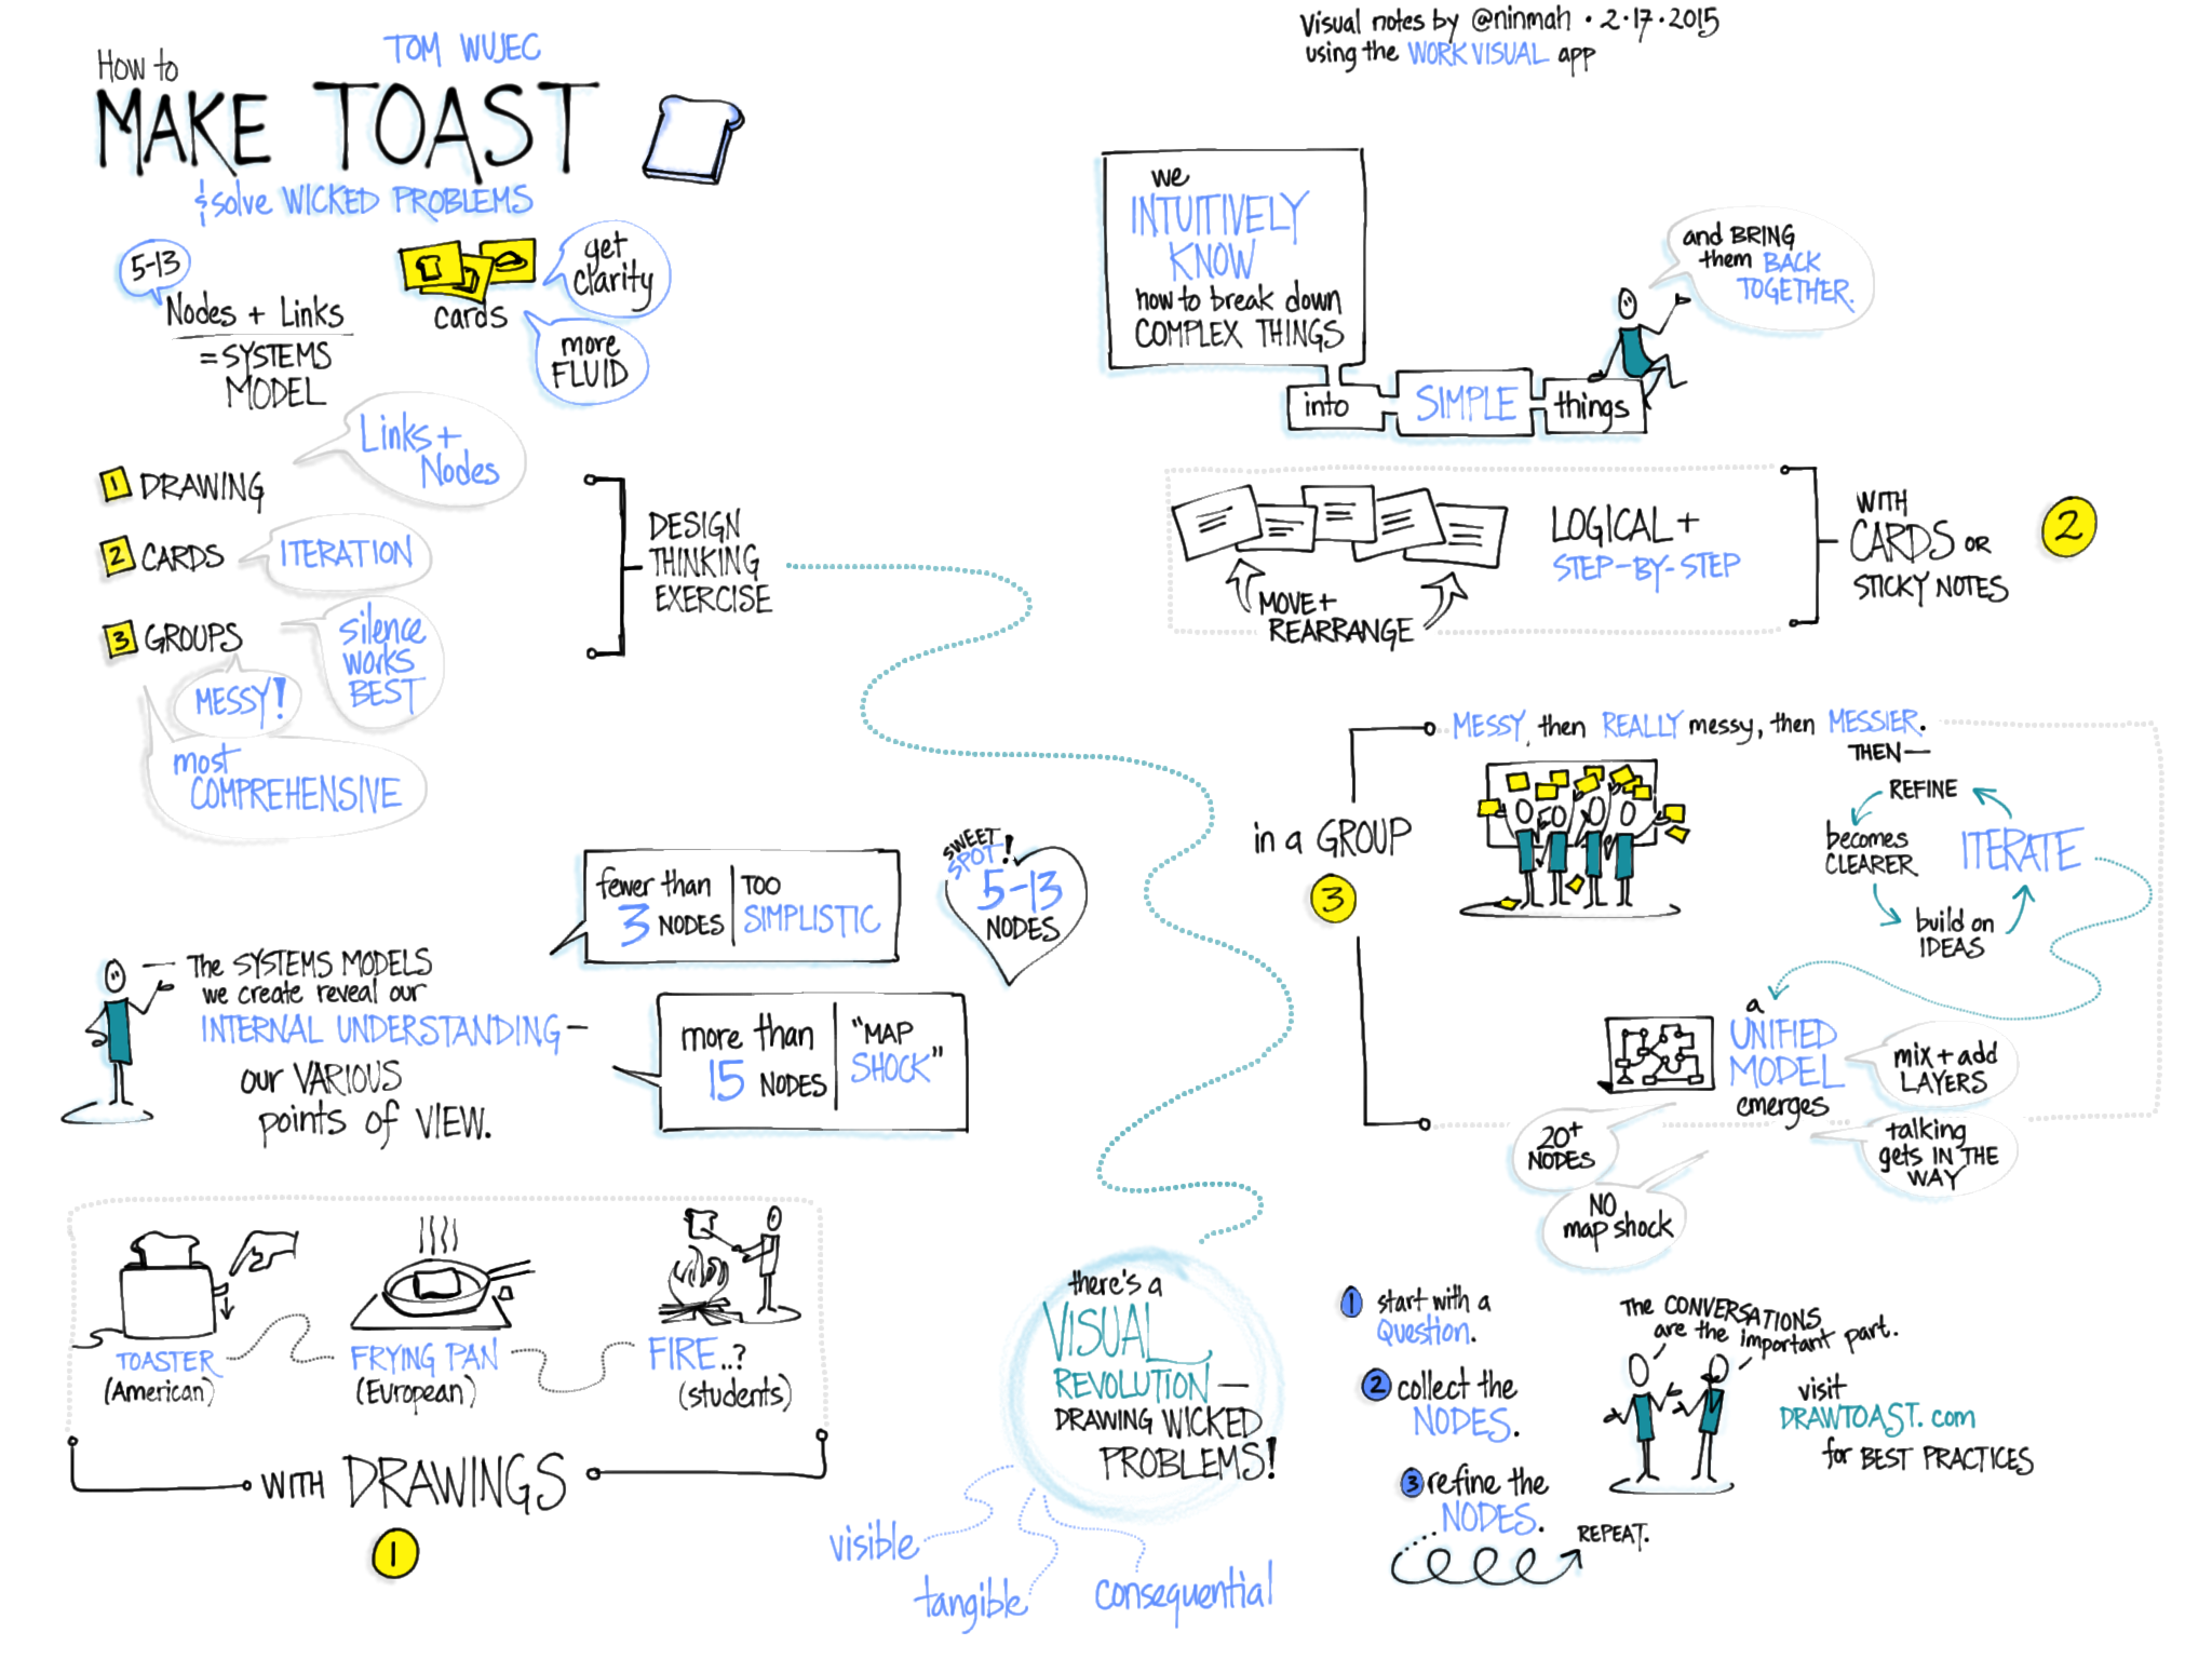
- Find a photo of a chart you’ve done that you like. Try to recreate it on the iPad. This will teach you more about how your app works than almost anything else. Notice what you can and can’t recreate, adjust your brushes and colors, and get comfortable with your own style — up to 3 hours. I don’t recommend tracing a photo, because you won’t really understand how your app handles scale if you do that. Instead, look at a copy of the chart and recreate it on a blank screen.
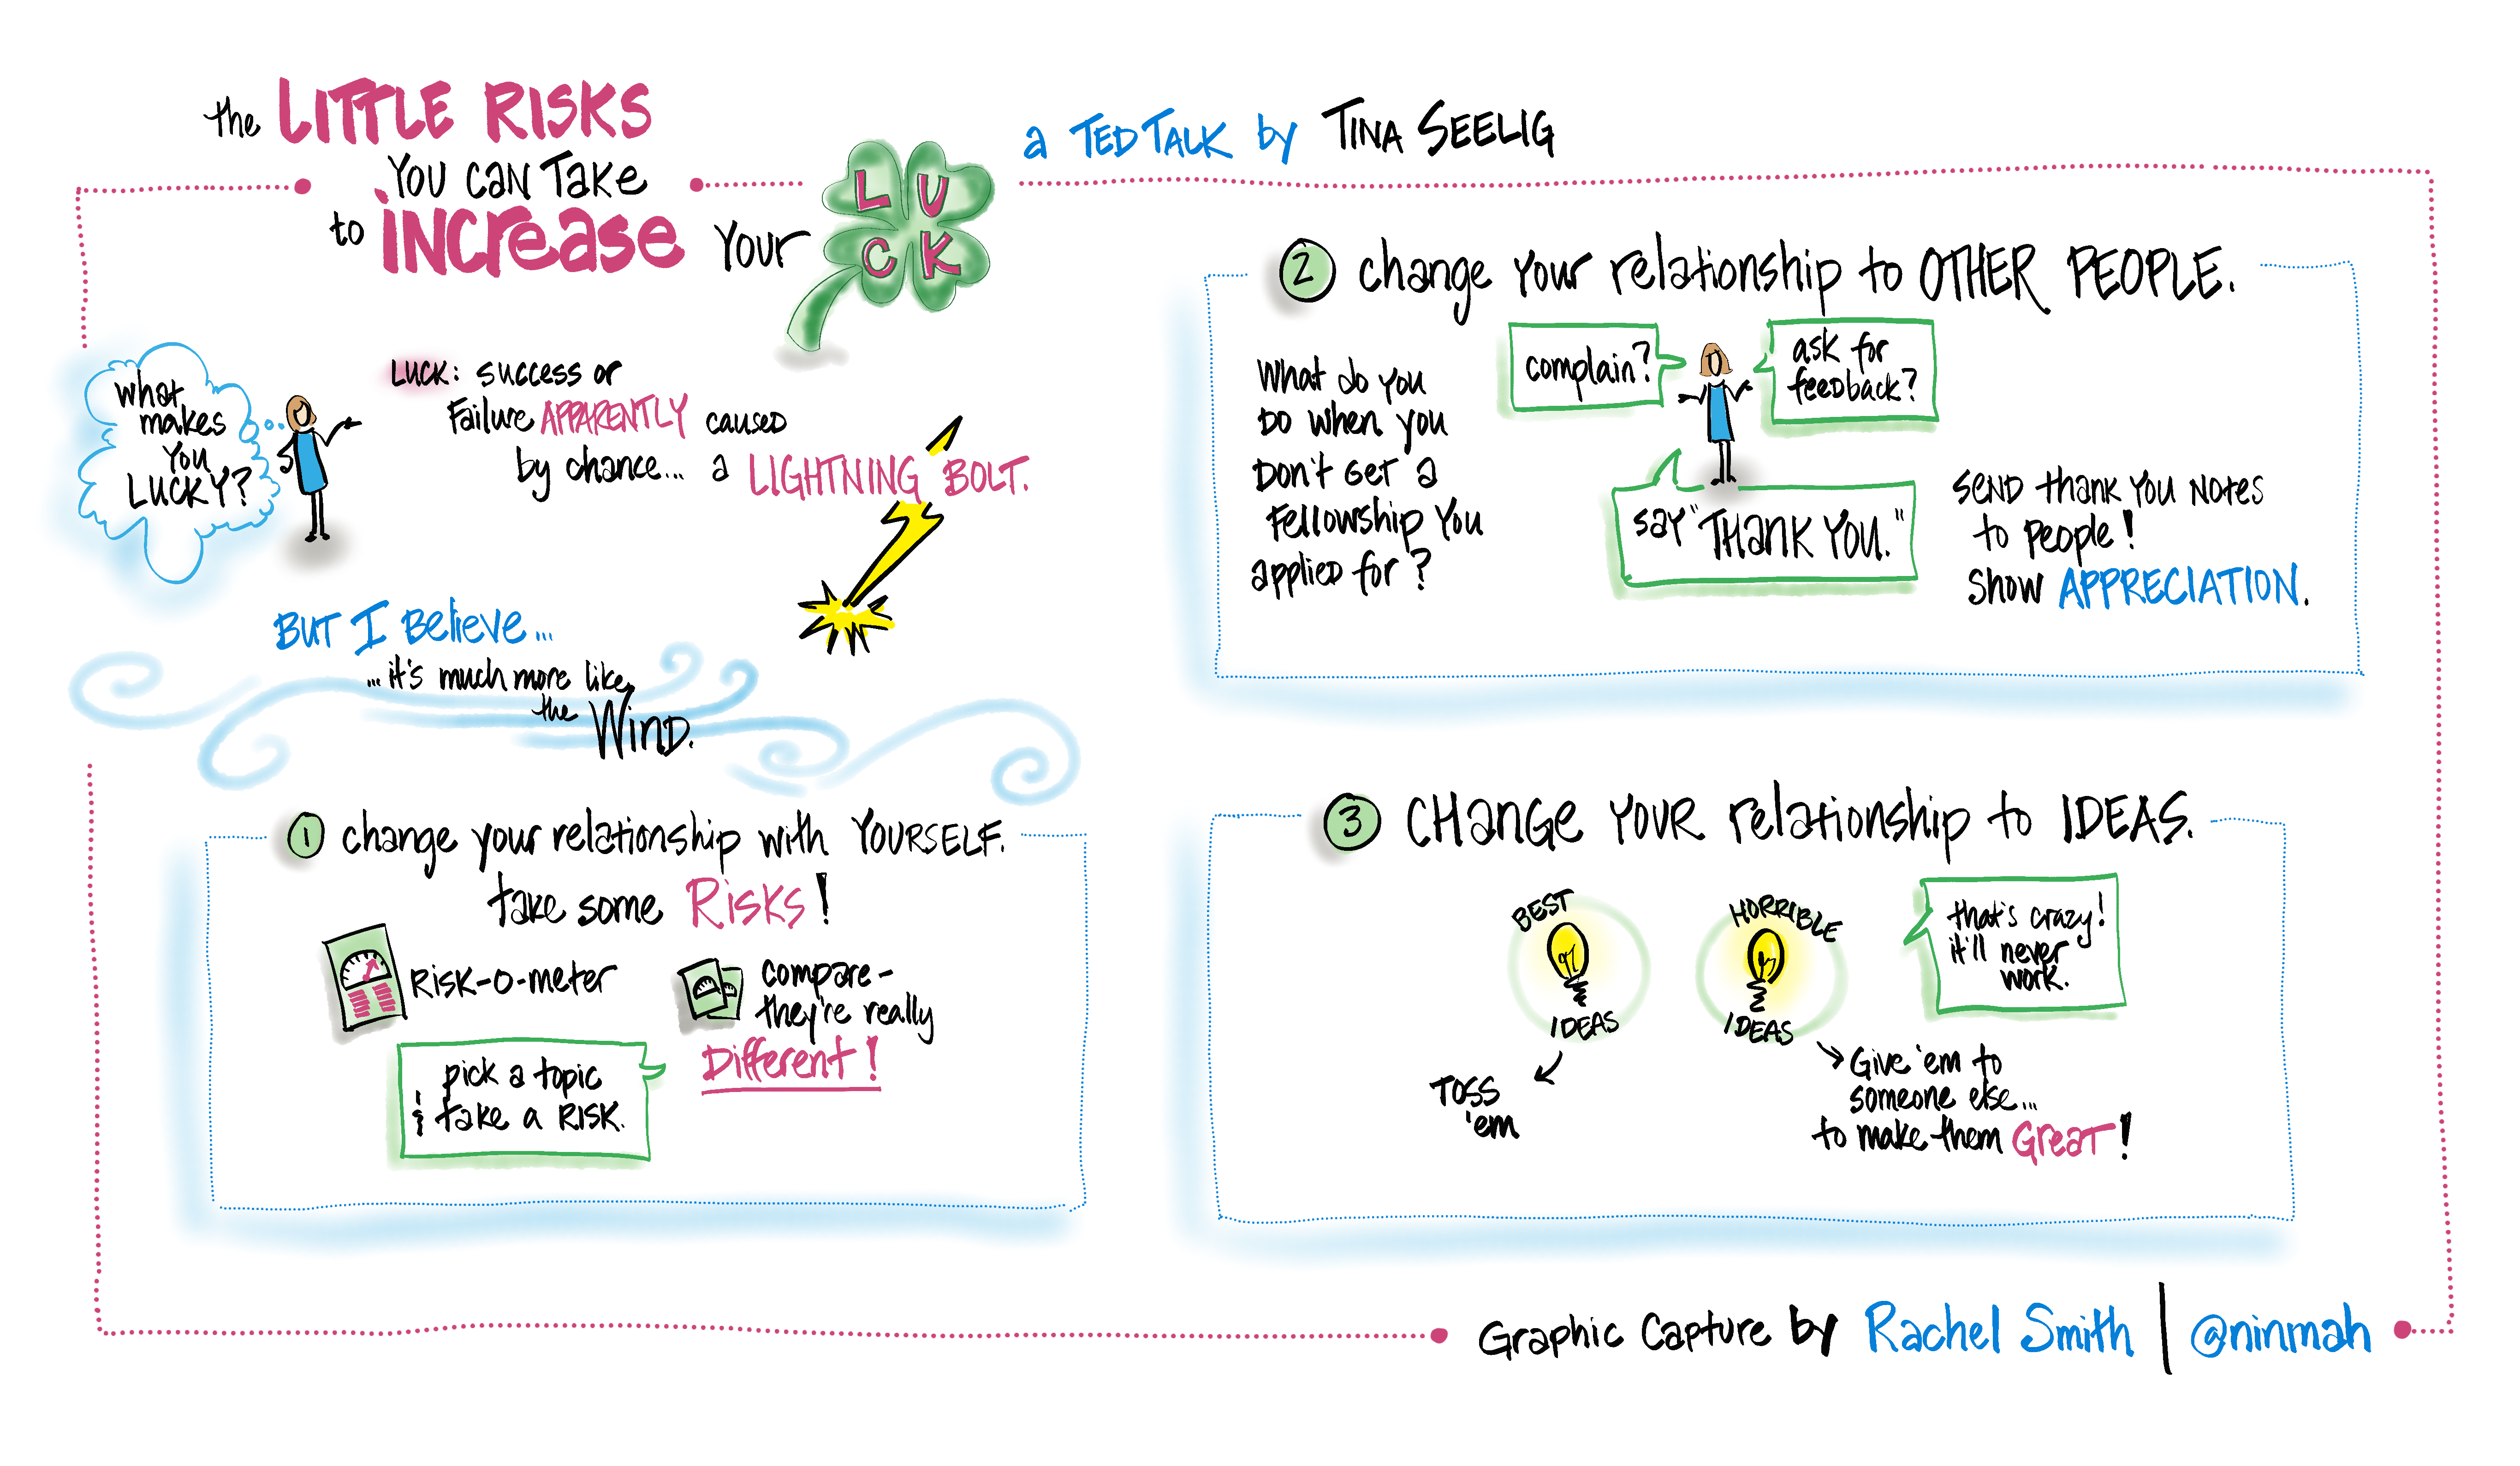
Next, go to TED.com or find a podcast or a news channel or something that you can listen to and record. Pick an episode and play it. Record it as it plays, then play it again and just look at your recording while you listen. Notice what you got and what you missed. You’ll miss more than you are used to, especially at first, but always.
Let me say that again. You will always miss more when you are digitally graphically recording than when you are doing it on paper. Everyone does. It’s because the interface is more complicated than paper and pen, so a part of your brain that usually helps you listen and record is always dealing with the interface instead.
Play another video or podcast and record that one. Do this three or four times. Take a minute to compare your last one with your first one — see the progress? You can totally do this.
This is also the time when you want to get yourself into weird interface places so you can get yourself out of them. If you accidentally hit a button and the whole screen changes and it takes you 15 minutes to figure out why and how to undo it, that’s a gift: next time it happens, you’ll know how to fix it.
Spend up to 2 hours on this part.
So much for the recording part. The rest is technical details.
5. Get a headset that’s comfortable and reliable.
You’ll work better if you can hear clearly and if your ear doesn’t hurt (ask me how I know). ‘Nuff said. I use the Plantronics Savi 730.
6. Ask for a 30-minute tech check sometime before the meeting begins.
The tech crew will want to know a couple of things from their end, but they don’t know what you need to know. Here’s what you need to check:
- Ask to be put in the exact audio setup that the meeting or conference will use, and ask someone to speak from the place(s) where the speaker(s) will be sitting or standing. (If it’s a Zoom meeting where everyone will dial in separately, you don’t have to ask for this specially, because the tech check itself should be set up the same way.) Make sure you can hear.
- Test how to mute your microphone so that you can cuss if you need to without everyone hearing it. (Again, ask me how I know.) Make sure you really are muted and that you know how to unmute. Clarify whether it’s okay for you to speak up if you can’t hear, or if there’s some other way they want you to handle this, like typing in the chat box or texting someone.
- Share your iPad or tablet screen into the meeting and get them to confirm what they can see. Draw a little, and ask them to tell you how fast it shows up for them. Notice if there’s any drawing lag on your end while you are connected that isn’t there when you’re not connected (there shouldn’t be, but it’s not unheard of).
- Ask whether they expect to switch between you and anyone’s slides or other shared materials, and get clear on what the schedule and expectations are if that’s going to happen. If you will have to click buttons on your end to make this happen, practice sharing and un-sharing your screen until it’s easy.
Make sure your device is charged, including the stylus, if you’re using an Apple Pencil or other stylus that has a battery. If possible, plug in to power while you work. If you’re using an iPad with Zoom, connect your iPad to the computer with the charging cable and share it through the cable. You’ll get a better connection and your iPad will charge while you work.
Finally, and perhaps most importantly, don’t panic. Stuff will go wrong. You’ll lose a brush or a color. You’ll mess up layers. The app will quit in the middle (or you’ll accidentally hit the round button and minimize the app when you didn’t mean to; ask me how I know…). Just keep breathing. It’s not the end of the world. Everyone is upside down right now because of all the rapid changes and the uncertainty of what will happen today, tomorrow, or next week. Be calm, and people will support you as you do your best, even if you screw up.
Ask me how I know.
Q & A
Q. What if my app can’t hide my drawing tools?
This is a nice-to-have feature, where you can see the tools but the participants can’t. If the app you choose doesn’t have it, don’t worry about it. It’s infinitely better to use an app that you are comfortable with that doesn’t have this feature, than to struggle with one you don’t like that does.
Q. Should I use the lasso tool to move or resize stuff?
Not if this is your first rodeo, no. (Sorry-not-sorry about the pun.) You can tweak it post-production if it really bugs you, but just go with what you’ve got while you’re working live. Better to keep moving.
Q. My app lets me make icons ahead of time and just paste them in, but you didn’t mention that. Why not?
Because it will slow you down. It feels like a shortcut, but as you’re learning how to listen and write and use the app, it will slow you down too much. It’s tempting, but leave it for now. You can work up to that later.
Q. What’s the best drawing app to use?
If you are totally at a loss as to where to start, try Procreate. I’ve done these screen shots with Concepts because it’s what I currently use when I record, to the point that I’ve lost facility with other apps. However, I don’t recommend Concepts to a beginner. It’s powerful, but boy is the interface confusing. Plus it lacks a quick way to zoom back to 100% size, which can trip you up.
In reality, the best app to use is the one that feels good to you, which may or may not be Procreate or Concepts. Try a few and see which seems to make the most sense, then use that one. This is worth taking a little time to do.
I’ve listed some common options here; there are others. Some of these may not have all the features I mention in this article, like a watercolor brush or layers. If you find that you love one that doesn’t have those features, great. Make it work for you using the tools that it does have. I’ve also linked to a tutorial for each app, when I could find a good one.
- Procreate (tutorial)
- Concepts (tutorial)
- Paper (tutorial)
- Autodesk Sketchbook (tutorial)
- Inkflow Plus (tutorial)
- ArtRage (tutorial)
- neu.Draw (no tutorial found)
Q. What’s the best stylus to use?
Again, the one that feels most comfortable to you. I use an Apple Pencil.
Q. You’re sure I can do this?
Positive. You got this. Go help people stop traveling.
* This is the crash-course, bare-minimum, starting-from-zero-got-to-do-it-in-five-days level of information. There’s a lot more to it than this, but this will get you going.