Getting people comfortable in a virtual meeting can be a challenge, especially if you plan to use some of the more advanced features of your web conferencing tools. Even if that’s not in your agenda, it’s helpful to have folks take a minute to check in once the group has assembled. You’re familiar, I’m sure, with the awkward-silence-and-simultaneous-speaking method of going around the virtual room. How about trying a visual alternative in your next meeting? This one was shared with me by a student in one of my digital facilitation workshops.
The check-in grid is a quick, easy and fun way to avoid the awkward stumbling while still giving everyone a chance to have his or her voice heard. It also lets folks experience the group whiteboard feature of a web conferencing tool during a safe and low-stakes activity, so that later, when you ask them to dot vote or contribute to a group visual, they aren’t totally lost.
You’ll need to enable the collaborative whiteboard feature in your web conferencing tool. Some of them require you to do this when you set the meeting up, and others let you activate it once the meeting has begun. (See below for alternative ideas if your system just doesn’t have this feature.)
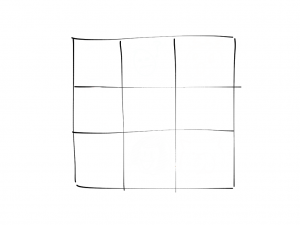
Start by drawing a grid on the collaborative whiteboard that has at least enough squares for each person to have one (including yourself). You can do this in advance of the meeting, or while people are gathering in the call, or right after you call the meeting to order when everyone is present.
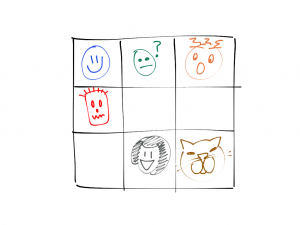
Next, set the stage for participation by saying that you’d like to have the group do a visual check-in. When you give the signal, everyone will pick an empty square and use the drawing tools to draw a simple face that reflects how they are feeling right now. Alternatively, you could frame the instructions in one of these other ways:
Draw a simple face that shows…
• …how you are feeling about our progress so far.
• …how you are feeling right now about the issue we have come together to discuss (name the issue so it’s clear).
• …how your weekend went.
And so on. Explain that there will be a little pandemonium for a moment as people sort out which square to use. Point out that there are enough for everyone, so if two people start to use one square, one of them should just choose a different one instead.
Show people where the drawing tools are and how they work, if they don’t already know. You can invite everyone to make a test mark outside the grid if they want to practice.
When everyone is ready, tell them to go ahead. Let them sort out the squares themselves – it’s a mess at first, but it will work out. It’s okay if they talk. Wait until it looks like most people have chosen before drawing your own image in an unused square.
When everyone has finished, start at the top left and go along the rows. Ask each artist to identify him or herself and say something about why they chose to draw what they did. Acknowledge each person’s contribution.
There you go! You’ve given everyone a chance to speak and share something about themselves, and you’ve established a speaking order that you can use throughout the meeting to help avoid talking over one another.
Bonus Points:
Once everyone is done drawing but before you go around for the verbal check-in, take a screen shot or download the image, open it in your drawing program, share your screen, and graphically record everyone’s remarks around the outside of the grid. Only do this if you can manage it very smoothly and quickly, or you will lose the good energy built up by the drawing.
No collaborative whiteboard? No problem!
Alternative #1: Ask everyone to draw a quick face on a scrap of paper, take a photo with their phone, and either upload it to the web conferencing tool (if that’s easy) or email it to you right away. Flip through the uploaded drawings in the web conference, or share your screen and open them one by one on your computer. Have each person explain as above.
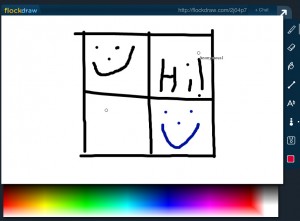
Alternative #2: There are a lot of free shared whiteboarding tools that you can use for your meeting. Flockdraw is one. You just create a whiteboard and share the link, and everyone can draw together using its incredibly simple interface. There are many other options too — just keep searching until you find one that you like.
Alternative #3: Instead of drawing a face, everyone can use the whiteboard type tool to write one word that describes how they are doing (or answers whatever question you have asked them).
Give it a try — let me know how it goes!


2 responses to “Virtual Meeting Tool: The Check-in Grid”