Tag Archives: webconferencing

Virtual Meeting Tool: The Check-in Grid

Getting people comfortable in a virtual meeting can be a challenge, especially if you plan to use some of the more advanced features of your web conferencing tools. Even if that’s not in your agenda, it’s helpful to have folks take a minute to check in once the group has assembled. You’re familiar, I’m sure, with the awkward-silence-and-simultaneous-speaking method of going around the virtual room. How about trying a visual alternative in your next meeting? This one was shared with me by a student in one of my digital facilitation workshops.

The check-in grid is a quick, easy and fun way to avoid the awkward stumbling while still giving everyone a chance to have his or her voice heard. It also lets folks experience the group whiteboard feature of a web conferencing tool during a safe and low-stakes activity, so that later, when you ask them to dot vote or contribute to a group visual, they aren’t totally lost.

You’ll need to enable the collaborative whiteboard feature in your web conferencing tool. Some of them require you to do this when you set the meeting up, and others let you activate it once the meeting has begun. (See below for alternative ideas if your system just doesn’t have this feature.)

Start by drawing a grid on the collaborative whiteboard that has at least enough squares for each person to have one (including yourself). You can do this in advance of the meeting, or while people are gathering in the call, or right after you call the meeting to order when everyone is present.
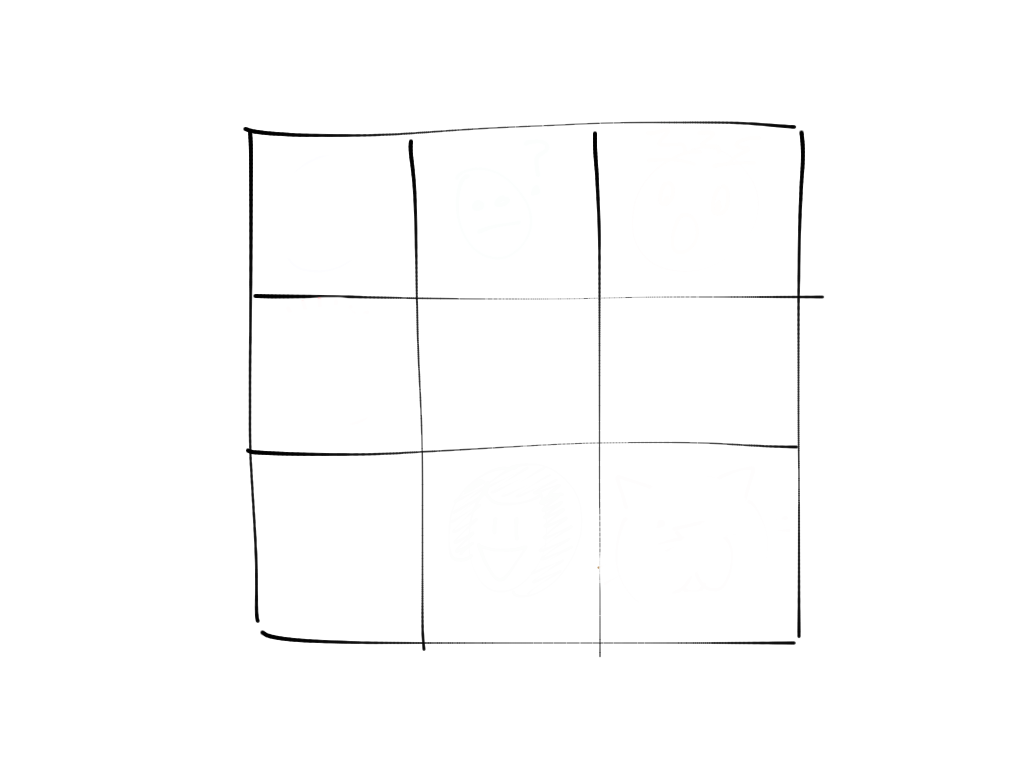
the check in grid - it looks like a tic tac toe board.

Draw a simple grid.


Next, set the stage for participation by saying that you’d like to have the group do a visual check-in. When you give the signal, everyone will pick an empty square and use the drawing tools to draw a simple face that reflects how they are feeling right now. Alternatively, you could frame the instructions in one of these other ways:

Draw a simple face that shows…
• …how you are feeling about our progress so far.
• …how you are feeling right now about the issue we have come together to discuss (name the issue so it’s clear).
• …how your weekend went.

And so on. Explain that there will be a little pandemonium for a moment as people sort out which square to use. Point out that there are enough for everyone, so if two people start to use one square, one of them should just choose a different one instead.

Show people where the drawing tools are and how they work, if they don’t already know. You can invite everyone to make a test mark outside the grid if they want to practice.

When everyone is ready, tell them to go ahead. Let them sort out the squares themselves – it’s a mess at first, but it will work out. It’s okay if they talk. Wait until it looks like most people have chosen before drawing your own image in an unused square.

filled-in version of the check in grid

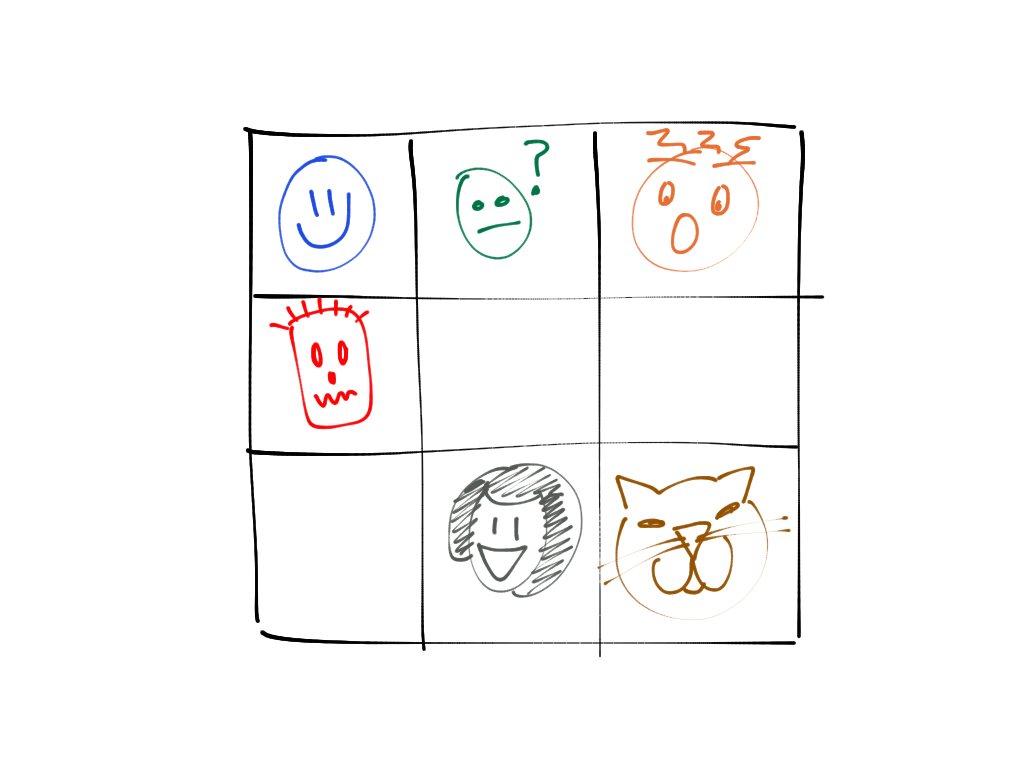
Makes you want to know what’s up with the cat person, doesn’t it?


When everyone has finished, start at the top left and go along the rows. Ask each artist to identify him or herself and say something about why they chose to draw what they did. Acknowledge each person’s contribution.

There you go! You’ve given everyone a chance to speak and share something about themselves, and you’ve established a speaking order that you can use throughout the meeting to help avoid talking over one another.

Bonus Points:
Once everyone is done drawing but before you go around for the verbal check-in, take a screen shot or download the image, open it in your drawing program, share your screen, and graphically record everyone’s remarks around the outside of the grid. Only do this if you can manage it very smoothly and quickly, or you will lose the good energy built up by the drawing.

No collaborative whiteboard? No problem!
Alternative #1: Ask everyone to draw a quick face on a scrap of paper, take a photo with their phone, and either upload it to the web conferencing tool (if that’s easy) or email it to you right away. Flip through the uploaded drawings in the web conference, or share your screen and open them one by one on your computer. Have each person explain as above.

Alternative #2: There are a lot of free shared whiteboarding tools that you can use for your meeting. Flockdraw is one. You just create a whiteboard and share the link, and everyone can draw together using its incredibly simple interface. There are many other options too — just keep searching until you find one that you like.

flockdraw screenshot

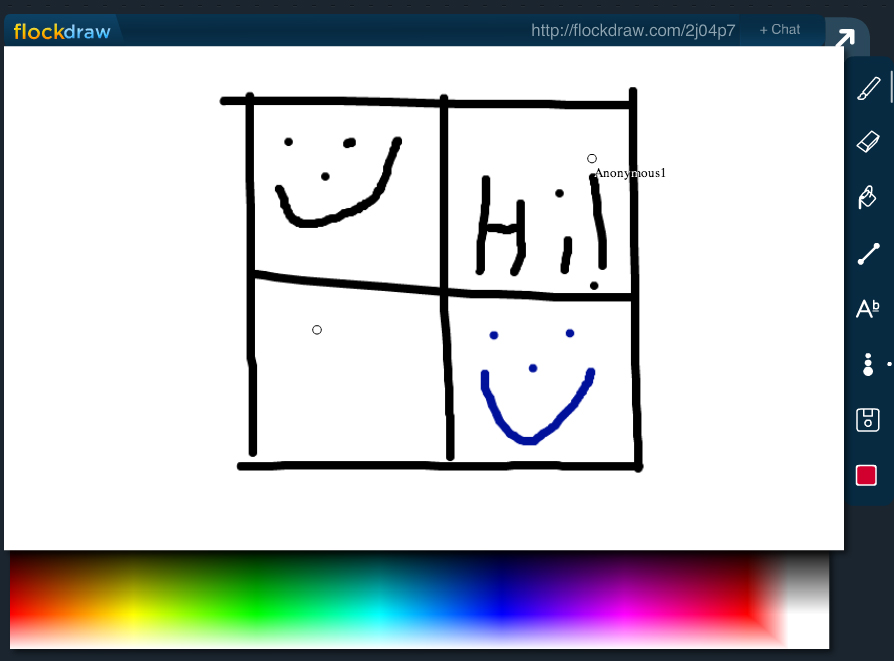
A co-conspirator and I created this in about fifteen seconds on our first Flockdraw visit.


Alternative #3: Instead of drawing a face, everyone can use the whiteboard type tool to write one word that describes how they are doing (or answers whatever question you have asked them).

Give it a try — let me know how it goes!

Virtual meeting nightmares: funny, sad, and way too true

This lovely little piece, created by Tripp & Tyler to promote Leadercast Live, came to my attention this week:

I laughed. Then I cried. Many of my colleagues had similar reactions. The video points out some of the common events that make so many online meetings so incredibly dysfunctional: ineffective introductions, bad audio, people talking over one another because of a lack of visual cues, and of course the Technology Factor.

We have a lot of skills for coping with these issues in face-to-face meetings, but we’re still working out the promising practices for handling the same issues in online meetings. Throw in some technology tools — which sometimes work and sometimes don’t — and a group of people who have different kinds of equipment and different levels of comfort and skill with the tools, and you’ve got a situation that is uncomfortable at best and disastrous at worst, especially for the meeting facilitator. We’ve all been that guy out in the hallway, talking to the wall, slowly realizing that no one else can hear us.

The good news is that the tools are growing simpler and more cross-platform. Enterprise-level tools that have been around for a long time in terms of Internet timeframes (think WebEx and similar systems) are evolving, and new tools are emerging (think Join.Me and Skype and so on). Instead of requiring special plug-ins or client versions of the software or different setups for different operating systems, the tools are being adapted to work on any platform, be it PC, Mac OS, or the different mobile flavors. The users of the tools don’t need to do as much to make them work, because the tools are becoming more flexible.

More good news is that we’re developing methods to cope with the social aspects of online meetings regardless of the technology we’re using. Not everyone can manage multi-party video calls — although that’s getting cheaper and easier too — so we’re working out ways to handle basic interactions like introductions, orientation to the meeting purpose, and conversations that lead to real work, even when you can’t see your colleagues. Visual methods that support these interactions can be employed without much special equipment at all, and the payoff in terms of lower frustration, greater efficiency, and higher engagement is huge.

So go ahead and laugh at the poor folks in the video. Then think about which of those painful moments you encounter the most — and how you can address that one issue in your next online meeting. I’d love to hear your ideas… and I’ll share some of mine too. Let’s make awkward online meetings a thing of the past.

Playing with Doceri

You know how I’m often the one with the nifty new gadget, app, or techie thing? Well, a lot of those come to me from other people. One of the folks that I rely on to have the geekiest new stuff is John Ittelson, and he recently put me on to an iPad app that gets us one step closer to being able to draw in web meetings using our iPads. (Not quite there… but closer.)

The app is called Doceri, and has a partner desktop application (Doceri Desktop) that runs on the computer. Doceri on the iPad talks to Doceri on the computer, and turns the iPad into a remote control for the computer (like Air Display, which I need to revisit again too). You can also switch on annotation mode and draw over any screen — a web page, your email, what have you. Then you can play back your annotations in order.


Doceri1


This is a screen capture of my iPad, showing an annotation that I drew over digitalfacilitation.net. (Killer, I know!)

Doceri’s website has several videos showing some of what the app can do. It’s designed for use by teachers, so a lot of the examples are educational (cool). I’m still in the early stages of playing with it and I haven’t discovered all it can do, yet.

Naturally, one of the first things I tried to do was use it in a way it’s not intended to be used. (I’m either one of the best beta testers in the world, or one of the worst.) I noticed that Doceri had two icons for different monitors, because my laptop was hooked up to an external monitor at the time, so I tapped the icon for the other monitor. Then I opened Sketchbook Pro over there (this is the desktop version, not the iPad version) and tried drawing.


Doceri2


Let’s be clear: I was drawing with my finger, on my iPad, and it was controlling Sketchbook Pro on my Mac laptop. Imagine if I were also in a web conference, sharing my screen. Then I would be drawing in the web conference, using my iPad.

Totally cool.

Of course, it’s not all smooth sailing. If you zoom in to do detail work, you lose track of the palettes, because you’re zooming the whole screen and they get cut off. Also, Doceri’s not made for this kind of work; it has a magnifier so that you can click accurately on small screen bits, and the magnifier partially obscures what you’re drawing as you draw it. I know Doceri makes a special stylus that connects to the iPad, but I don’t have one so I can’t say whether it makes it easier to draw detail work or not.

The next thing I want to try is using the annotation feature to see if it’s easier to do graphic-recording type work with that, rather than through a drawing application. There are different brushes and different colors, and you can zoom (though I don’t know if there are layers), so a lot of my basic must-have features are there.

More research is needed. But I feel that progress has been made toward my quest to graphically record a web meeting using an iPad. Hurrah!