I just tried Milanote for the first time and I have to say, I love it. Full disclosure: Milanote contacted me and asked if I’d consider adding it to the list of collaboration apps on one of my blog posts. They offered me a lifetime pro account in exchange. I said I’d be happy to try it out and write an honest review, which this is, but it’s only fair to tell you that they did upgrade my trial account to pro at no cost (thanks, Milanote!). However, the review is entirely mine and, as usual, I’m speaking my mind here.
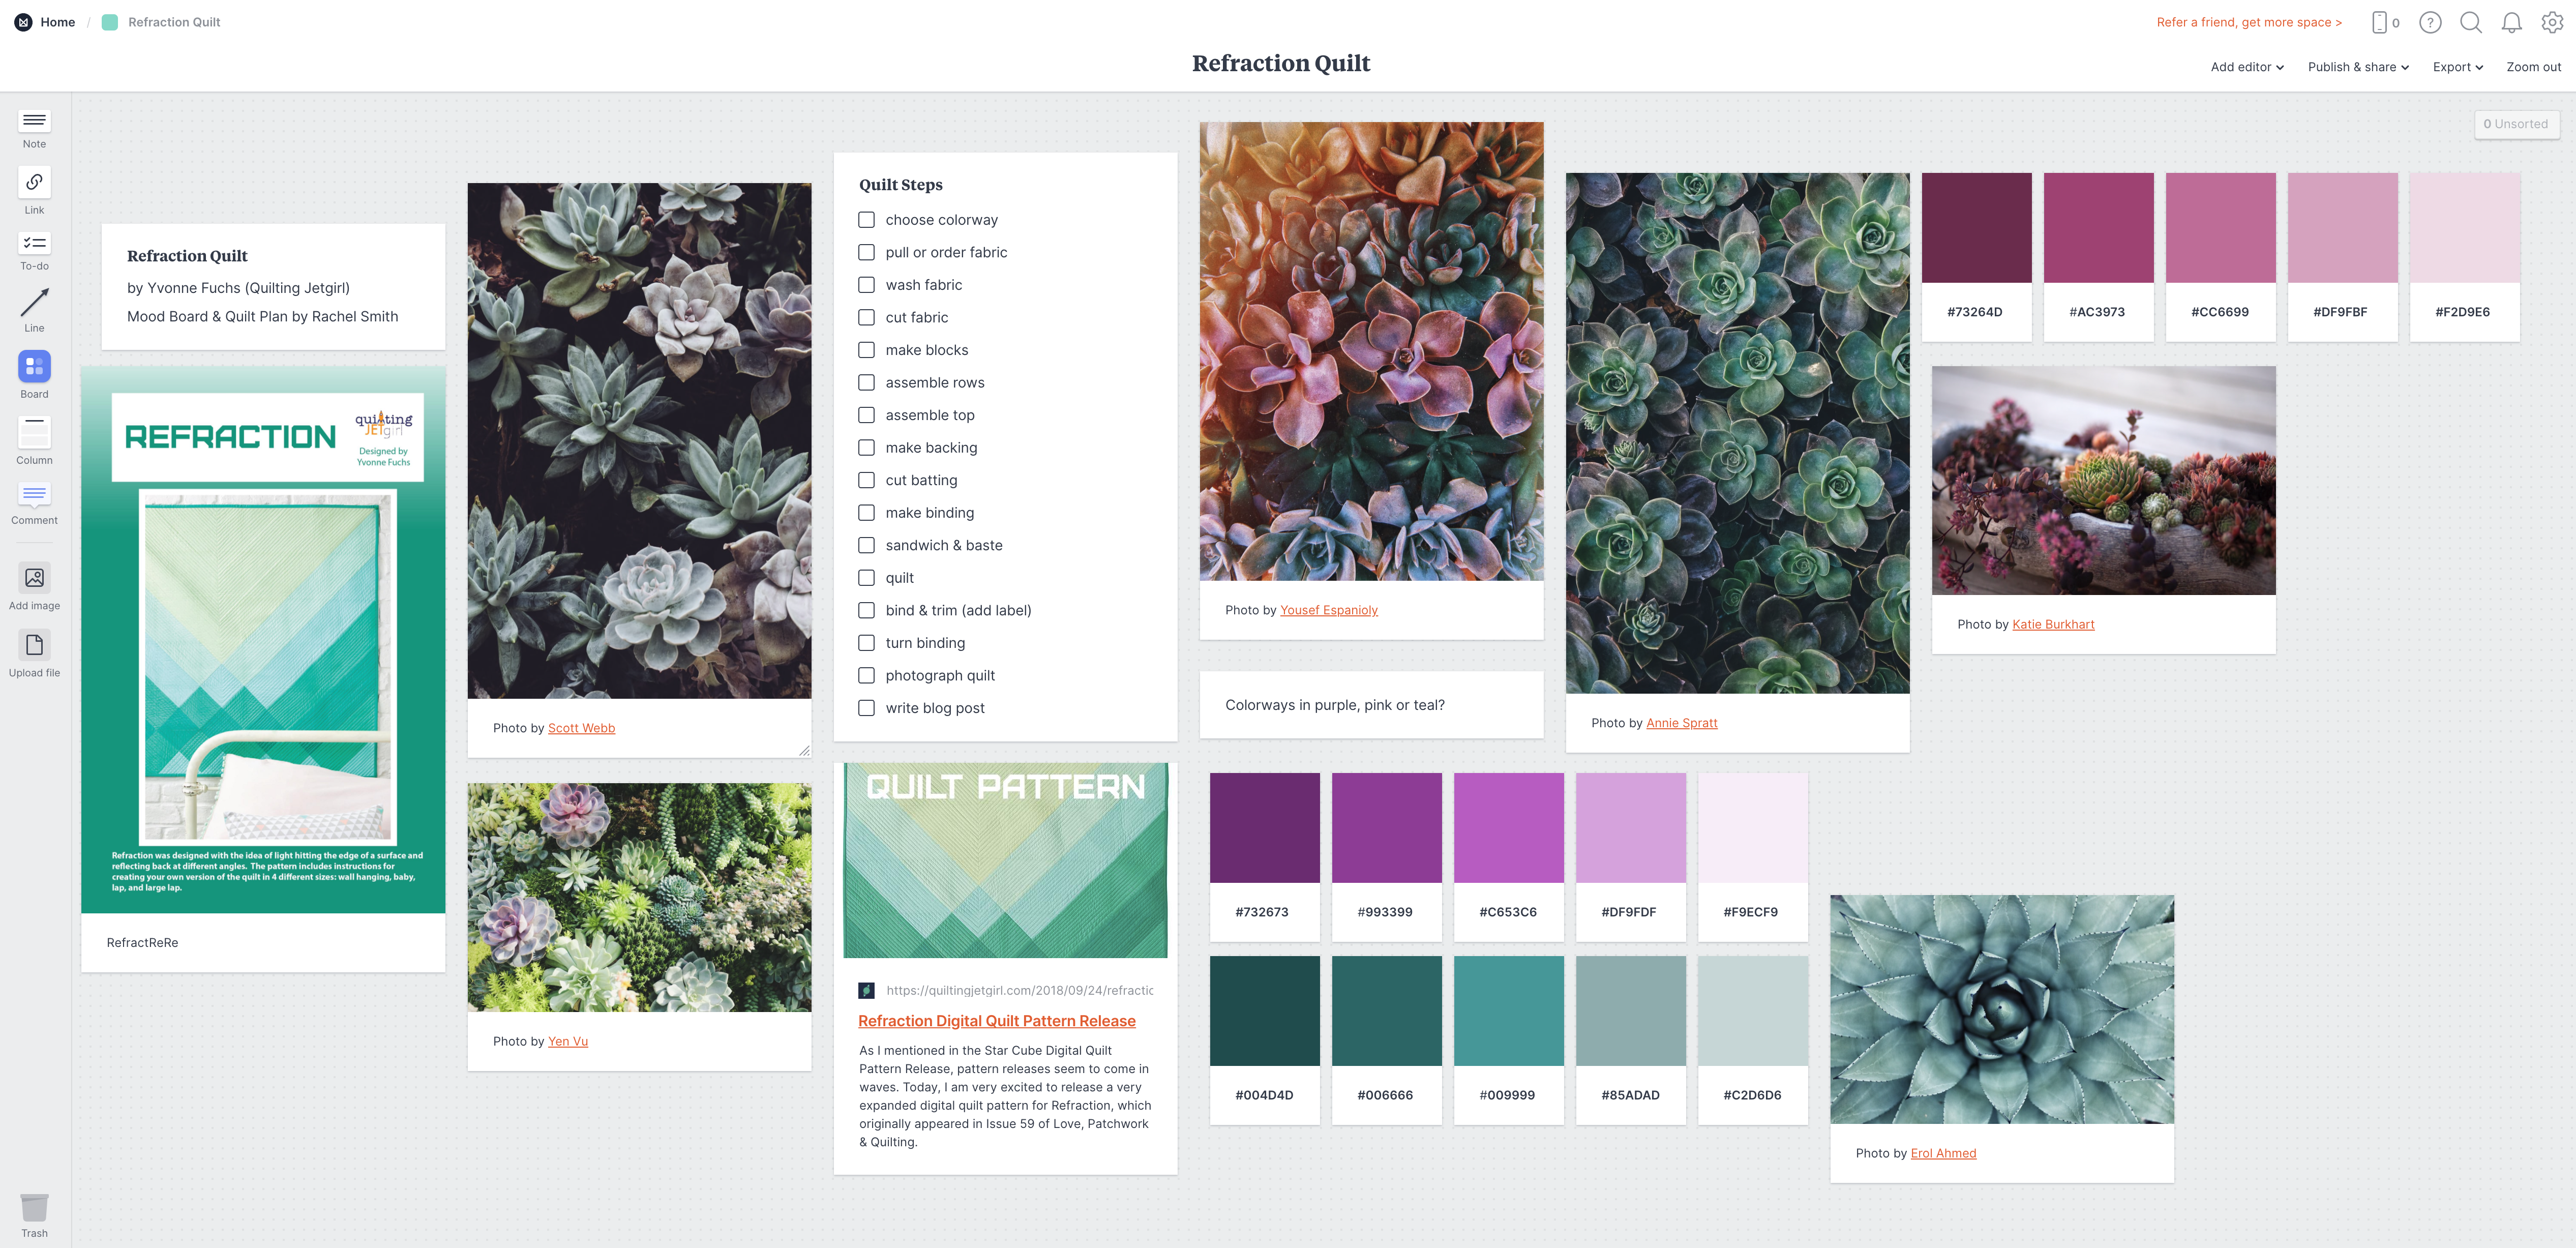
My first mood board in Milanote
Milanote is… I don’t even know how to classify it, it’s so versatile. It can do kanban boards like Trello, and mood boards faster and easier than how I usually do them (uh… in Illustrator… when all you have is a hammer, after all), and checklists and swatches and comments and… there’s a lot there. It has dozens of templates to choose from, for design and software/agile and teaming and planning and even writing. I picked the Mood Board template because I wanted to see how it would work for planning a new quilt that I hope to make. You know, someday.
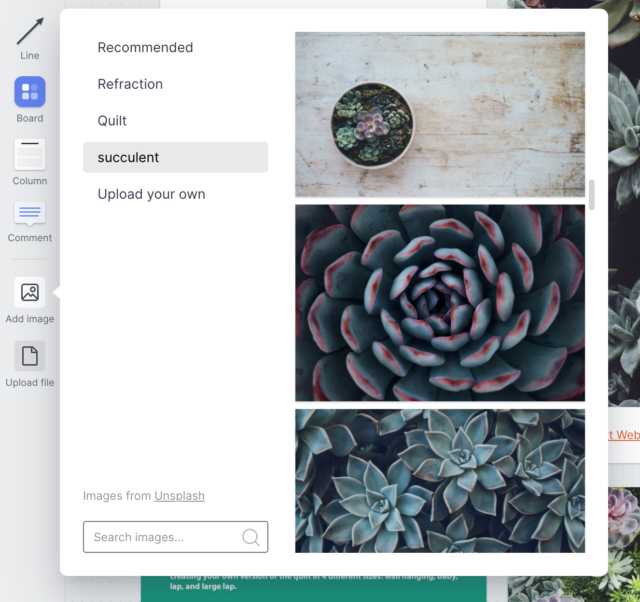
After adding a heading, a picture of the quilt, and a link to my selected pattern (Refraction by Quilting JetGirl/Yvonne Fuchs), I headed over to Unsplash to find mood pictures. I did a bunch of work downloading the pictures and copying the credits into a file, as I usually do, and then I uploaded some of them into Milanote. When I had used all the photo spaces that came with the template, I clicked the “add image” button, and that’s when Milanote blew my mind. It’s already linked up with Unsplash. I typed the same search terms in Milanote, and then just clicked each Unsplash photo to add it, right there on my board. Each one popped in beautifully with the photo credit already attached.
Adding a photo from Unsplash.com in Milanote
After that, I just started writing this review because I had to rave about it. The interface is delightful. It’s pretty and elegant and intuitive, with just enough snap-to help so that your board looks perfect, but not so much that you spend a lot of time nudging stuff and swearing (I’m looking at you, MS Word). The different cards (checklist, photo, swatch, comment, heading…) behave exactly as I expected, except where they were even better than I expected. Software companies always talk about delighting their customers. Milanote, I am delighted.
I didn’t test the collaborative aspects, but there’s a tab to add collaborators (editors) and it looks as easy as you’d expect. You can also add comment cards and use @ mentions to your teammates to ask them questions. You can export the board as a PDF or an image, or you can create a view-only link like this one. Have a look. You can even look at a board on your phone and add a “quick note,” which appears in a special column accessible from a menu icon.
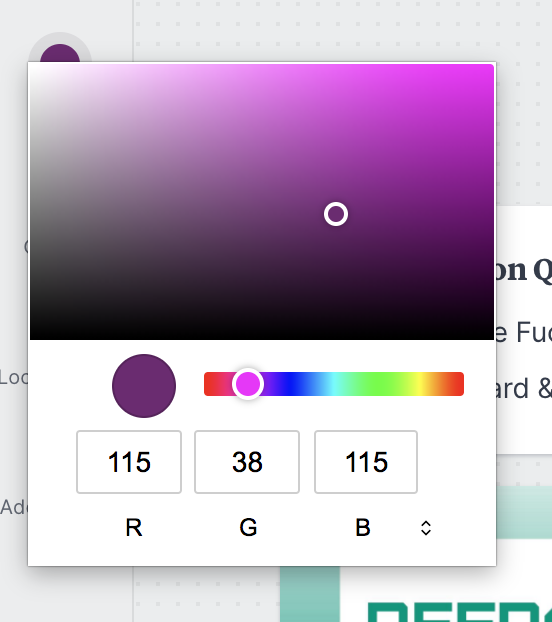
The one drawback I found was the color picker. It’s a very simple one, and I wanted an eyedropper so I could pick colors out of the photos on my board. (If there is one, I didn’t find it.) I ended up flipping back and forth between Milanote and a hex color picker in another tab, which was unsatisfying. I did love being able to paste the hex color into the swatch template and have the color fill the swatch, though.
Milanote’s color picker (there’s also a small swatch palette)
After about 45 minutes (including writing this review) I ended up with the board pictured above. I’m left feeling like there is more to discover, in a good way, and looking forward to creating more boards later on. I’m curious how it would behave with multiple people working on a board at once — something to test another time. For now, I definitely recommend giving it a try for any planning or design project you’ve got coming up.
Yesterday I released five previously unpublished chapters from a manuscript I wrote while working at The Grove a few years ago. The mini-book, called The Virtual Workspace Architect’s Guide, explains how to bring your team together to create a virtual workspace that supports remote collaboration and covers the whole process of figuring out what your team prefers and requires, establishing which interactions aren’t being adequately supported, selecting a set of tools that will work for you, and rolling them out with your team.
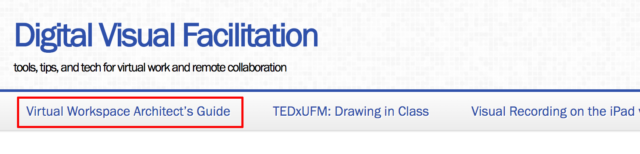
It’s free to download. If you want it again later, you can find it under the permanent link at the top of the blog (“Virtual Workspace Architect’s Guide”) for easy access.
The button highlighted in red links to the Guide’s permanent page.
It’s designed for anyone who suddenly finds themselves working remotely and needing to engage in ongoing collaboration with a team or group. Full details are provided on the page linked from the button.
Over the years I’ve spoken to hundreds of people who have attempted some kind of collaborative online work only to have it go sideways. It happens to me, too. It’s pretty common, since tools for remote collaboration are not yet a completely solved problem.[1]
What struck me in these conversations is the commonality of feeling that people express when they tell me about the problems they’ve had. They’re understandably frustrated, sure, but there’s also a sizable chunk of disappointment and betrayal in the mix: My tools let me down, and I feel personally hurt.
It’s totally natural to feel this way. It comes about in part because we unconsciously expect the technology to take away some of the burden of whatever we’re doing, the way a word processor takes away some of the burden of typing with spelling correction, easy undo, delete, and cut and paste. We expect that the technology will bear some of the burden of designing, planning, running, and facilitating the remote work we need to do. We certainly expect it to help connect people who are located at a distance from each other. We expect the work, therefore, to be easier. And then we try it, and it isn’t, and we feel let down.
The truth is, in the world of remote collaboration, technology doesn’t make anything easier. Technology just makes some things possible that aren’t otherwise possible.
It’s not actually supposed to be easier; as I said, the tools aren’t there yet. But based on experiences with older technologies that are solved problems, like telephones and word processors and spreadsheets, we imagine it should be easier to get people together online and have a meeting and get real work done, and we feel disappointed and betrayed when it isn’t.
So how can we address this issue? During those conversations with disappointed remote workers, I asked why the work felt so painful. Their responses resolved into three major problems that came up again and again. The bad news is, these problems make remote work a struggle. The good news is, they are fixable, though not with a purely technical solution.
The three problems that make remote work so much harder boil
down to these:
The structure of the engagement doesn’t match the intended outcomes.
The collaborative bandwidth we expect to be available to us, is reduced.
People don’t feel co-present with one another, and instead feel disconnected.
Let’s
look at how each one shows up and what you can do to fix it in your next remote
engagement.
Problem 1: The
structure of the engagement doesn’t match the intended outcomes.
This causes frustration because people can’t do the work they have shown up to do, which is very unsatisfying. The fix is straightforward and can be implemented even before the engagement starts, although I am always ready to pivot during an engagement if it turns out I goofed in my planning.
When designing a remote engagement, carefully think through what you want to accomplish in a given period of time, and how you can best use that time to get to your outcomes. It takes more time and more thought than preparing for a similar face-to-face meeting, but the work itself is not all that different.
These are the questions I ask myself to make sure the
structure is going to match the outcomes of my remote engagement:
What does this group need to accomplish before the engagement ends?
Are they also invested in those outcomes? If not, what do I need to do to either realign the outcomes or increase people’s investment in them before we start?
What is the highest and best use of our time together? The phrasing of this question comes from my colleague Marsha Acker, CEO of TeamCatapult, and I love how it helps me prioritize what should be done together and what can be done asynchronously (or not at all).
When I imagine each participant sitting alone at their computer, what can I offer that will help them accomplish the outcomes they are invested in? Here, I’m thinking about activity design, tools, careful instructions, smooth transitions, and tech support, but I’m also thinking about the attitude or presence that I will bring to the group — calm and supportive.
How am I going to make sure no one gets lost when we switch from one tool or context to another? What am I going to do when someone gets lost anyway?
How long can I expect them to focus on this engagement? Is that enough time to accomplish all the outcomes? If not, what do I need to change about my design?
There are two reasons this takes longer for a remote engagement than a face-to-face one: most of us aren’t used to doing complex remote engagements, so we have to think about it more than we would if it were a face-to-face engagement; and the toolset is wider and requires more research than the familiar in-room toolset. Both of those things do get easier with time and practice.
Problem 2: The
collaborative bandwidth we expect to be available to us, is reduced.
We’re all aware that there are many rich communication channels available to us when we are standing face-to-face with someone, especially if we’re in a well-appointed meeting space with tools to support the work that needs to be done. When we switch to an online setting, we are also acutely aware that many of those channels have been stripped away; the most common one that people miss is body language, but it’s not the only compromised channel. I call those channels, and the capacity they have to enable communication, collaborative bandwidth.
Collaborative bandwidth is defined as the number of channels available to support collaborative group work and the capacity of those channels to enable communication in the service of that work. (p. 24)[2]
Imagine the amount of communication your group has to have in order to accomplish its outcomes. Imagine all that communication moving through a wide pipe, big enough with room to spare. No problem. Now imagine the pipe gets smaller — a lot smaller. Like 80% smaller. Communication slows down, mushes together, and becomes unclear and frustrating. That’s exactly what’s happening in a remote engagement that doesn’t have enough collaborative bandwidth.
Plenty of room in this pipe. Photo by Eryk on Unsplash
The fix is simply to make the pipe bigger: add enough collaborative bandwidth to accomplish what needs to get done. Audio is one channel, video is another, sharing screens is a third, and using hands-on tools to co-create something is a fourth (there are many others). If your design includes enough channels to support the work you are doing, you can reduce this pain point or remove it entirely. I usually use different channels throughout an engagement depending on what we’re doing at the time. (See footnote #2 if you want to get geeky with collaborative bandwidth.)
Problem 3: People
don’t feel co-present with one another, and instead feel disconnected.
Co-presence is the feeling of being somewhere together with someone. I learned about it from Rachel Hatch, who was at the Institute for the Future at the time. She was exploring technologies to support co-presence and the idea of replacing telepresence, where you are present on video and audio, with co-presence, where you are present in other ways as well. The concept has stuck with me and influenced the way I plan my remote engagements ever since. I find that people who feel co-present are more productive and effective at collaborative work than people who don’t feel co-present.
To really bring this concept home, think about attending a webinar where you have no idea who else is there, or even how many attendees there are. The audio only supports the speaker or panelists; the only visuals you see are the ones they choose to share. It feels like you are alone on one side of a one-way mirror. During Q&A, you find out that some people you know are also attending, but you have no opportunity to connect with them. This is the opposite of co-presence. It might be a good way to deliver a lecture, but it’s a terrible way to do collaborative work.
Now think about a virtual coffee break with your best friend or a close family member. It’s just the two of you, your video connection is working great, the audio is clear, and you each have your favorite hot beverage in hand. You sip and laugh and comfort each other about whatever you’re struggling with at the moment. This is absolutely co-presence. Although it’s a social example, this is the feeling that will help people work together better remotely.
When you are co-present, the distance between you disappears. Photo by Brooke Cagle on Unsplash
To bring co-presence into a remote engagement, I ask myself this question as I’m preparing for it: What approaches and tools will work best for this group in this situation to increase their sense of co-presence? The answer will be different depending on the size of the group, who is in it, and what you all need to accomplish together.
Here
are some of the ways I do it:
Request (coax, if necessary) that people use a video camera for conversations that are personal in nature, like check-ins and check-outs.
Ask people to choose a photograph, either one of theirs or one that they like from a site like Unsplash, and share it while they tell us briefly why they chose it. (I use this as an icebreaker, or right after a break in a longer engagement.)
Set up small breakout groups so people can connect with a few other people while they work, rather than always being in a large group. Mix up the breakouts for different activities.
Establish a chat backchannel and encourage people to use it while working (yes, even in a meeting) if they have questions, off-topic ideas, or just want some individual connection.
Let go of the feeling that I need to control every interaction in order to stay “in charge,” and accept that technology can mediate interactions that I’m not party to — and don’t need to be party to. In other words, allow people to whisper behind my back.
These are just a few of the many solutions to this problem. Once you begin to think about helping people create a sense of co-presence, it changes the way you structure the engagement and the way you show up online.
I try always to plan for and to consider all three of these common problems when designing a remote engagement. I hope this helps you create engagements that connect and inspire you and the people you work with.
Footnotes
[1] That is to say, they are not yet as invisible and reliable as the landline telephone, which could be used by anyone whether or not they had any understanding of how it worked. You still need to know too much about remote collaborative tools for them to be truly comfortable yet.
[2] Smith, R. (2014). Collaborative bandwidth: creating better virtual meetings. Organization Development Journal, 32(4), 15-35. An excerpt of the article is available on The Grove’s website. The link on that page to download the full article no longer works, but libraries and scholarly databases usually include OD Journal.
Your meeting room is all prepared. Your templates, markers, and sticky notes are at hand. But you and your client are both (very properly) practicing social distancing. So you have a face-to-face process for [strategy, visioning, brainstorming, decision-making, you name it], and you suddenly need to deliver this session remotely. You don’t even know where to start. Great! Let’s do this.
This is a bare-bones crash course in how to translate your face-to-face offering to a virtual one. We’ll cover:
Your mindset
Your mental model
Converting your existing agenda
Getting help
Matching processes with tools
Common problems you may encounter
It can be a lot more complex than this, but this is a good starting point if you’ve never done it before. Throughout, I’ve named tools that I personally prefer, but you can choose others that do the same thing. Let’s go.
Your Mindset
First, stop panicking. This is do-able, and you can do it. Also, your participants really need you to hold the container for them while they work, and you can’t do that effectively while you are panicking. So leave the panic at the door.
Second, accept that something will go wrong, and when it does, embrace it. I’ve done remote sessions for years and I still open each one with the thought, “Hmm, I wonder what will go wrong today?” I phrase it a little differently, though. I think to myself, “Hmm, I wonder what I will learn today?” Everything that goes wrong is a gift, because it teaches you something you didn’t know. It’s okay. Remain calm, explain what’s happening, and work the problem. It’ll be fine.
Third, let go of the fear that your virtual session will by definition be worse than your face-to-face one would have been. That isn’t necessarily true, especially for some kinds of work which are actually easier to do online. Accept that it will be a different experience, not necessarily a worse one, and aim to provide the best experience that you can.
Your Mental Model
This part is for those who have almost no experience in
virtual settings, so you can wrap your mind around how it’s set up. Skip this
section if you’ve participated in a bunch of remote sessions before. Otherwise,
read on.
You’ll have a meeting room, just like you do any other time. People will connect to the meeting room and remain in it for the duration of the session. The tool I use to create the meeting room is Zoom. Everyone connects to the same Zoom link and can use a phone or their computer to hear what’s going on. They can see each other (if they’re using video cameras) and anything that I’m sharing on my screen too. Only the host (me, or you in your case) needs a Zoom account.
You’ll have supporting tools, like you do in any other session. Instead of sticky notes, paper charts, and paper templates, you’ll use digital tools so your participants can engage in the hands-on activities you want them to do. They will connect to these tools using a web browser, while they are still connected to the meeting in Zoom. You give the link to the supporting tool or tools (go easy — multiple tools get confusing really fast), and everyone connects to it. I use tools like MURAL for sticky notes and visual templates, Trello for kanban boards, and Google Docs for shared editing.
A diagram of my typical set up with Zoom, Mural, and an iPad for graphic recording.
Pro tip: Usually, people are either looking at Zoom or they are looking at the shared tool, so if you are going to be working in a shared tool for a while, have people turn off their video camera in Zoom. Even when they are in Zoom breakout groups while using a shared tool, their focus will be on the tool, not on Zoom. Turning off the video camera can make the audio clearer and the tools load faster for people with limited bandwidth.
If you do graphic capture, you’ll also have a tablet (iPad or similar) that you can write on. You’ll share this screen in the Zoom session while you’re capturing. I use Concepts as my drawing app, but I recommend others for first-timers.
Converting Your Existing Agenda
The basic crash-course process for this consists of five steps:
Take out 25% of your activities (or make your session 50% longer). You can’t get as much done in the same amount of time, especially when you’re new at this. Transitions will eat up a lot more time than you expect. See this post for more details, including when to add breaks.
Identify the process you are using at each stage in your agenda, then select a tool that matches it and supports its desired outcome(s). Use as few tools as possible, even if it means using the same tool for two or more different activities. See the table below.
Create any templates or other materials you need so that they are ready in the selected tools. Include instructions right in the tool whenever possible, so that they can refer back to them if they get confused.
Visualize the transitions you will be asking participants to make between tools. How will you help them make the switch and get oriented? How will you teach them the basics of the tool so they are able to do what you ask them to do? How will you support them when they get stuck? Answer these questions for yourself, and you will be better able to support them through the session. Draw a diagram of the transitions between tools for your own reference. Make notes on your copy of the agenda to remind you what to say and when to say it.
Practice with each tool beforehand. Make mistakes, so that when participants make the same mistake, you can help them out. Do everything you are asking them to do. Find out where you need to give extra instructions to prevent mishaps.
Getting Help
Everyone is trying to learn this very fast right now. Several of the tools I use either have fantastic online tutorials (I’m looking at you, Zoom) or have staff who can help guide you through the basics, or both. Sign up for a demo webinar (thank you, MURAL) if they are on offer. Google the name of your tool plus “tutorial” or “demo” to find what’s available.
The new meeting space! Embrace it. Photo by Burst on Unsplash.
Matching Processes with Tools
Here is a list of common processes that you might need to use, and tools that support them. It’s obviously not an exhaustive list, but these are some of the most common things I do in virtual sessions. Again, I’ve listed my favorite tools; there are many others available.
Process You Want to Do (links in this column go to how-to articles)
Tools That Support It (links in this column go to the tool’s website)
Problem: People behind firewalls can’t access certain tools.
Solution: Have them do a pre-meeting tech check. Some tools have a test link (for instance, Zoom’s is here). For others, like MURAL or Google Docs, set up an open-access test document and send the link to your participants ahead of time.
Problem: People get lost switching between tools.
Solution: Visualize how this will work before you start. Give clear, explicit instructions, both verbally and written down in the tool they will use. Spend an extra minute making sure everyone is with you before you start. Have a colleague or volunteer present who can help stragglers figure out how to get where you are.
Problem: Not everyone has a video camera.
Solution: Ask the group what they prefer to do in this case: turn off all cameras, or have people use them if they are available. Keep in mind that the people who show up on video will have more perceived power and will have a different experience than those who don’t. Personally, I tend to be an all-or-nothing facilitator when it comes to video, but it’s up to you and your group.
Problem: Someone can’t connect to one of the tools.
Solution: If you have a tech helper, ask them to work with the person. If it just can’t be resolved, pair that person up with a buddy who is responsible for making sure that person’s ideas and input get added to the shared document. Share your screen through Zoom so they can watch what’s happening in the tool, even if they can’t get there themselves.
Caution: This is the only time you should screen share a tool that people are actively using. Otherwise, some folks will get lost between the real tool and your screen share, and they are likely to get confused at some point.
Problem: Someone’s audio or video suddenly stops working when it had been working before.
Solution: Ask them to leave the meeting and re-join. If that doesn’t work, ask them to leave the meeting, reboot their computer, and then re-join. Usually that fixes it.
Problem: There’s a ton of background noise from someone’s microphone that’s making it hard for others to hear.
Solution: In working sessions, I prefer to have everyone stay off mute; the conversation flows more naturally that way. However, sometimes there is a lot of noise in one location. Look on the participant list in Zoom to see whose microphone icon is filling up with green, and politely ask that person to mute themselves unless they need to say something until the noise has stopped.
Caution: It’s difficult to switch back to Zoom to mute and unmute while working in one of the web-based tools if you’re not used to it. Give people extra time to do this. They can return to Zoom by selecting its icon (blue with a white video symbol) from their task tray (PC) or dock (Mac).
I hope this crash course helps you find a starting point. As you do this more, you’ll get more comfortable with it. Remember that people are generally supportive when you invite them along on a learning journey like this. And good luck!
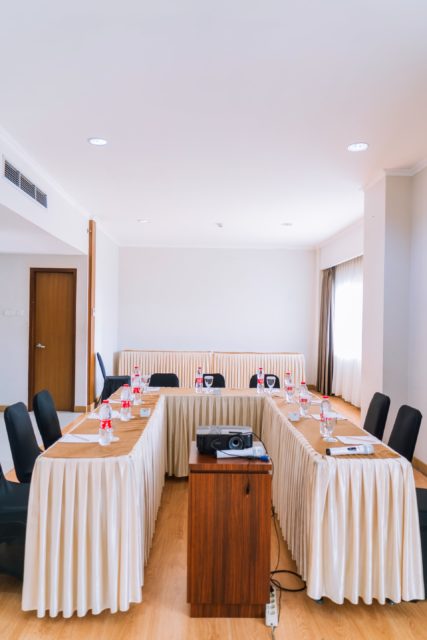
Using a sticky note tool for brainstorming in remote meetings is a wonderful method to gather a lot of different ideas quickly. But once those ideas are up on the shared board, the task of sorting through them and choosing which options to pursue can be daunting. Here’s a method for tackling all that information and turning it into a manageable dataset, and a list of some of the pros and cons of doing it this way.
Step 1: Get the ideas out.
Gather your remote team and get them into the same sticky note board using whatever tool you prefer. (My example here was done in Mural.) Pose a good question and ask them to write one idea per sticky note. They can place ideas anywhere on the board. To make later steps easier, ask them all to use the same color note; yellow, for instance. Anything but red, green, or blue. (A nice feature of Mural is that it’s easy to turn a bunch of notes all the same color in one click, even after they’ve been created.)
A wall of words — fresh from the brainstorm! Click the images if you want to read the notes.
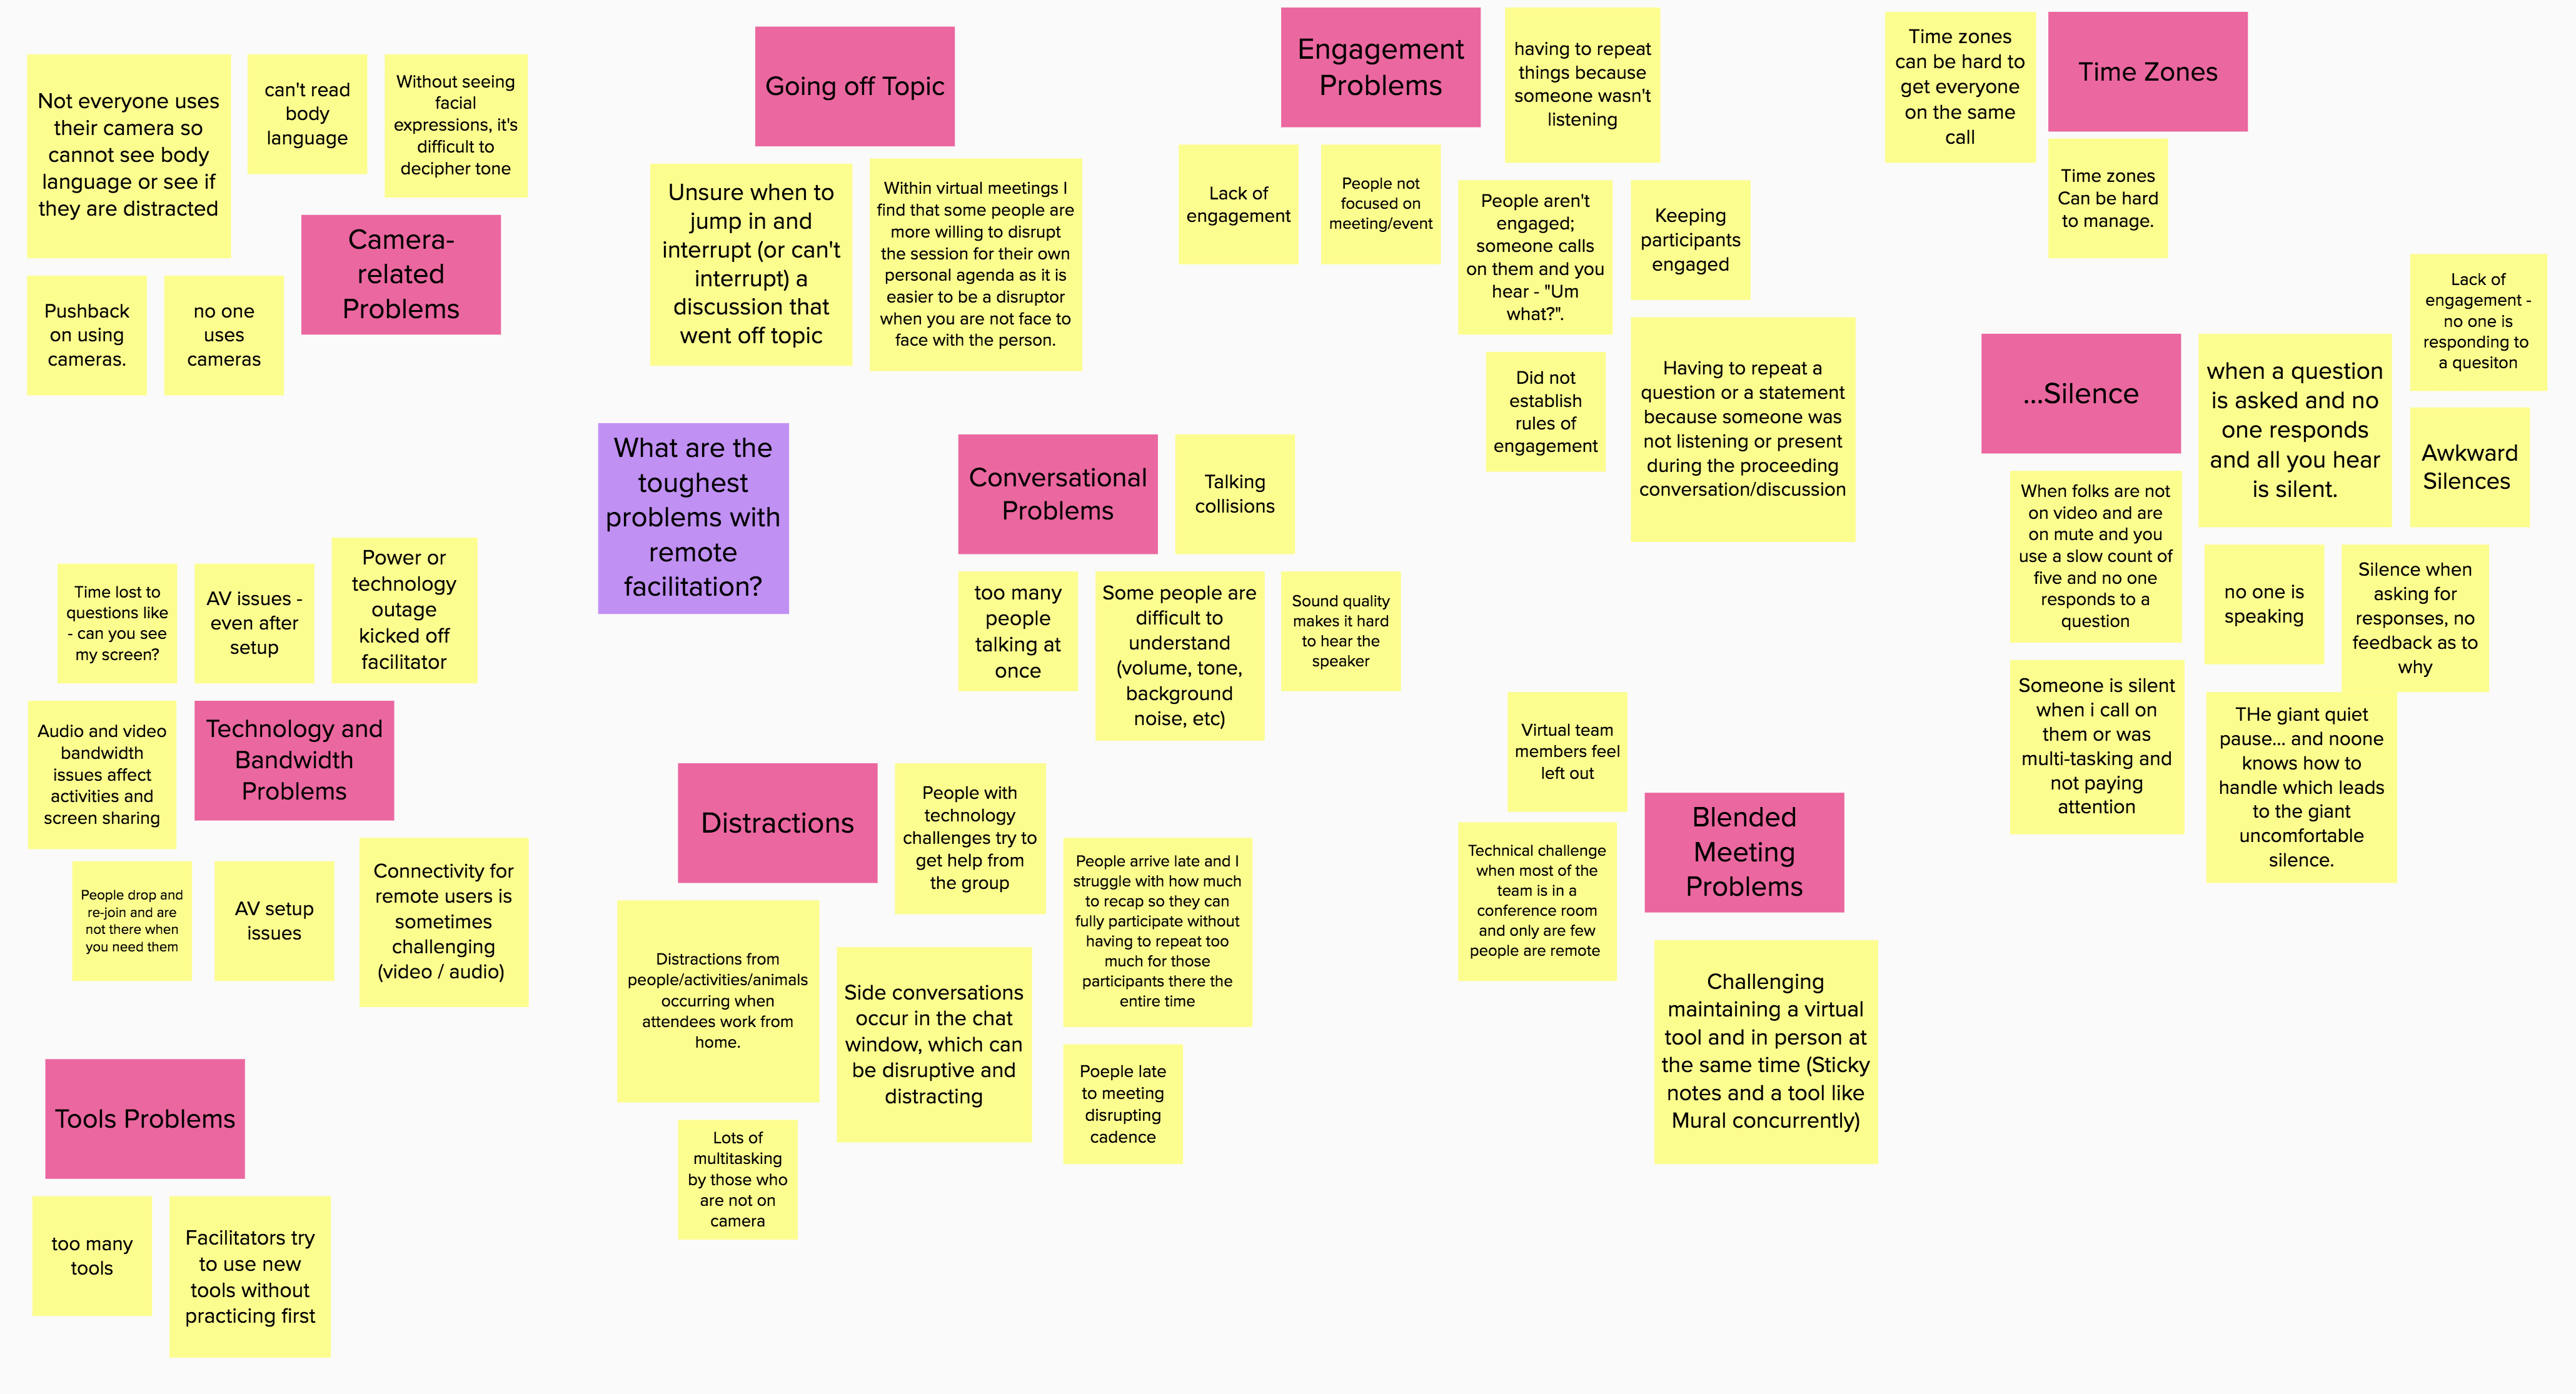
Step 2: Get the ideas organized. No judgment!
As a group, spend some time clustering the notes and removing or consolidating duplicates. At this stage, you’re just looking for things that are alike. You’re not evaluating anything. You can do this any way you like; if you have a high-energy group, ask them to silently cluster the notes all at the same time, and watch them fly around the board.
If your group is larger, or if you have some folks who are unfamiliar with the tool you’re using, silent clusters can be a little alarming and you might want to take a slower pass as a whole group, or assign sections of the board to breakout groups and then come together to finalize the clusters.
Make sure the clusters are clear and that all the notes in each cluster belong in that group. Naming each cluster as you go is helpful, too.
Sticky notes clustered into groups. The pink notes are the cluster labels.
Step 3: In, Out, or Discuss?
Make sure your guiding question is clear, and change it if you need to. The question must help participants decide whether ideas are in or out of scope. For example, in the fictitious brainstorm shown in my screenshots, the original question was, “What are the toughest problems with remote facilitation?” At this stage, though, I would need to amend the question to add, “… and which problems do we want to prioritize solving for our team?” There needs to be some reason for people to decide whether to keep or discard each idea, so make sure your question is pertinent. This second question makes the end goal clear: We are selecting priorities for action.
Now work through one cluster at a time. Set this up by saying something like, “We’re going to do a quick first pass on the ideas in each cluster. I’ll read out a note, and you tell me if it’s definitely IN, definitely OUT, or needs more discussion.”
Then further explain the labels:
In: An idea the
group definitely wants to accept or adopt. It’s a no-brainer, a table-stakes
item, something you’re already working on, or just plain required.
Out: An idea that doesn’t require any further consideration. It’s out of scope, technically impossible, too expensive (time or money), duplicates another idea already under consideration, or was meant as a joke.
More discussion:
Anything else, including things that some people think are “in” and others
think are “out.”
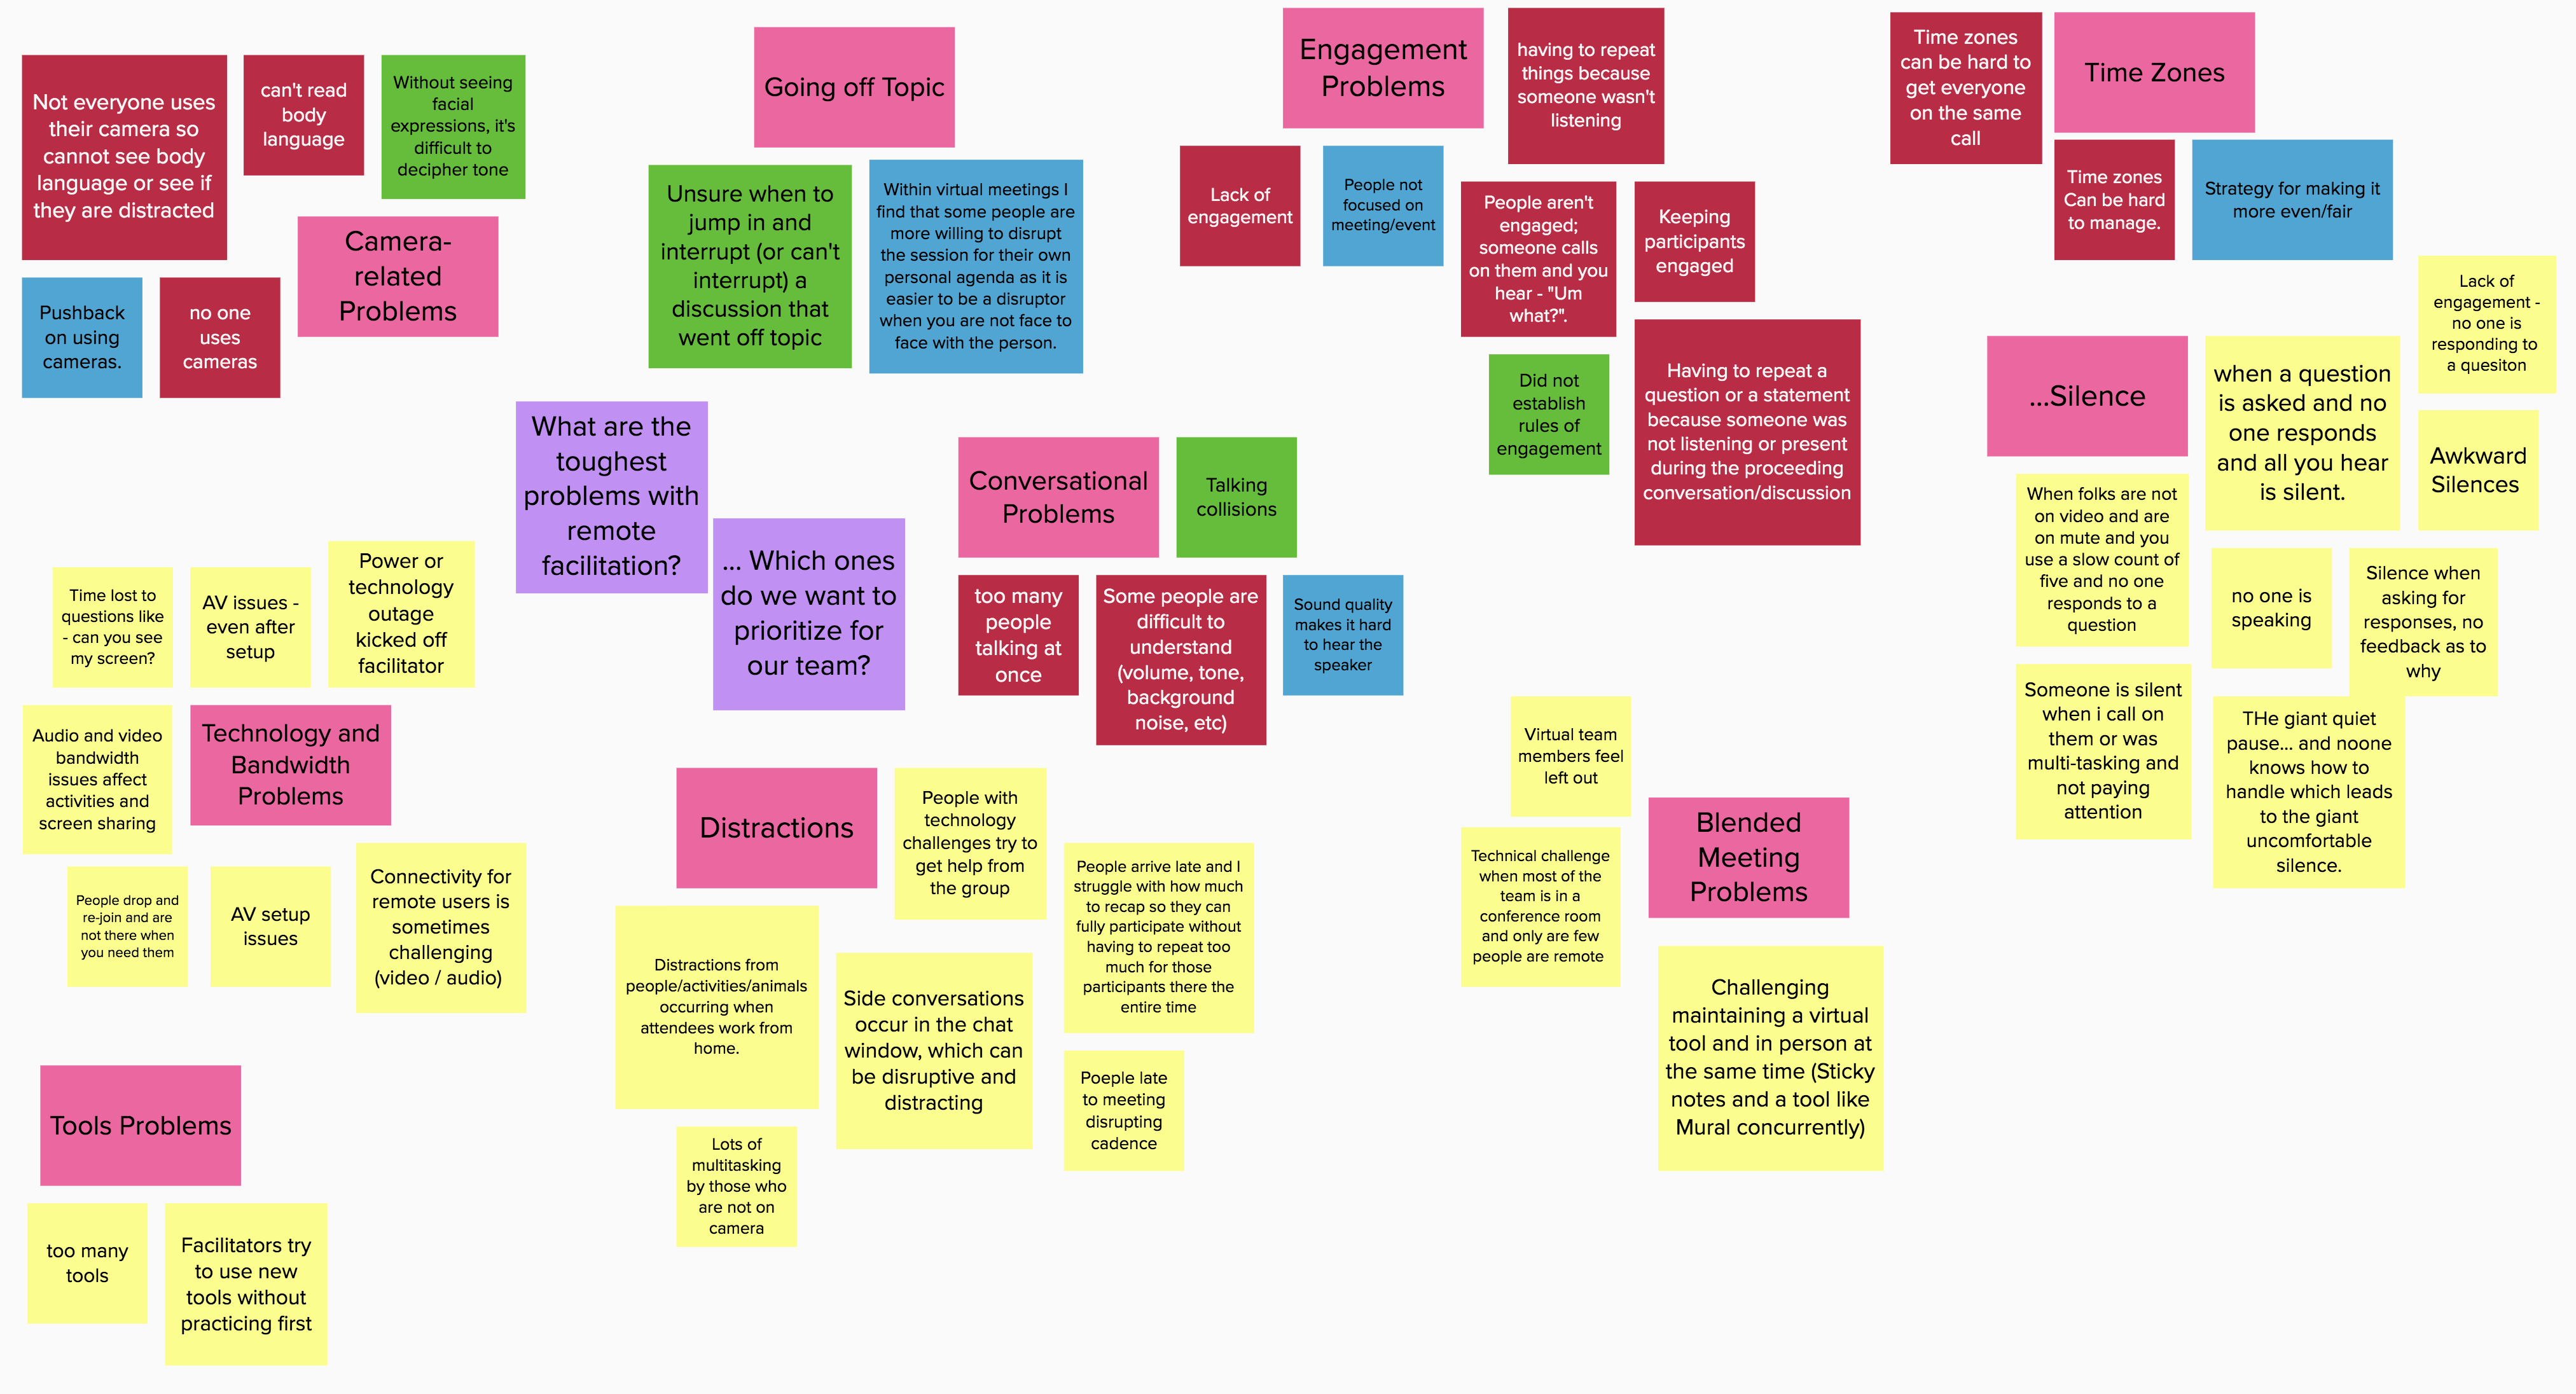
Work through each cluster note by note. If the group agrees
unanimously that an idea is IN, turn the note green. If they agree unanimously
that it’s OUT, turn it red. Otherwise, turn it blue.
As you read each note, people may only say “In,” “Green,” “Out,” “Red,” “Discuss,” or “Blue.” Again, if opinions on a given note are divided, it’s blue. Even if one person thinks something different from everyone else, turn it blue.
Work through all the clusters. When you’re done, all the notes should be either red, green, or blue.
Asynchronous or silent option: If this is too time-consuming or tedious-sounding for your group, you can use another method. Open up the board to voting, and ask each person to vote only on those ideas they think should be IN. If there’s a note that someone thinks should be discussed, they can turn it blue. If a note is OUT, leave it alone. Take a sweep through at the end. Any notes that have the same number of votes as people become green. Any notes that have no votes become red. Notes that are blue stay blue, and notes that have some votes but not the total possible number of votes also become blue. This can be done in between meetings to free up meeting time for discussion.
Note that some sticky note boards don’t have a vote option, and some have the option but don’t let you limit how many votes a person can put on a single idea. You have to invoke the honor system, but people usually play fair.
Working through each cluster. In this image, five clusters have been dealt with already, revealing four accepted ideas (green) and five ideas that need further discussion (blue). Notice that we’ve refined the guiding question here as well.
Step 4: Deal with the Blues.
The group can now ignore the red notes; they don’t matter.
The green ones can float to the top or side (or leave them where they are) —
they will move forward into the next phase, but you don’t need to talk about
them now.
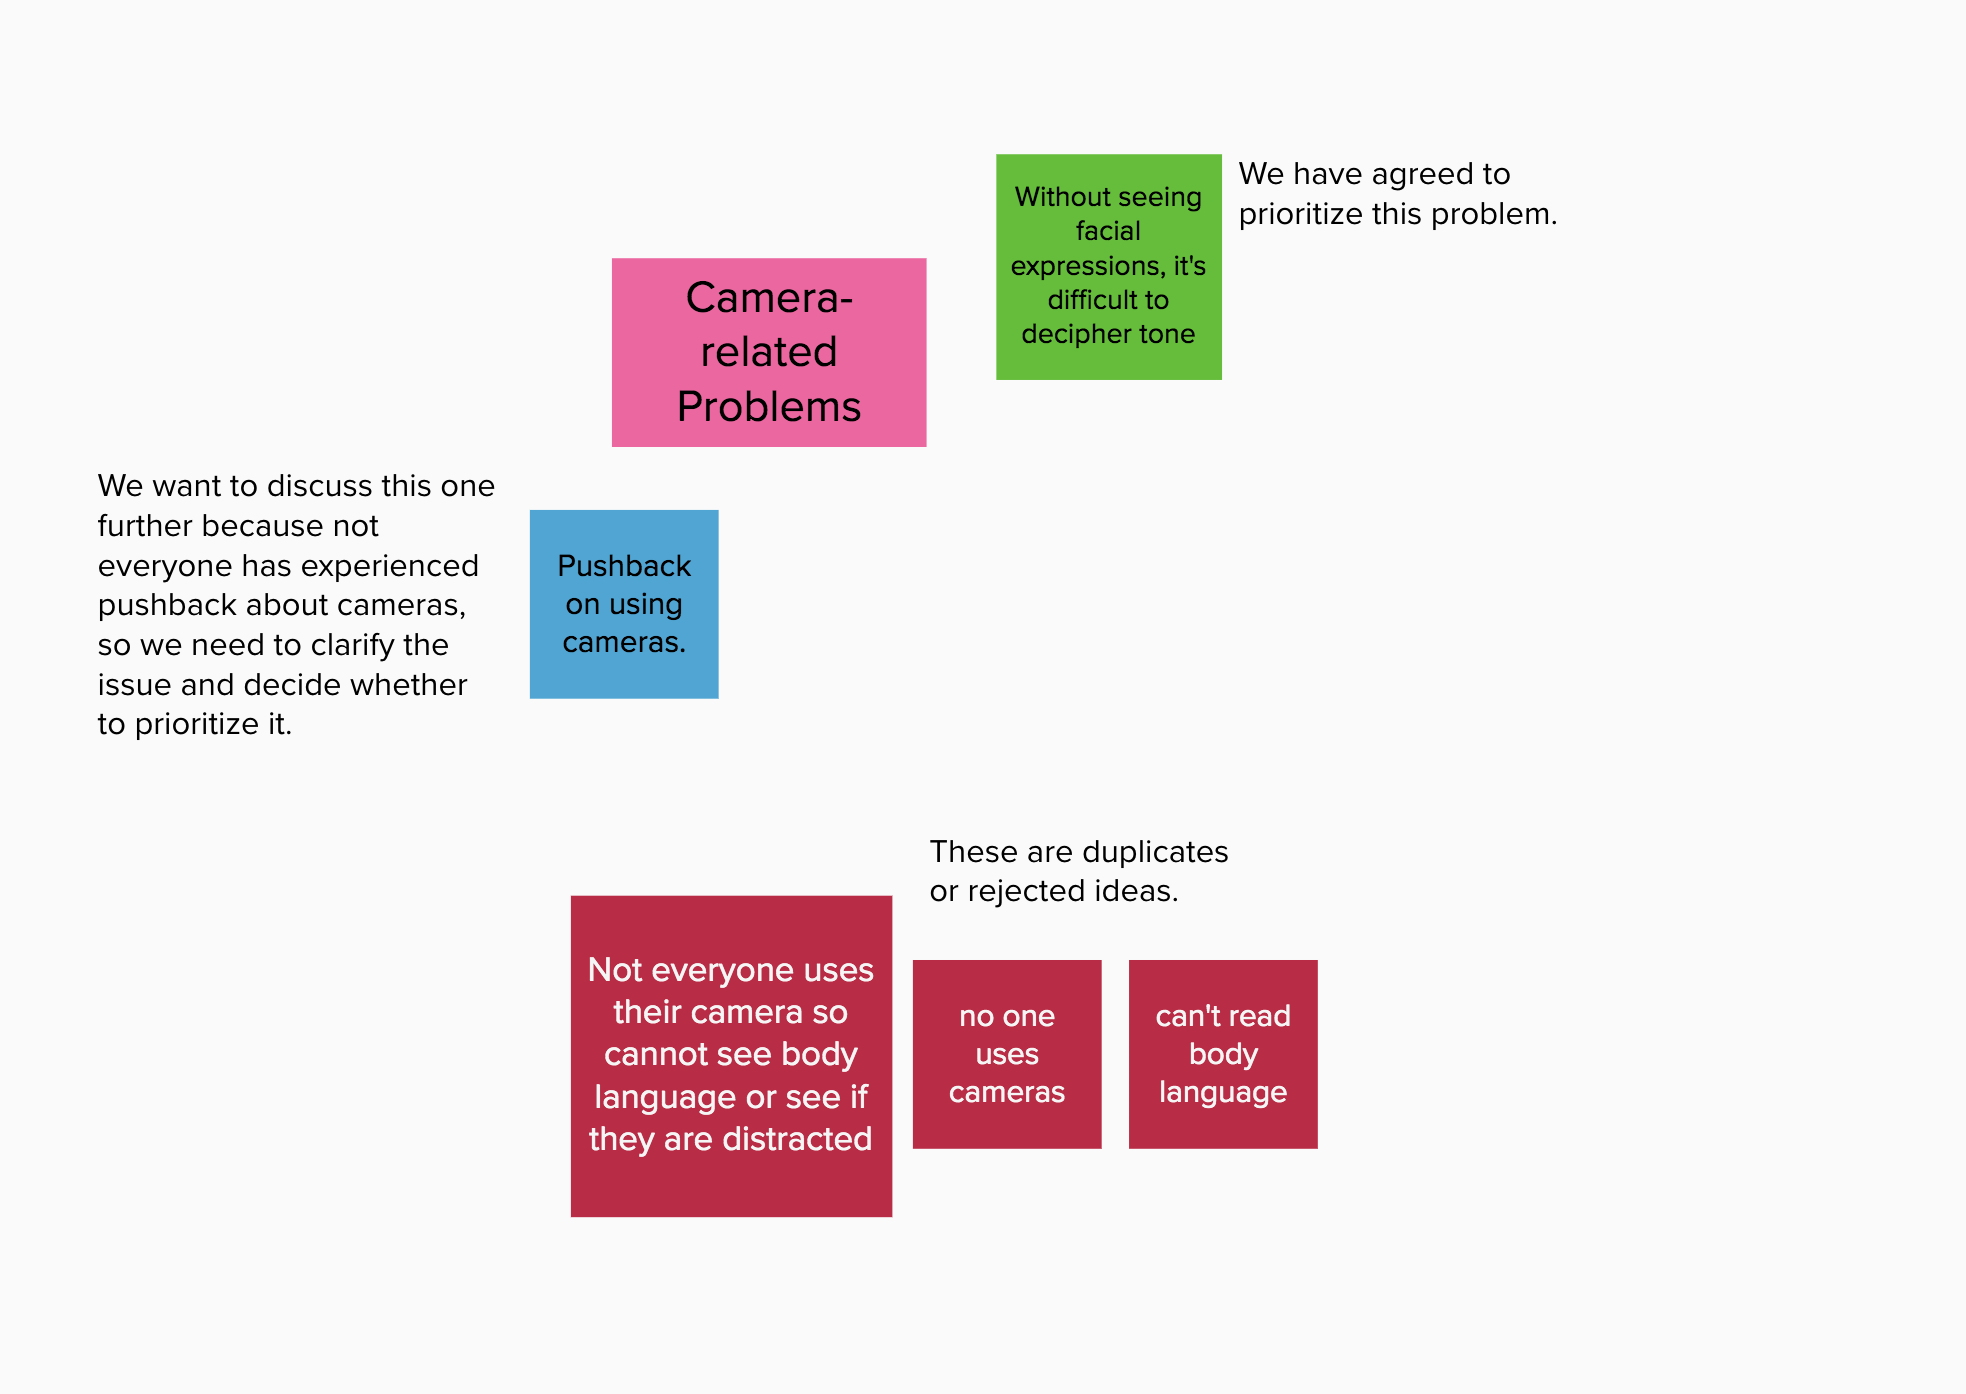
For each blue note:
Call the group’s attention to the note so they are all looking at the same thing. Ask, “What do we need to talk about here?” Facilitate the conversation, helping them work through the issues. At the end, the note should either be turned red or turned green. It’s perfectly okay to revise the note before changing the color, but it needs to be red or green at the end.
When you’re done, everything on the board should either be red or green (or a cluster name). Copy the green notes into a new workspace.
Talking about the blue ideas to get clarity and decide whether to make them red or green. The plain-text annotations are just for illustration here; I don’t write them on the sticky note board.
Step 5: Work with the Greens.
Working with the duplicated green notes, you can re-cluster (if needed — I usually don’t), dot vote, place the notes on a hi-low grid or a risk wall or something similar, or use the method(s) of your choice to decide which ideas to implement or adopt. Every idea has been considered, but no time has been wasted on ideas that don’t merit (or don’t need) discussion.
These are the green ideas from all of the original cluster groups, and this is one way to assess the relative value of the selected ideas. The ones in the lower right will yield the greatest impact for the least effort, in the group’s opinion.
Pros:
This method takes an overwhelming number of choices and turns it into a manageable number of choices pretty quickly.
As the group moves through the process, they feel a great sense of speed and progress rather than feeling bogged down or stuck.
It can bring in different voices, because people often have strong opinions about some of the notes and less strong opinions about others. They tend to speak up when they care about an idea.
Cons:
This can be a tough exercise for people who are color blind. See if your sticky note tool allows you to highlight notes in another way, such as changing the shape (star? stop sign? triangle?) or adding a sticker (check mark? X mark? question mark?).
Be careful about getting bogged down in conversation as you turn notes blue. Cut off blossoming discussions and let the group know you’ll get back to it once the notes are sorted out.
It’s possible for a vocal subset of the group to take over, causing others to check out. Manage this by asking for different voices to speak up, asking more vocal people to step back, or assigning a different champion to each cluster. Using the asynchronous or silent voting option can help combat this problem.
In-Room Adaptation
If you’re working with real sticky notes in a co-located meeting, you can still use this method. Grab markers in green, red, and blue. Add a big green checkmark to the “in” sticky notes. Make a big red “x” on the “out” sticky notes. Write a blue question mark on the “discuss” notes. Just make your marks in the edges of the notes, not over the words, so that people can read the original notes later. To change a blue note to a green or red one, cross out the question mark and add the appropriate green or red marking.
I’m delighted to announce a project that’s been underway for several months now: a new online workshop developed in collaboration with TeamCatapult called Virtual Team Facilitation. The workshop is hosted by TeamCatapult and will be co-taught by their CEO Marsha Acker and myself.
It’s offered in a two-day online format and includes a mini team intensive that gives participants an opportunity to really practice what they’ve learned. The workshop focuses on creating and facilitating effective team engagements in virtual settings. It’s different from my current Grove workshop Facilitating Virtual Collaboration in that the new workshop is framed within the context of agile teaming methodology and taking agile practices into virtual settings. Some experience with agile team facilitation is required. We review key tenets of agile facilitation but don’t cover it in depth — TeamCatapult has another course for that. Learn more about Virtual Team Facilitation and/or register here.
A project I’ve been working on for three years is tantalizingly close to completion… it’s a book! The working title: Beyond Virtual Meetings.
I think the world would be a better place if people could work together more effectively at a distance. Based on experience and observation, I’d say that working with a remote team can be pretty painful and frustrating… but it doesn’t have to be. So that’s what I’m writing about: how you, as a team member, team leader, or facilitator, can make remote collaboration better for yourself and everyone you work remotely with.
The Grove recently published a short interview in which I talk about some of the main themes.
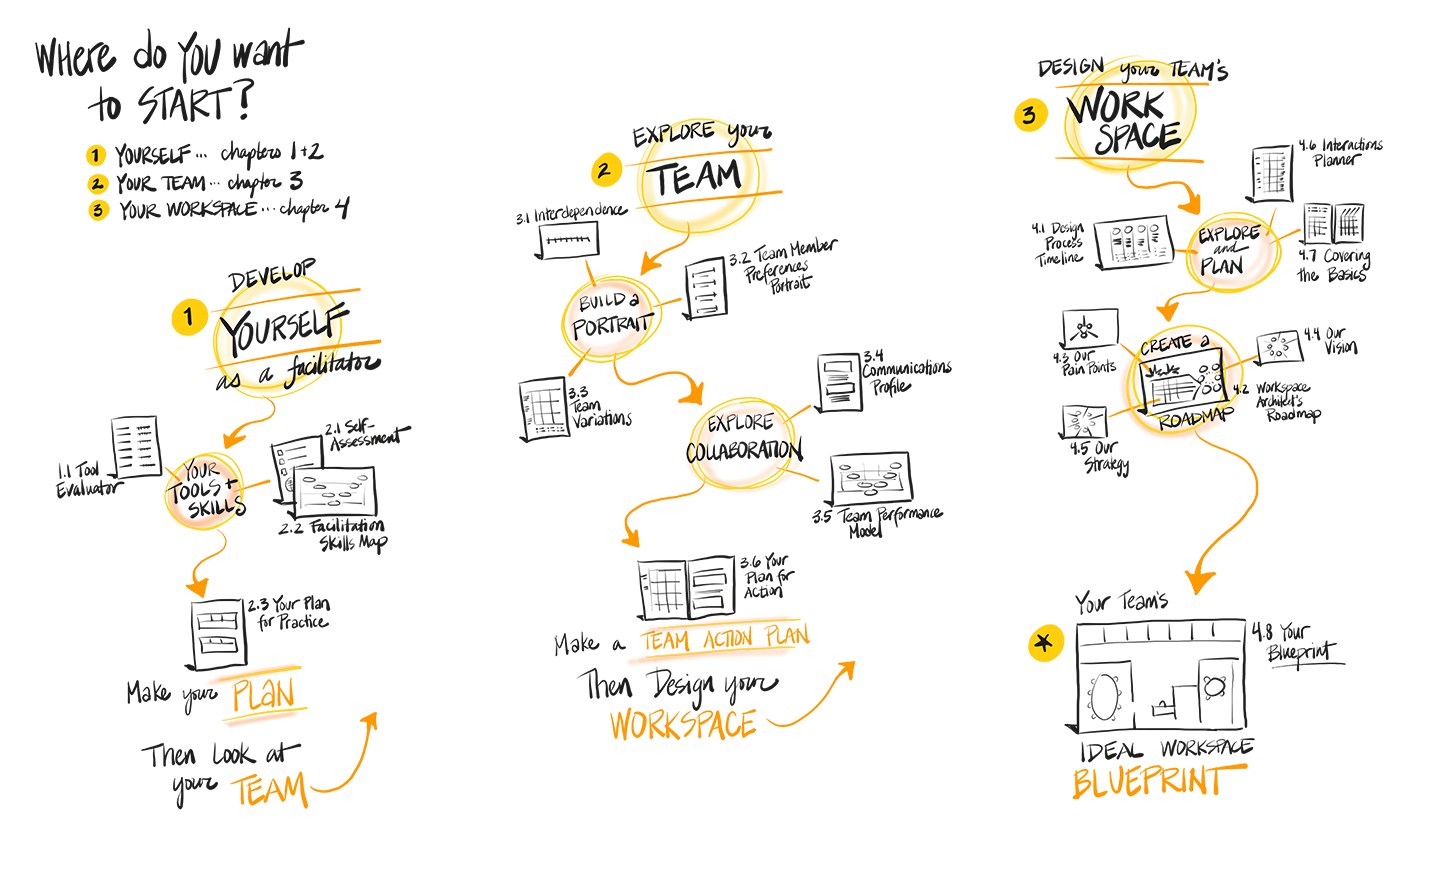
One possible path through Part I
Writing the book itself has been an interesting process, sometimes fun, sometimes painful; just like writing any book, I imagine. At this point, the manuscript is complete and I’m doing an editing pass to tighten it up. We don’t have a publication date yet but I’ll post it when we do! The current draft has three parts: the first, illustrated here, is about being facilitative in online settings, finding out what your team needs most, and creating a beautiful virtual workspace to support collaboration. The second part includes agendas and checklists for doing virtual work (both in meetings and in between meetings, when lots of important work happens too!). The third part is a collection of 70 best practices for yourself and your teams to make remote collaboration smoother, easier, and more effective.
There’s a website attached to the book, too, which is where I talk about actual tools. The book’s best practices are linked to types of tools rather than specific ones. Look up the tool type on the website to find specific applications you might want to try. The website will also have a bunch more best practices — there were too many to fit in the book — all targeted at specific areas your team needs to work on. You can see the site in its embryonic stage right now! (Just the tool reviews, though. No best practices there yet.)
Want to stay informed? Sign up to be notified when the book is ready. If you think this book will be helpful, I’d love it if you’d leave a quick comment saying so. Thanks!
Last week, my colleague Malgosia Kostecka and I co-facilitated a challenging four-hour remote meeting of 33 attendees in 22 locations involving complex work: developing a mission statement and the initial five-year vision for a new organization. This meeting kicked off a five-month process to explore different models for how the organization might be structured. Over the summer, sub-groups will design possible models and prepare to present them to the whole group. The process will conclude in October with the group’s first face-to-face meeting, where the final mission, vision, and five-year strategy will be set. These will then be used in securing approval to launch the organization.
For this kickoff, we used Zoom, Boardthing, and Slack as our workspaces. I’m happy to report that it went well. Astonishingly well, actually, given that I always assume something will go horribly wrong! We barely needed Plans B and C and didn’t reach Plans D or E at all. Here’s how it worked.
Pre-Meeting Preparation Facilitators:
We worked closely with the meeting sponsors to identify outcomes and understand who would be in the meeting.
We set up Slack for the whole team, since they will be doing ongoing work throughout the summer. The ongoing setup includes channels for smaller working groups, plus one for questions, general information, and workgroup chairs. Special temporary channels were also set up for the meeting (see Plan C, below).
We set up a Zoom room for the main meeting space.
We created a Boardthing board for collecting and sorting vision ideas. Advance setup included creating a list of instructions, uploading a template image for sorting the ideas, and preparing an agreement scale in case we needed it.
We prepared 14 digital templates covering each part of the meeting from the Do-Now to Closing Thoughts. Not all were used, but they were ready!
We created a spreadsheet to track who had signed in to Slack, who had done the tech check, who was to be at the one co-located venue, and who would be in each breakout discussion group during the meeting. We took into account the 11 people who would be connecting from a single location when planning breakout groups.
We prepared a visual roadmap of the entire process, from this kickoff meeting throughout the summer and fall to the final group meeting scheduled in October.
We prepared the agenda (a detailed facilitators’ version and a more general participants’ version).
We prepared a text document with participant names and email addresses, key web links that would need to be copied and pasted, and a few technical support statements that we would likely need to paste multiple times.
Participants:
Prior to our involvement, participants went through a selection process based on interest, expertise, and availability. There were also initial discussions about the process and its outcomes.
We asked participants to sign in to the Slack team space prior to the meeting and to have Slack open during the meeting itself.
They were also encouraged to attend a brief tech check to make sure they could access Zoom.
Meeting Tools/Technologies
As mentioned above, we used Zoom, Boardthing, and Slack; additionally, I used Autodesk Sketchbook, a spreadsheet, and a text editor. We used a countdown timer to time breaks.
Agenda & Activities
The planned timing is on the agenda image here. The actual timing is noted in parentheses next to each activity below.
Our agenda. Organization and other names have been removed.
Do-Now & Orientation (15 minutes)
The do-now was designed to help folks start thinking about the meeting content and give them something to do while everyone else got connected. Everyone was to type into a special Slack channel, answering the question: Why is this organization important to you personally? [Wondering whats a do-now is? Here’s a PDF that explains.]
Once everyone was settled and had had a chance to work on the do-now, the sponsors opened the meeting by setting the context for the work this team will be doing, why do it now, and why the team was comprised of these particular people.
I introduced myself briefly when I took over, and ran through the outcomes, agenda, roles and rules as shown above. I left space for additional rules but the group didn’t add any.
I mentioned the backchannels (Slack and the chat feature of Zoom) and encouraged participants to speak up in those channels if they were having trouble. Malgosia was monitoring both channels throughout the meeting.
We asked people to turn off their video cameras while they were in the full-group session and said they were welcome to use them in the breakouts later.
Introductions (30 minutes)
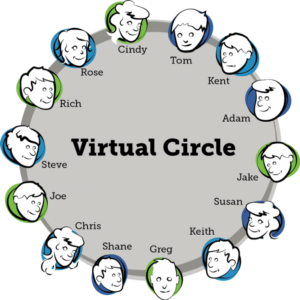
Since this group is not an intact team but a group of colleagues from different organizations, we invested some time in team introductions. Using a prepared template that showed six ‘tables’ — one for each of the working groups that will meet over the summer — we went around the virtual room.
Malgosia and I modeled what we were looking for with our own introductions first.
Each person’s name was already written in, along with his or her organization. When it came time to speak, each person said who they were and where they worked and also shared one hope or expectation for the process. I added each person’s hope/expectation to the template as they spoke, using Sketchbook and my Wacom Cintiq pen display tablet (it’s like the 27HD but mine is a 24HD).
Project Roadmap (10 minutes)
We placed the project roadmap on the screen and walked through it to be sure the five-month process was clear.
Facilitators and meeting sponsors/workgroup chairs answered questions as they arose.
After that, we took a five-minute stretch break. I placed a countdown timer on the shared screen to time five minutes.
New Org.’s Mission (55 minutes)
After the break, we shifted to developing a draft mission statement. We started by reviewing mission statements from four or five well-known organizations (selected in advance and written on a template).
Next, we explained the process we were about to use, as well as the backup plan should our initial plan fail (see Backup Plans, below). We answered questions (all this took a little less than 10 minutes) and then got started.
First, each person wrote down an answer to the question: What is this organization’s reason for being? This was done individually on whatever piece of paper was handy. (5 minutes)
Next, we grouped everyone into trios using the Zoom breakout rooms. In each group, the three people shared what each had written and generated one statement for the trio — either choosing one of the three, or writing a new one. (10 minutes)
Whenever they worked in breakouts, we checked in with each group periodically to make sure that everything was going well.
Next, we grouped up three trios together to make a group of nine, and they repeated the process: listen to each trio’s statement, and come up with one statement for your group of nine. (15 minutes)
This resulted in three statements. We came back to a whole-group discussion, and each group read their statement. We captured it on a template using Sketchbook and screen sharing, and then briefly discussed the three statements. We noted issues and key questions that would need to be resolved in the work over the summer. (10 minutes)
We ended that segment with three possible mission statements, agreeing to finalize the new organization’s mission in October.
At this point we were halfway through the four-hour time, and we took a 20-minute break to stretch, wolf down food, adjust any technical glitches, and so on. Once again I shared the countdown timer.
Vision Images (10 minutes)
After the break, we briefly reviewed the agenda to check in with the process and our progress.
Then we shifted to working on the vision. We opened with a guided imagery activity, set five years in the future. We set the context by saying that five years had passed and the organization was very successful. Then, everyone listened and imagined, but did not answer or speak, as we asked the following questions: What activities are happening throughout the year? Who is involved? What are the media saying? What publications and resources exist that didn’t before? How is your work different now?
Everyone was then given five minutes to jot down some ideas that had come to them during the visioning.
New Org.’s Vision (65 minutes)
Using a template prepared in advance (a Mandala with the imagery questions written in the segment circles), we asked the group to share thoughts that they had had. We worked through each of the questions and captured ideas as they were voiced. (25 minutes)
When that was complete, we saved it and uploaded it to Slack right away so that everyone could use it during the next activity.
Once again, before launching into the activity, we showed a template with the steps written out, reviewed them, and answered questions. We explained and gave examples of what we were looking for: specific vision themes, or what the organization will be, do, or have in five years’ time. (about 5 minutes)
Once everyone was ready, we pasted the Boardthing link into the Zoom chat and into Slack and asked everyone to open it.
While they were doing that, we placed them into breakout groups of about six people (the 11 co-located people formed two groups where they were).
Each group was responsible for generating 3-5 cards in Boardthing. Each card included one key theme for the vision, either pulled from the previous conversations or generated now. (25 minutes)
While they worked, we checked in on each breakout to make sure that everything was going well.
After that time, we gave everyone else a 5-minute stretch break (using the timer). Meanwhile, Malgosia and I took an initial pass on the cards, grouping them into rough clusters and proposing cluster names. When the group returned, we had six or seven theme categories and three or four cards that we weren’t able to place in groups.
Refining the Vision (15 minutes)
After the break, we reviewed the clusters and asked for corrections or changes. We refined the cluster names and added the loose cards to clusters with the group’s guidance.
We copied the seven cluster heading cards and placed them into the vision template in Boardthing.
The group discussed and refined the vision elements further, adding nuances and making distinctions, until they were happy with the draft vision.
We did a brief and informal check for alignment, and declared victory!
Next Steps & Closing (7 minutes)
We briefly brought back the process roadmap and reviewed it again, answering new questions.
The sponsors outlined next steps, thanked everyone for their involvement, and closed the meeting — on time. Well, almost. We were two minutes over.
After the meeting, we created a PDF file containing all the meeting charts, including screenshots from and a link to the Boardthing board, sent it to the sponsors, and uploaded it to the team’s Slack space. Now we are in the process of planning and scheduling the series of smaller remote meetings for each of the six working groups that will take place over the summer.
Backup Plans
When I create a backup plan, I pick the thing that is most likely to go wrong, imagine what will happen if it does, and come up with a workaround. I keep doing this until the only remaining workaround is for everyone to talk normally on the phone while I take notes on paper. The backup plans for this meeting centered on people not having access to Zoom, or the Zoom breakout groups not working, since those were the trickiest parts of the meeting.
Plan A: The meeting as designed and described above, and basically what we did.
Plan B: Assuming people couldn’t see the screen but could connect to Zoom via the phone, they would be paired up with a ‘screen buddy’ who could help them create Boardthing cards. I also read everything that was on the templates and described each new one briefly as I brought it up.
Plan C: Plan C covered us if the breakout groups in Zoom failed. In every meeting, there are always a few people who can’t get into the breakout rooms, and I have yet to figure out why. If it’s just a few, then I leave them in the main room and they become their own breakout group. If it’s a lot, then we are into Plan C. To prepare for Plan C, we created temporary channels in Slack for each breakout group and invited those people to each channel. The instructions to the group were that if the Zoom breakout wasn’t working, they were to have their discussions via text in the Slack channels instead. We only needed to do this with one group once.
Plan D: Plan D assumed failure of Boardthing, or failure of people to get into Boardthing. In this case, I would have brought it up and shared my screen and we would have talked through the process, perhaps collecting ideas in Slack and having Malgosia read them to me to type in. Luckily, we didn’t need to do this.
Plan E was the last-ditch backup, where we do the whole thing in full-group discussion while I share my screen and do graphic recording.
What I Would Do Differently
I learned a LOT about Zoom breakout rooms in this meeting. One thing I should have taken advantage of more is the ability to set breakout groups up in advance and then re-use them. If I had done that, it would have greatly simplified (and speeded up) the process of getting people into breakout rooms. Instead, I created different groupings on the fly based on lists in our spreadsheets, which got a little complicated and took some time to set up. Astute readers will notice that in steps 4 and 6 in particular, we lost a few minutes of work time getting people into the breakout rooms.
On the whole, though, I’m happy with how it went, and I’ve heard very positive feedback from the participants and sponsors as well.
Need a Good Remote Meeting?
Do you need to get work done with a remote group? I’d love to help. Contact services@grove.com to set up a time to talk about what you need.
The first and second posts in this series covered rules for orienting to purpose, connecting people, drawing out information, and getting closure on commitments — the first four stages of The Grove Facilitation Model. This post, the last in the series, deals with Videoconferencing Rules of Order for the final three stages: supporting action, monitoring progress, and leveraging learning. A future post will go into more detail about the Model itself. For now, if it’s unfamiliar, just think of it as a set of lenses that a facilitator can use to plan and handle group processes.
Tickcounter’s Web-based Timer
Supporting Action
When the videoconference is humming along and people are embedded in the work of the meeting itself, it seems like the safest thing to do is to sit back and not mess with it. But there are still some small things you can do to make it easier for everyone to work together via video.
Build in stretch breaks. It’s more fatiguing to sit in a video call than to sit in a face-to-face meeting of the same length. For every hour of meeting, build in a five-minute stretch break, with longer breaks after two hours. Set a countdown timer on a shared screen to help people return on time, and discourage people from skipping their break. (Here’s a timer for PowerPoint — I haven’t tried it, though — and here’s a web-based one that I do use.)
Give participants something to focus on besides each other. Share a screen showing a visual map of the work process or other materials that are not text-heavy. Bring in a digital graphic recorder to capture the meeting in real time on a shared screen. Create a simple template in PowerPoint and complete it while the group talks. Having a visual representation to discuss and refer to helps to keep the conversation on track. People find a bit of variety stimulating and engaging, so don’t use the same technique every time.
Give participants something to do. Use other tools in combination with video. Set up a shared spreadsheet where participants can take a few moments to reflect and type answers to relevant questions, or give their opinions of different options. Once everyone has had a chance to reflect and respond, use the document as a springboard for discussion. Or get everyone into a shared sticky-note board and have them create and interact directly with digital sticky notes.
Monitoring Progress
When the group is working, the facilitator can keep the meeting flowing with light touches as they would do in a face-to-face meeting.
Keep an eye on body language, but not the way you’re used to doing it. On most video conferences, you can only see people from the shoulders up. It’s easy to miss signals that would be obvious in a face-to-face meeting. Watch for signs of fatigue or distraction: looking down often, repeatedly or persistently looking away from the computer, frequent nodding without contributing, leaning the head back onto the top of the chair and looking at the ceiling, fidgeting. These can all signal that patience has run out and it’s time for a quick stretch break. Also watch for quiet people trying to break in to the conversation, and help make room for them. They may suddenly look alert, sit up straighter, or start to open their mouth and then close it again if there isn’t space to talk. Call on them by name and ask if they wanted to say something.
Narrate your actions when you do something that appears to be a distraction. If you need to pull up a document, for instance, or look for a relevant email pertinent to the task at hand, say so. “I’m going to pull up the email that has our agreements from last time. It will only take a moment and I’m not reading any new messages right now.” Otherwise, your obvious shift in focus will be taken as an invitation for everyone to check their messages and the meeting will lose momentum.
Bring the agenda back on screen each time an item is completed. In face-to-face meetings, we tend to keep the agenda posted all the time and refer to it throughout the process to keep people oriented and on track. With videoconferences, it’s easy to lose sight of progress because the agenda is displayed once at the start of the meeting and then never again. Instead, share it on the screen, annotating and updating it if possible, each time you shift from one topic to another. Even if you’ve sent agendas to everyone beforehand, it’s helpful to do a quick group check in now and then.
Leveraging Learning
The activities that fall under the category of Leveraging Learning are often dismissed as ‘extras,’ things that are nice to have but not necessary in our time-pressured workdays. However, they do not need to take a lot of time and the payoff in participant satisfaction, productivity, and engagement is huge. Spare a few minutes for practices like these that get everyone involved in the group’s choices and success.
Take a moment at the end of the meeting for “likes and wishes.” Invite each participant in turn to share one thing they liked about the way the meeting worked, and one thing they wish for next time. You can leave it open in terms of scope or frame it so that people are reflecting on the technical aspects of the engagement. In settings where people are not inclined to speak openly about what they would like to change, set up an anonymous way to contribute, such as a shared sticky-note board or shared document. Use the feedback to adjust future video meetings.
Take screen shots at various points in the meeting. Combine them with images of charts created by digital graphic recording and links to documents jointly edited during the meeting. Share this output with participants via email soon after the meeting as a visual record of their virtual time together.
Host occasional pop-up sessions dedicated to reviewing the technology you use for video, shared editing, and other meeting functions. Invite interested participants to prepare short presentations of new tools that show promise, or ask volunteers to try out specific tools and report the results. Keep your group’s tech fresh by sharing the responsibility for finding, testing, and proposing new tools.
Although synchronous meetings are only a small part of remote work, they provide opportunities to build relationships and cement commitments among distributed colleagues. Using these guidelines will help you make the most of your team’s remote gatherings, bring team members closer together, and increase their effectiveness as a distributed team.
Last week I had the marvelous opportunity to chat with Rachel Hatch, one of the research directors for Institute for the Future (IFTF)’s Ten-Year Forecast program. Rachel is into a wide range of fascinating things including affective technologies, which are devices and systems that can detect, interpret, and/or represent human emotions and behaviors related to emotions. She also has a radical view about virtual meetings: what if we don’t try to make them as good as face-to-face meetings? What if we look at them as something totally different and make them the best that they can be, in ways that don’t map to face-to-face meetings at all? Mmm. Love it.
I’m really curious what YOU think about some of the ideas we talked about. Each of the sections below ends with a question. If you have thoughts about one or more of them, post your answer in the comments.
Attentional Proximity
Our conversation started with the idea of attentional proximity, which is people paying attention to the same thing at the same time. Rachel observes that in collaborative work, attentional proximity is more important than physical proximity (i.e., being physically near someone). She also notes that physical proximity doesn’t guarantee attentional proximity; just think of the last time you tried talking to someone next to you who was busy playing with their mobile, and you’ve got the picture of physical proximity without attentional proximity.
We talked about how challenging it is to convey attentional proximity in remote settings. The cues that we are used to depending on, like body language, gaze direction, and posture, are often unavailable in those settings. Rachel also pointed out that among colleagues she feels in tune with, she finds it easy to share attentional proximity even at a distance, and she raised the question of what might be at the core of those interactions that makes them flow so well and be so productive.
I’ve experienced this too—there are some people it just seems easy to be in sync with, or some situations where it has just clicked—and I also wonder what makes that happen or not happen. Obviously if one of us is distracted or thinking of something else, we won’t get that ‘click,’ but sometimes it just doesn’t seem to happen no matter what.
Question 1: Have you experienced attentional proximity with someone at a distance? How did you recognize it, and what do you think allowed that to happen?
Copresence
Last fall, Rachel wrote an article, From Telepresence to Copresence, about shifting the conversation around remote work from aiming for telepresence (“as if you were there”) to embodying copresence (“different from and maybe better than being there”). This is an idea that I really love as a way to reframe virtual work. She points out that using the term ‘remote’ or the prefix ‘tele’ puts distance at the center of the relationship. ‘Copresence,’ on the other hand, puts togetherness at the center.
As near as we can tell, the term copresence comes from sociology, where it describes the experience of being with other humans, either physically or otherwise (see this article by Shanyang Zhao at Temple University for a taxonomy of types of copresence). I asked Rachel to describe what copresence looks like with a geographically dispersed group or team; how can you tell when you’re experiencing it? She responded that what it brings to mind for her is having an ambient sense of who is available for shared attentional proximity, and when. She’s thinking of signals like we might see with Skype icons (available, busy, offline, grumpy, what have you), but “embedded in the surfaces of the environment in subtle ways that impact your actual experience of the space as a remote worker.”
She also sees a trend toward micro-collaboration, where people work together for very short periods of time and need to be able to shift in and out of collaborative relationships quickly and easily. This implies a need for indicators of trust (as in, how much of the company’s IP is this person trusted with) that could be supplied by some of the same technologies that deal with attentional proximity and ambient prompting.
Question 2: What do you think about the term copresence? Do you find that it opens possibilities for how we think about working together at a distance, or do you have a different view?
Reframing Virtual Meetings
I was struck by Rachel’s idea about reframing virtual meetings partly because of a response that came in to The Grove’s Five Minutes on Working Virtually survey last May. One of the respondents expressed the view that virtual meetings can’t be improved, and it got me thinking. Attempting to recreate face-to-face meetings in virtual settings isn’t a long-term strategy, I have to agree. While high-end video conferencing is a great option, I don’t think it’s the right solution for most people because I really feel that it should be possible to fully participate in virtual meetings right from your own desk. Virtual reality and holograms may eventually provide options for avatars that are even better than ‘being there,’ but right now, they just don’t.
I think we are still working on this, and I see two big groups of technologies that will help virtual meetings come into their own: hardware-based tools and software-based tools. The hardware-based tools take advantage of affective technologies by giving us physical objects that convey some of the cues we would normally get in other ways, like the ambient collaborative prompts Rachel mentions in her article, or wearable devices that signal the user with vibrations or other sensory information.
The software-based tools don’t require any additional objects and include programs or apps that support activities that can be done online as well as or better than they can be done in person. These include tools for using sticky notes card boards, collaborative drawing, polling and voting, and the like. Right now, most of them are aiming for the ‘as well as’ category by reproducing activities that would be done in a face-to-face meeting, maybe adding a few extra features, but not really breaking totally new ground. I think there’s a lot of room for really new ideas about what we can do online to support collaborative work that is simply different from what can be done in person.
Question 3: What do you think? What would you love to do in a virtual meeting that would support your work, but can’t be done face to face?
Rachel’s Seven Shifts
Rachel’s article, From Telepresence to Copresence, concludes with a list of seven shifts we should make if we want copresence to be the norm in 2025. I asked her which of the shifts she thought would be easiest to make, and which the hardest; and I asked her to say which one she felt would have the greatest impact. Here are her thoughts:
RS: Which shift will be the hardest?
RH: The first [“as if” you were there to better than if you were there] or last [pre-structured days to emergent, just-in-time calendaring] would be hardest. The calendaring thing is so deeply embedded, how we relate to time is so deeply embedded, it’s the substrate of everything. This one will be the most challenging in traditional business contexts.
RS: Which will be easiest, in your view?
RH: Ambient signals of availability might come on line pretty quickly because of the pace of change around the internet of things and networked smart objects. We’ve seen a lot of Kickstarter campaigns for things like the TapTap bracelet and so on, and I think social norms will come along quickly. It’s an intermediate step; once you see these things everywhere, you start to ignore them after a while. Where it gets interesting is if the design of the experience can convey an energy; a spectrum, a different set of colors, something so we know how you’re feeling and not just whether you’re there.
RS: If we could universally, magically, make just one of those shifts right now, which one would be the most impactful?
RH: Shifting from physical to attentional proximity. It would unleash so much productivity! Imagine ‘just-in-time dream teams,’ where you can capture someone’s attention just at the right moment of a project based on their location… You could grab their attention for half an hour, take advantage of those efficiencies and just in time interactions.
Question 4: Looking at the seven shifts in Rachel’s article, which one grabs you? Why?