Tag Archives: virtualmeetings

A delightful way to make virtual eye contact

In my Rules of Order for Virtual Meetings (first installment, rule B1), I recommend looking at the camera on your computer or device rather than looking at the video window of the person you are talking to, in order to simulate eye contact. Weird for you, much more natural for them: from their point of view, you are looking directly into their eyes. From yours, though, you’re looking at a tiny light and there’s lots of distracting stuff in your peripheral vision.

I received this photo today from Brian Tarallo, a colleague who took that advice and ran with it. To help himself remember to look at the camera (and probably feel less weird while doing it), he created a little paper avatar. Look closely and you’ll see a hole punched out where the avatar’s right eye should be. That goes over the camera, so the camera is ‘looking out’ from the avatar’s eyes. Brian can look at the friendly little avatar — which gives him a face to talk to — and make perfect eye contact. In this case, the paper is a sticky note attached to his mobile’s screen so that the hole remains over the camera. The same idea could be applied to any webcam where the camera is close to the surface of the screen (like Mac laptops and desktops).

Photo of Brian's solution

Look ’em in the eye! Photo courtesy of Brian Tarallo.


I just love it. What an elegant solution!

It might be trickier if you’re using one of those eyeball-shaped USB webcams, because it might be hard to get the hole to line up with the camera in a way that doesn’t cause the paper to obscure the camera’s view. But smartphones, tablets, and computers with built-in cameras should work just fine.

Thanks, Brian, for allowing me to share your idea and photo, and Ben Tinker for being the guy behind the sticky.

33 people, 22 venues, 4 hours, 3 platforms: 1 brilliant remote meeting

Last week, my colleague Malgosia Kostecka and I co-facilitated a challenging four-hour remote meeting of 33 attendees in 22 locations involving complex work: developing a mission statement and the initial five-year vision for a new organization. This meeting kicked off a five-month process to explore different models for how the organization might be structured. Over the summer, sub-groups will design possible models and prepare to present them to the whole group. The process will conclude in October with the group’s first face-to-face meeting, where the final mission, vision, and five-year strategy will be set. These will then be used in securing approval to launch the organization.

For this kickoff, we used Zoom, Boardthing, and Slack as our workspaces. I’m happy to report that it went well. Astonishingly well, actually, given that I always assume something will go horribly wrong! We barely needed Plans B and C and didn’t reach Plans D or E at all. Here’s how it worked.

Pre-Meeting Preparation
Facilitators:

  • We worked closely with the meeting sponsors to identify outcomes and understand who would be in the meeting.
  • We set up Slack for the whole team, since they will be doing ongoing work throughout the summer. The ongoing setup includes channels for smaller working groups, plus one for questions, general information, and workgroup chairs. Special temporary channels were also set up for the meeting (see Plan C, below).
  • We set up a Zoom room for the main meeting space.
  • We created a Boardthing board for collecting and sorting vision ideas. Advance setup included creating a list of instructions, uploading a template image for sorting the ideas, and preparing an agreement scale in case we needed it.
  • We prepared 14 digital templates covering each part of the meeting from the Do-Now to Closing Thoughts. Not all were used, but they were ready!
  • We created a spreadsheet to track who had signed in to Slack, who had done the tech check, who was to be at the one co-located venue, and who would be in each breakout discussion group during the meeting. We took into account the 11 people who would be connecting from a single location when planning breakout groups.
  • We prepared a visual roadmap of the entire process, from this kickoff meeting throughout the summer and fall to the final group meeting scheduled in October.
  • We prepared the agenda (a detailed facilitators’ version and a more general participants’ version).
  • We prepared a text document with participant names and email addresses, key web links that would need to be copied and pasted, and a few technical support statements that we would likely need to paste multiple times.

Participants:

  • Prior to our involvement, participants went through a selection process based on interest, expertise, and availability. There were also initial discussions about the process and its outcomes.
  • We asked participants to sign in to the Slack team space prior to the meeting and to have Slack open during the meeting itself.
  • They were also encouraged to attend a brief tech check to make sure they could access Zoom.

Meeting Tools/Technologies

As mentioned above, we used Zoom, Boardthing, and Slack; additionally, I used Autodesk Sketchbook, a spreadsheet, and a text editor. We used a countdown timer to time breaks.

Agenda & Activities

The planned timing is on the agenda image here. The actual timing is noted in parentheses next to each activity below.

Picture of the meeting's agenda.

Our agenda. Organization and other names have been removed.


  1. Do-Now & Orientation (15 minutes)
  • The do-now was designed to help folks start thinking about the meeting content and give them something to do while everyone else got connected. Everyone was to type into a special Slack channel, answering the question: Why is this organization important to you personally? [Wondering whats a do-now is? Here’s a PDF that explains.]
  • Once everyone was settled and had had a chance to work on the do-now, the sponsors opened the meeting by setting the context for the work this team will be doing, why do it now, and why the team was comprised of these particular people.
  • I introduced myself briefly when I took over, and ran through the outcomes, agenda, roles and rules as shown above. I left space for additional rules but the group didn’t add any.
  • I mentioned the backchannels (Slack and the chat feature of Zoom) and encouraged participants to speak up in those channels if they were having trouble. Malgosia was monitoring both channels throughout the meeting.
  • We asked people to turn off their video cameras while they were in the full-group session and said they were welcome to use them in the breakouts later.
  1. Introductions (30 minutes)
  • Since this group is not an intact team but a group of colleagues from different organizations, we invested some time in team introductions. Using a prepared template that showed six ‘tables’ — one for each of the working groups that will meet over the summer — we went around the virtual room.
  • Malgosia and I modeled what we were looking for with our own introductions first.
  • Each person’s name was already written in, along with his or her organization. When it came time to speak, each person said who they were and where they worked and also shared one hope or expectation for the process. I added each person’s hope/expectation to the template as they spoke, using Sketchbook and my Wacom Cintiq pen display tablet (it’s like the 27HD but mine is a 24HD).
  1. Project Roadmap (10 minutes)
  • We placed the project roadmap on the screen and walked through it to be sure the five-month process was clear.
  • Facilitators and meeting sponsors/workgroup chairs answered questions as they arose.

After that, we took a five-minute stretch break. I placed a countdown timer on the shared screen to time five minutes.

  1. New Org.’s Mission (55 minutes)
  • After the break, we shifted to developing a draft mission statement. We started by reviewing mission statements from four or five well-known organizations (selected in advance and written on a template).
  • Next, we explained the process we were about to use, as well as the backup plan should our initial plan fail (see Backup Plans, below). We answered questions (all this took a little less than 10 minutes) and then got started.
  • First, each person wrote down an answer to the question: What is this organization’s reason for being? This was done individually on whatever piece of paper was handy. (5 minutes)
  • Next, we grouped everyone into trios using the Zoom breakout rooms. In each group, the three people shared what each had written and generated one statement for the trio — either choosing one of the three, or writing a new one. (10 minutes)
  • Whenever they worked in breakouts, we checked in with each group periodically to make sure that everything was going well.
  • Next, we grouped up three trios together to make a group of nine, and they repeated the process: listen to each trio’s statement, and come up with one statement for your group of nine. (15 minutes)
  • This resulted in three statements. We came back to a whole-group discussion, and each group read their statement. We captured it on a template using Sketchbook and screen sharing, and then briefly discussed the three statements. We noted issues and key questions that would need to be resolved in the work over the summer. (10 minutes)

We ended that segment with three possible mission statements, agreeing to finalize the new organization’s mission in October.

At this point we were halfway through the four-hour time, and we took a 20-minute break to stretch, wolf down food, adjust any technical glitches, and so on. Once again I shared the countdown timer.

  1. Vision Images (10 minutes)
  • After the break, we briefly reviewed the agenda to check in with the process and our progress.
  • Then we shifted to working on the vision. We opened with a guided imagery activity, set five years in the future. We set the context by saying that five years had passed and the organization was very successful. Then, everyone listened and imagined, but did not answer or speak, as we asked the following questions: What activities are happening throughout the year? Who is involved? What are the media saying? What publications and resources exist that didn’t before? How is your work different now?
  • Everyone was then given five minutes to jot down some ideas that had come to them during the visioning.
  1. New Org.’s Vision (65 minutes)
  • Using a template prepared in advance (a Mandala with the imagery questions written in the segment circles), we asked the group to share thoughts that they had had. We worked through each of the questions and captured ideas as they were voiced. (25 minutes)
  • When that was complete, we saved it and uploaded it to Slack right away so that everyone could use it during the next activity.
  • Once again, before launching into the activity, we showed a template with the steps written out, reviewed them, and answered questions. We explained and gave examples of what we were looking for: specific vision themes, or what the organization will be, do, or have in five years’ time. (about 5 minutes)
  • Once everyone was ready, we pasted the Boardthing link into the Zoom chat and into Slack and asked everyone to open it.
  • While they were doing that, we placed them into breakout groups of about six people (the 11 co-located people formed two groups where they were).
  • Each group was responsible for generating 3-5 cards in Boardthing. Each card included one key theme for the vision, either pulled from the previous conversations or generated now. (25 minutes)
  • While they worked, we checked in on each breakout to make sure that everything was going well.

After that time, we gave everyone else a 5-minute stretch break (using the timer). Meanwhile, Malgosia and I took an initial pass on the cards, grouping them into rough clusters and proposing cluster names. When the group returned, we had six or seven theme categories and three or four cards that we weren’t able to place in groups.

  1. Refining the Vision (15 minutes)
  • After the break, we reviewed the clusters and asked for corrections or changes. We refined the cluster names and added the loose cards to clusters with the group’s guidance.
  • We copied the seven cluster heading cards and placed them into the vision template in Boardthing.
  • The group discussed and refined the vision elements further, adding nuances and making distinctions, until they were happy with the draft vision.
  • We did a brief and informal check for alignment, and declared victory!
  1. Next Steps & Closing (7 minutes)
  • We briefly brought back the process roadmap and reviewed it again, answering new questions.
  • The sponsors outlined next steps, thanked everyone for their involvement, and closed the meeting — on time. Well, almost. We were two minutes over.

After the meeting, we created a PDF file containing all the meeting charts, including screenshots from and a link to the Boardthing board, sent it to the sponsors, and uploaded it to the team’s Slack space. Now we are in the process of planning and scheduling the series of smaller remote meetings for each of the six working groups that will take place over the summer.

Backup Plans

When I create a backup plan, I pick the thing that is most likely to go wrong, imagine what will happen if it does, and come up with a workaround. I keep doing this until the only remaining workaround is for everyone to talk normally on the phone while I take notes on paper. The backup plans for this meeting centered on people not having access to Zoom, or the Zoom breakout groups not working, since those were the trickiest parts of the meeting.

  • Plan A: The meeting as designed and described above, and basically what we did.
  • Plan B: Assuming people couldn’t see the screen but could connect to Zoom via the phone, they would be paired up with a ‘screen buddy’ who could help them create Boardthing cards. I also read everything that was on the templates and described each new one briefly as I brought it up.
  • Plan C: Plan C covered us if the breakout groups in Zoom failed. In every meeting, there are always a few people who can’t get into the breakout rooms, and I have yet to figure out why. If it’s just a few, then I leave them in the main room and they become their own breakout group. If it’s a lot, then we are into Plan C. To prepare for Plan C, we created temporary channels in Slack for each breakout group and invited those people to each channel. The instructions to the group were that if the Zoom breakout wasn’t working, they were to have their discussions via text in the Slack channels instead. We only needed to do this with one group once.
  • Plan D: Plan D assumed failure of Boardthing, or failure of people to get into Boardthing. In this case, I would have brought it up and shared my screen and we would have talked through the process, perhaps collecting ideas in Slack and having Malgosia read them to me to type in. Luckily, we didn’t need to do this.
  • Plan E was the last-ditch backup, where we do the whole thing in full-group discussion while I share my screen and do graphic recording.

What I Would Do Differently

I learned a LOT about Zoom breakout rooms in this meeting. One thing I should have taken advantage of more is the ability to set breakout groups up in advance and then re-use them. If I had done that, it would have greatly simplified (and speeded up) the process of getting people into breakout rooms. Instead, I created different groupings on the fly based on lists in our spreadsheets, which got a little complicated and took some time to set up. Astute readers will notice that in steps 4 and 6 in particular, we lost a few minutes of work time getting people into the breakout rooms.

On the whole, though, I’m happy with how it went, and I’ve heard very positive feedback from the participants and sponsors as well.

Need a Good Remote Meeting?

Do you need to get work done with a remote group? I’d love to help. Contact services@grove.com to set up a time to talk about what you need.

Rules of Order for Videoconferences, Part 3

The first and second posts in this series covered rules for orienting to purpose, connecting people, drawing out information, and getting closure on commitments — the first four stages of The Grove Facilitation Model. This post, the last in the series, deals with Videoconferencing Rules of Order for the final three stages: supporting action, monitoring progress, and leveraging learning. A future post will go into more detail about the Model itself. For now, if it’s unfamiliar, just think of it as a set of lenses that a facilitator can use to plan and handle group processes.

Screen shot of web-based countdown timer

Tickcounter’s Web-based Timer

Supporting Action
When the videoconference is humming along and people are embedded in the work of the meeting itself, it seems like the safest thing to do is to sit back and not mess with it. But there are still some small things you can do to make it easier for everyone to work together via video.

  1. Build in stretch breaks. It’s more fatiguing to sit in a video call than to sit in a face-to-face meeting of the same length. For every hour of meeting, build in a five-minute stretch break, with longer breaks after two hours. Set a countdown timer on a shared screen to help people return on time, and discourage people from skipping their break. (Here’s a timer for PowerPoint — I haven’t tried it, though — and here’s a web-based one that I do use.)
  2. Give participants something to focus on besides each other. Share a screen showing a visual map of the work process or other materials that are not text-heavy. Bring in a digital graphic recorder to capture the meeting in real time on a shared screen. Create a simple template in PowerPoint and complete it while the group talks. Having a visual representation to discuss and refer to helps to keep the conversation on track. People find a bit of variety stimulating and engaging, so don’t use the same technique every time.
  3. Give participants something to do. Use other tools in combination with video. Set up a shared spreadsheet where participants can take a few moments to reflect and type answers to relevant questions, or give their opinions of different options. Once everyone has had a chance to reflect and respond, use the document as a springboard for discussion. Or get everyone into a shared sticky-note board and have them create and interact directly with digital sticky notes.

After I posted the first in this series, Nora Rubinoff added some excellent rules of order in a blog post of her own that I would also classify under supporting action.

Monitoring Progress
When the group is working, the facilitator can keep the meeting flowing with light touches as they would do in a face-to-face meeting.

  1. Keep an eye on body language, but not the way you’re used to doing it. On most video conferences, you can only see people from the shoulders up. It’s easy to miss signals that would be obvious in a face-to-face meeting. Watch for signs of fatigue or distraction: looking down often, repeatedly or persistently looking away from the computer, frequent nodding without contributing, leaning the head back onto the top of the chair and looking at the ceiling, fidgeting. These can all signal that patience has run out and it’s time for a quick stretch break. Also watch for quiet people trying to break in to the conversation, and help make room for them. They may suddenly look alert, sit up straighter, or start to open their mouth and then close it again if there isn’t space to talk. Call on them by name and ask if they wanted to say something.
  2. Narrate your actions when you do something that appears to be a distraction. If you need to pull up a document, for instance, or look for a relevant email pertinent to the task at hand, say so. “I’m going to pull up the email that has our agreements from last time. It will only take a moment and I’m not reading any new messages right now.” Otherwise, your obvious shift in focus will be taken as an invitation for everyone to check their messages and the meeting will lose momentum.
  3. Bring the agenda back on screen each time an item is completed. In face-to-face meetings, we tend to keep the agenda posted all the time and refer to it throughout the process to keep people oriented and on track. With videoconferences, it’s easy to lose sight of progress because the agenda is displayed once at the start of the meeting and then never again. Instead, share it on the screen, annotating and updating it if possible, each time you shift from one topic to another. Even if you’ve sent agendas to everyone beforehand, it’s helpful to do a quick group check in now and then.

Leveraging Learning
The activities that fall under the category of Leveraging Learning are often dismissed as ‘extras,’ things that are nice to have but not necessary in our time-pressured workdays. However, they do not need to take a lot of time and the payoff in participant satisfaction, productivity, and engagement is huge. Spare a few minutes for practices like these that get everyone involved in the group’s choices and success.

  1. Take a moment at the end of the meeting for “likes and wishes.” Invite each participant in turn to share one thing they liked about the way the meeting worked, and one thing they wish for next time. You can leave it open in terms of scope or frame it so that people are reflecting on the technical aspects of the engagement. In settings where people are not inclined to speak openly about what they would like to change, set up an anonymous way to contribute, such as a shared sticky-note board or shared document. Use the feedback to adjust future video meetings.
  2. Take screen shots at various points in the meeting. Combine them with images of charts created by digital graphic recording and links to documents jointly edited during the meeting. Share this output with participants via email soon after the meeting as a visual record of their virtual time together.
  3. Host occasional pop-up sessions dedicated to reviewing the technology you use for video, shared editing, and other meeting functions. Invite interested participants to prepare short presentations of new tools that show promise, or ask volunteers to try out specific tools and report the results. Keep your group’s tech fresh by sharing the responsibility for finding, testing, and proposing new tools.

Although synchronous meetings are only a small part of remote work, they provide opportunities to build relationships and cement commitments among distributed colleagues. Using these guidelines will help you make the most of your team’s remote gatherings, bring team members closer together, and increase their effectiveness as a distributed team.


Rules of Order for Videoconferences, Part 2

Last week, I wrote up a few Rules of Order for Videoconferences, focusing on reducing disorientation and on building connections with people. This post continues the list and proposes rules for having fruitful discussions and helping participants come to agreement. These ideas are pretty useful in any kind of meeting, not just videoconferences.

I’m dividing the Rules of Order for Videoconferences into the stages of the Grove Facilitation Model, shown here, in case you’re curious about my categories and where this is going. More about the model later.

Image of The Grove Facilitation Model

The Grove Facilitation Model v. 5.0. © 2006, The Grove Consultants International.


Rachel’s Rules of Order for Videoconferences: Part 2 (continued from Part 1)

C. Drawing Out Information

  1. Listen for understanding — not to respond. It’s natural to spend your listening time thinking of what you yourself are going to say in response. Be alert for this in yourself and try to put your own thoughts aside while you focus on what others are saying. If you’re afraid you’ll forget what you want to say, jot a quick note on a piece of paper, then go back to listening. (This is good general practice, not just for videoconferences. Read more about good listening habits here.)
  2. Ask good questions. Instead of following someone’s comments with a statement, try following with a question that invites them to say more. Or, rephrase back to them what you think you heard them say, to check for understanding. It’s often difficult to feel connected to people in video conferences. Asking good questions demonstrates that you’re paying attention and makes the speaker feel like you are really connecting with them.
  3. Be okay with some silence, especially after you ask a question. Silence can feel awkward, particularly on a video call. You ask a question and then nobody says anything, and everyone is just sitting there staring at you! So you start talking again to dispel the awkwardness. Don’t! What’s actually happening in that moment is that people are gathering their thoughts. Introverted thinkers in particular are framing what they want to say. Just sit and look relaxed and interested (even if you are privately freaking out) and leave an inviting space for others to fill. They will.

D. Getting Closure on Commitments

  1. Reflect agreements back to the group. There are lots of ways to do this, but if you’re in a videoconference, use what you’ve got. Keep a big marker and blank paper sheets handy. When an agreement is reached, write it down in large, clear letters and hold it up to the camera. (You might want to make sure your camera doesn’t reverse your image — but test with a friend, because some software shows YOU a mirror image of yourself even though other viewers see you correctly.) Give everyone a moment to read it and ask if it’s accurate. At the end of the meeting, run through them all again, then follow up with an email stating the agreements.
  2. Check for consensus explicitly. We’ve all been in meetings where the convener says, “Everyone in agreement? Yes? Great, let’s move on.” Wait, what? When was I supposed to consider, let alone voice, my level of agreement? Don’t mistake silence for agreement in videoconferences. Try introducing a simple agreement scale (see below). Ask everyone to write the scale down, or email it to them ahead of time. When you need to check for agreement, have everyone review the scale and hold up the number of fingers or otherwise indicate their level of agreement. Recall that consensus can mean no one is vetoing, though for more important decisions you might set a higher baseline of agreement.
  3. Allow responsible parties to state their own commitments. In the interest of time, it can seem expedient for one person to run rapidly through a list of who said they would do what. You’ll get more follow through if you give everyone a moment at the end of the meeting to state for themselves what they have agreed to do. It gives you a chance to address any misunderstandings or unclear action steps, too.

Two Simple Agreement Scales

Five point scale. Everyone holds up the appropriate number of fingers:

1 = totally agree

2 = mostly agree

3 = meh, don’t want to hold everyone up

4 = need to talk about it more

5 = complete disagreement

Thumb scale. Everyone holds their thumb in the appropriate position:

Thumb up: yes

Thumb sideways: not sure yet, maybe more discussion is needed, or it’s okay but not great

Thumb down: nope

The next post will cover Rules of Order for supporting action, monitoring progress, and leveraging learning. As always, remember that any ‘rules’ I share are like the Code of the Pirate Brethren: more guidelines than actual rules.

Video Conferencing: Rules of Order

Screenshot of Rachel in a videoconferencing window

Seriously, look at the camera.

I’ve found myself in more video conferences than usual lately, so naturally I have been noticing what works and what doesn’t and thinking about why. I used to actually dislike using video in remote meetings. No matter where other people look, they seem to be captivated by something just out of view; all the social cues we get from following another’s gaze simply don’t work; and no matter how I wear it, my hair always looks really bizarre.

Despite all that, I’m starting to change my mind about using video in remote meetings. I’m getting accustomed to it and even starting to enjoy it once in a while.

However, I’ve noticed that it isn’t always used very effectively. As an inveterate fixer, I’ve therefore started to compile a Rules of Order for videoconferences. They’re nothing like as complicated as Robert’s Rules of Order, and strictly speaking they’re not even about order so much as about reducing the confusion and disorientation people feel. I’m still developing it, but here is the beginning of the list.

Rachel’s Rules of Order for Videoconferences

A. Reducing Disorientation

  1. In the first five minutes, have everyone in the meeting say hello and show themselves. This is especially crucial when some people are together in a room but not all of them are on camera at once, and others are remote. It’s very disorienting for the remote folks to hear disembodied voices chiming in unexpectedly. It’s also common politeness to make sure everyone understands who is within earshot.
  2. If some people are on camera, everyone should be on camera. If some participants don’t (or won’t) have video, at least show a photograph or other image of every speaker. The people who are actually on video will seem more present and animated than those who are not. Getting everyone on equal footing helps.
  3. Figure out where the camera is on your device and look at it when you are talking. It feels strange at first because your instinct is to look at the face of the person you are talking to. If you look into the camera, you will be making eye contact while you are speaking. If you look at their face on your screen, you will not. If you’re using a Mac, for instance, the camera is right next to the green dot at the top of your screen. Try moving the video window to the top of your screen so you are naturally looking toward the camera more, then just lift your gaze to the green dot when you speak.

B. Building Connections with People

  1. Look at your camera more than you look at your notes or at other parts of your screen, even when you aren’t talking. See A.3., above. It feels weird for you (at first) but it feels very natural to the person you are talking to. Video conferencing actually allows you to make ‘eye contact’ with multiple people at once, so take advantage of that.
  2. Take time to be social. Ask how people’s day is going, or what they did over the weekend. Really listen to what they say and respond to what you hear. It seems counter-intuitive; doesn’t socializing just waste time in meetings? In fact, everything goes smoother when people are relaxed and comfortable with one another. The few minutes you take in being social will pay off later.
  3. Have a hot drink while you meet, and encourage everyone else to grab a cup of something too. There are several advantages to this. First, if everyone is sipping some of the time, no one is talking all of the time. Second, it may actually make everyone more friendly. A 2008 Yale study seems to indicate that people who hold a warm beverage perceive others as warmer and friendlier, and are more likely to be friendly themselves. If you’ve had too much coffee already by the time your meeting rolls around, try hot water with lemon.

I’m still mulling over some other ideas. Meanwhile, what rules would you add?

Transforming Virtual Meetings: What Do You Think?

Last week I had the marvelous opportunity to chat with Rachel Hatch, one of the research directors for Institute for the Future (IFTF)’s Ten-Year Forecast program. Rachel is into a wide range of fascinating things including affective technologies, which are devices and systems that can detect, interpret, and/or represent human emotions and behaviors related to emotions. She also has a radical view about virtual meetings: what if we don’t try to make them as good as face-to-face meetings? What if we look at them as something totally different and make them the best that they can be, in ways that don’t map to face-to-face meetings at all? Mmm. Love it.

I’m really curious what YOU think about some of the ideas we talked about. Each of the sections below ends with a question. If you have thoughts about one or more of them, post your answer in the comments.

Attentional Proximity

Our conversation started with the idea of attentional proximity, which is people paying attention to the same thing at the same time. Rachel observes that in collaborative work, attentional proximity is more important than physical proximity (i.e., being physically near someone). She also notes that physical proximity doesn’t guarantee attentional proximity; just think of the last time you tried talking to someone next to you who was busy playing with their mobile, and you’ve got the picture of physical proximity without attentional proximity.

We talked about how challenging it is to convey attentional proximity in remote settings. The cues that we are used to depending on, like body language, gaze direction, and posture, are often unavailable in those settings. Rachel also pointed out that among colleagues she feels in tune with, she finds it easy to share attentional proximity even at a distance, and she raised the question of what might be at the core of those interactions that makes them flow so well and be so productive.

I’ve experienced this too—there are some people it just seems easy to be in sync with, or some situations where it has just clicked—and I also wonder what makes that happen or not happen. Obviously if one of us is distracted or thinking of something else, we won’t get that ‘click,’ but sometimes it just doesn’t seem to happen no matter what.

Question 1: Have you experienced attentional proximity with someone at a distance? How did you recognize it, and what do you think allowed that to happen?

Copresence

Last fall, Rachel wrote an article, From Telepresence to Copresence, about shifting the conversation around remote work from aiming for telepresence (“as if you were there”) to embodying copresence (“different from and maybe better than being there”). This is an idea that I really love as a way to reframe virtual work. She points out that using the term ‘remote’ or the prefix ‘tele’ puts distance at the center of the relationship. ‘Copresence,’ on the other hand, puts togetherness at the center.

As near as we can tell, the term copresence comes from sociology, where it describes the experience of being with other humans, either physically or otherwise (see this article by Shanyang Zhao at Temple University for a taxonomy of types of copresence). I asked Rachel to describe what copresence looks like with a geographically dispersed group or team; how can you tell when you’re experiencing it? She responded that what it brings to mind for her is having an ambient sense of who is available for shared attentional proximity, and when. She’s thinking of signals like we might see with Skype icons (available, busy, offline, grumpy, what have you), but “embedded in the surfaces of the environment in subtle ways that impact your actual experience of the space as a remote worker.”

She also sees a trend toward micro-collaboration, where people work together for very short periods of time and need to be able to shift in and out of collaborative relationships quickly and easily. This implies a need for indicators of trust (as in, how much of the company’s IP is this person trusted with) that could be supplied by some of the same technologies that deal with attentional proximity and ambient prompting.

Question 2: What do you think about the term copresence? Do you find that it opens possibilities for how we think about working together at a distance, or do you have a different view?

Reframing Virtual Meetings

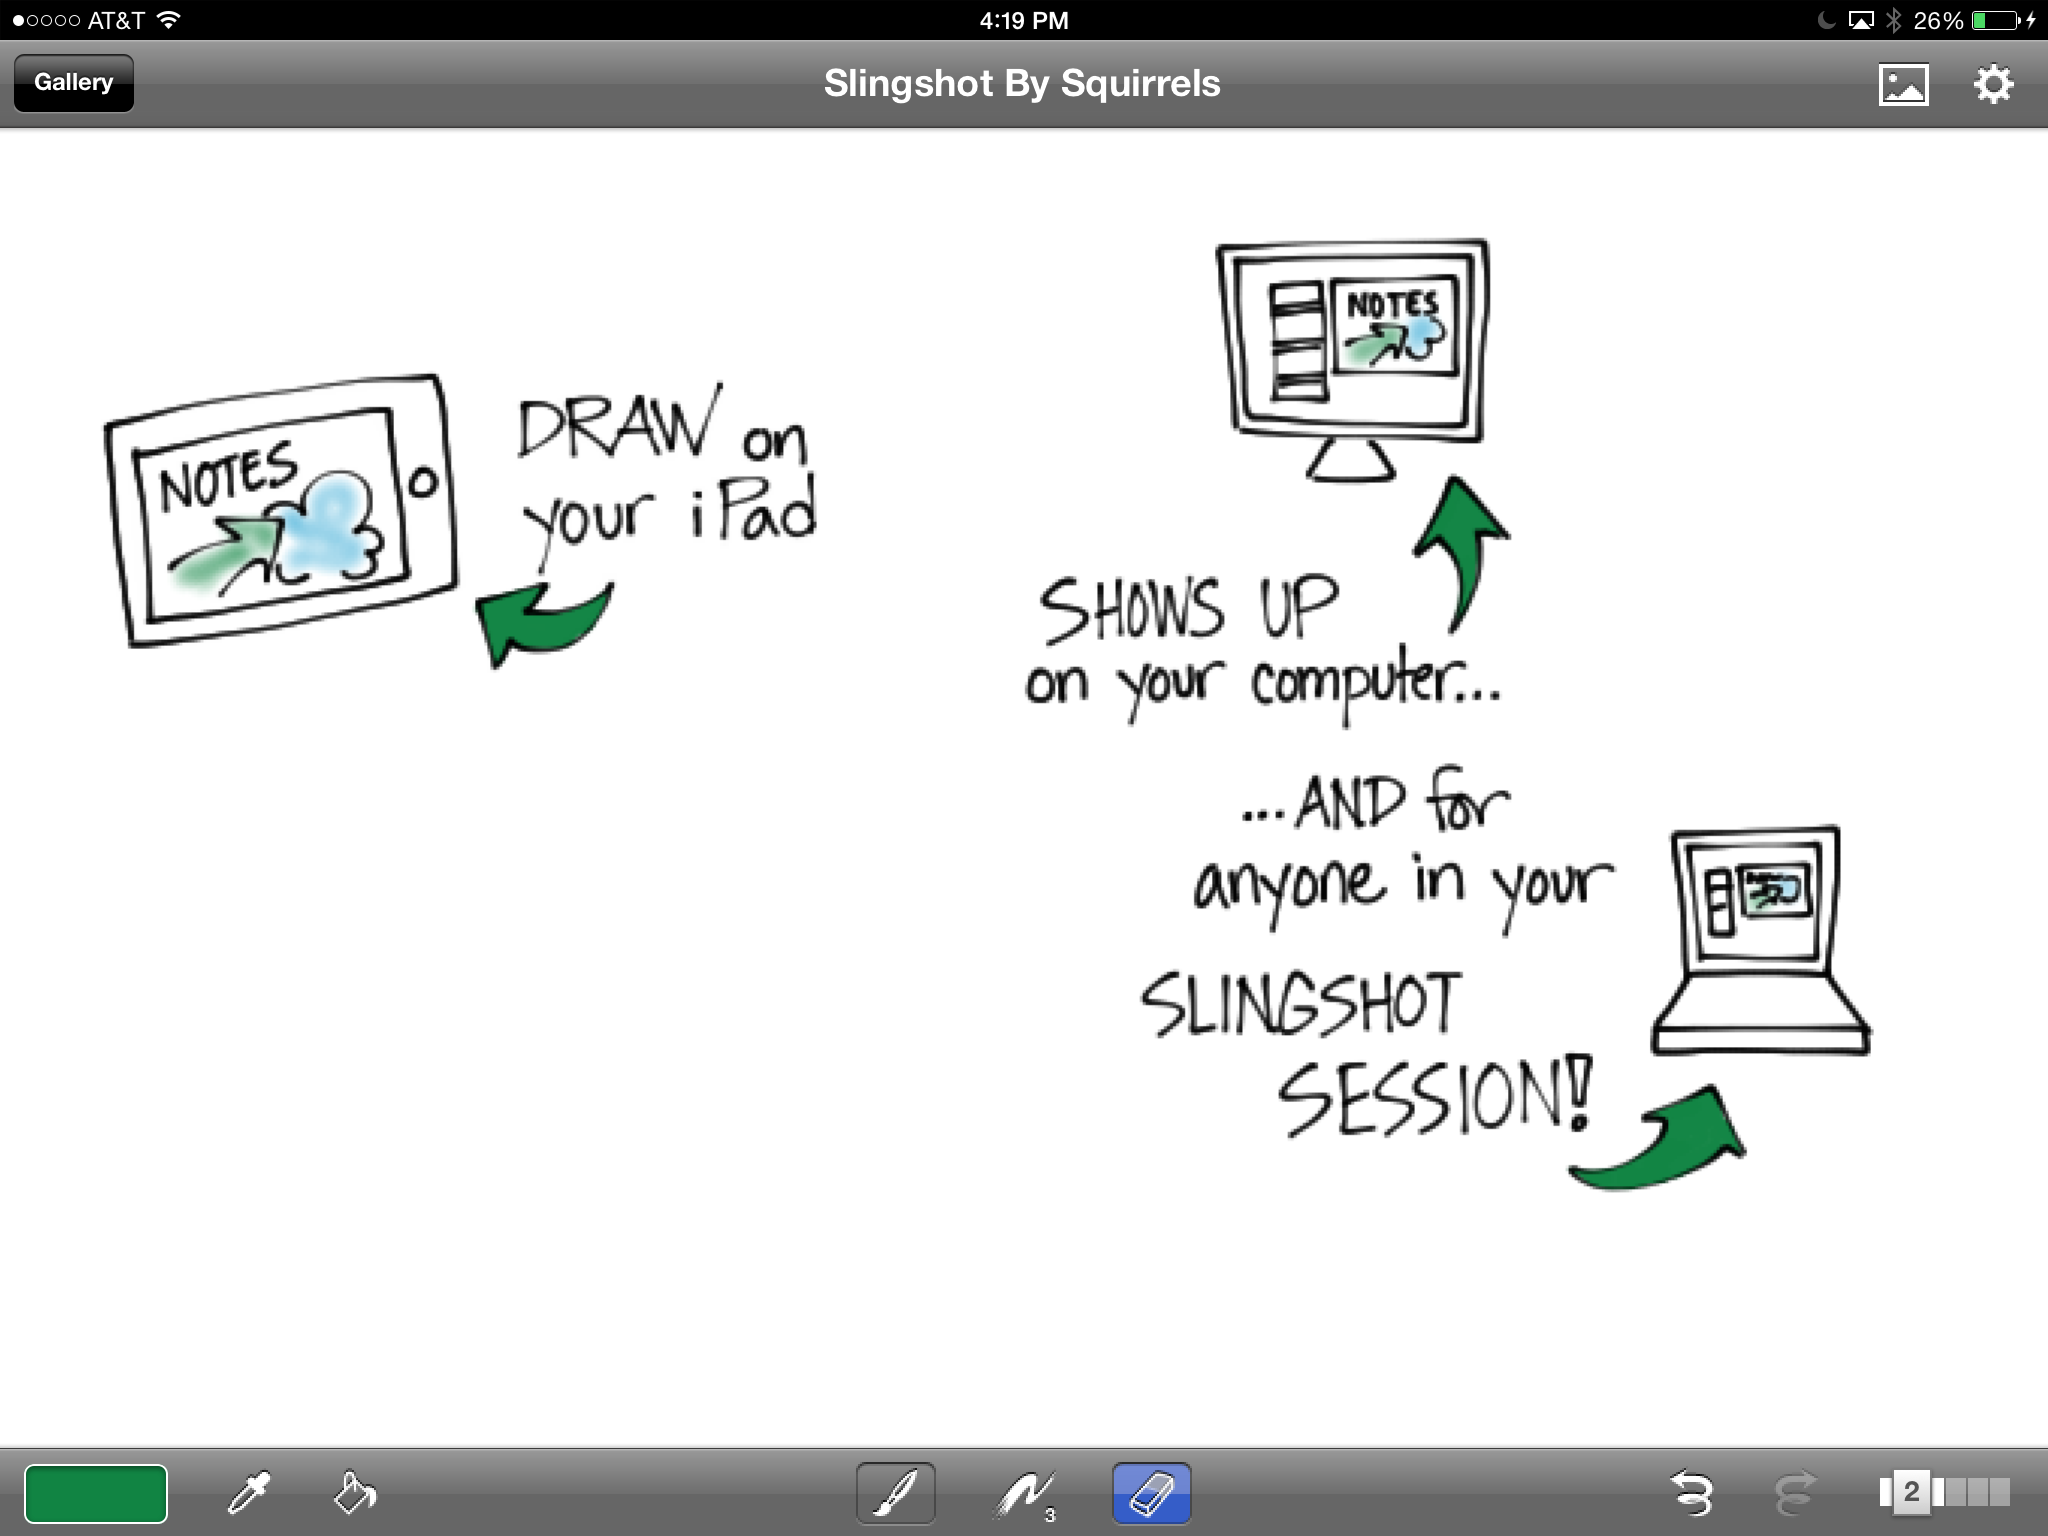
I was struck by Rachel’s idea about reframing virtual meetings partly because of a response that came in to The Grove’s Five Minutes on Working Virtually survey last May. One of the respondents expressed the view that virtual meetings can’t be improved, and it got me thinking. Attempting to recreate face-to-face meetings in virtual settings isn’t a long-term strategy, I have to agree. While high-end video conferencing is a great option, I don’t think it’s the right solution for most people because I really feel that it should be possible to fully participate in virtual meetings right from your own desk. Virtual reality and holograms may eventually provide options for avatars that are even better than ‘being there,’ but right now, they just don’t.

I think we are still working on this, and I see two big groups of technologies that will help virtual meetings come into their own: hardware-based tools and software-based tools. The hardware-based tools take advantage of affective technologies by giving us physical objects that convey some of the cues we would normally get in other ways, like the ambient collaborative prompts Rachel mentions in her article, or wearable devices that signal the user with vibrations or other sensory information.

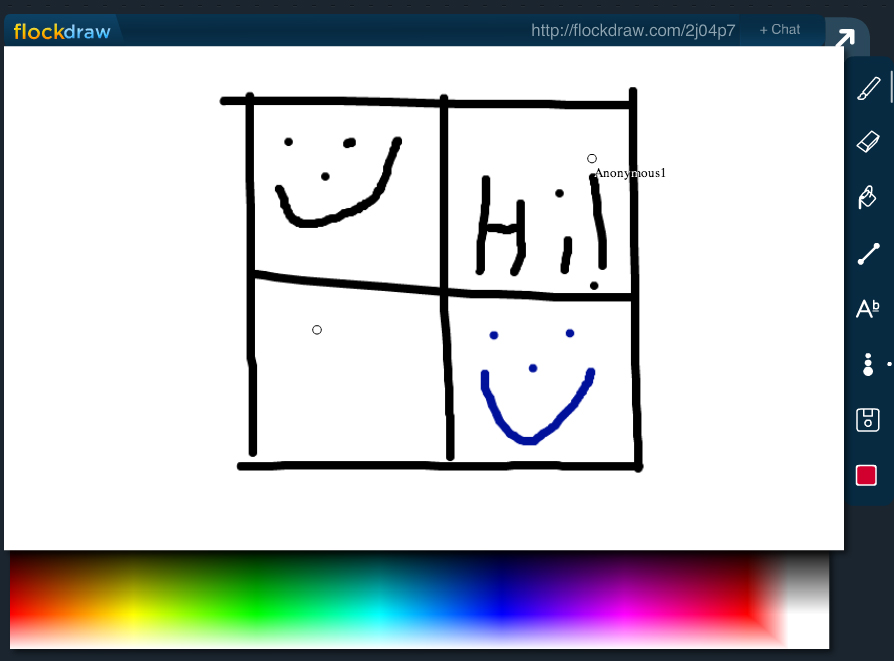
The software-based tools don’t require any additional objects and include programs or apps that support activities that can be done online as well as or better than they can be done in person. These include tools for using sticky notes card boards, collaborative drawing, polling and voting, and the like. Right now, most of them are aiming for the ‘as well as’ category by reproducing activities that would be done in a face-to-face meeting, maybe adding a few extra features, but not really breaking totally new ground. I think there’s a lot of room for really new ideas about what we can do online to support collaborative work that is simply different from what can be done in person.

Question 3: What do you think? What would you love to do in a virtual meeting that would support your work, but can’t be done face to face?

Rachel’s Seven Shifts

Rachel’s article, From Telepresence to Copresence, concludes with a list of seven shifts we should make if we want copresence to be the norm in 2025. I asked her which of the shifts she thought would be easiest to make, and which the hardest; and I asked her to say which one she felt would have the greatest impact. Here are her thoughts:

RS: Which shift will be the hardest?

RH: The first [“as if” you were there to better than if you were there] or last [pre-structured days to emergent, just-in-time calendaring] would be hardest. The calendaring thing is so deeply embedded, how we relate to time is so deeply embedded, it’s the substrate of everything. This one will be the most challenging in traditional business contexts.

RS: Which will be easiest, in your view?

RH: Ambient signals of availability might come on line pretty quickly because of the pace of change around the internet of things and networked smart objects. We’ve seen a lot of Kickstarter campaigns for things like the TapTap bracelet and so on, and I think social norms will come along quickly. It’s an intermediate step; once you see these things everywhere, you start to ignore them after a while. Where it gets interesting is if the design of the experience can convey an energy; a spectrum, a different set of colors, something so we know how you’re feeling and not just whether you’re there.

RS: If we could universally, magically, make just one of those shifts right now, which one would be the most impactful?

RH: Shifting from physical to attentional proximity. It would unleash so much productivity! Imagine ‘just-in-time dream teams,’ where you can capture someone’s attention just at the right moment of a project based on their location… You could grab their attention for half an hour, take advantage of those efficiencies and just in time interactions.

Question 4: Looking at the seven shifts in Rachel’s article, which one grabs you? Why?

Join.Me’s Whiteboard for iPad: Graphic recorders, rejoice!

Join.Me, a web conferencing tool, has released a new feature in the mobile version: Whiteboard for iPad. It’s worth a look.

Overall assessment:

This is definitely a big step in the right direction for making digital graphic recording accessible for more people. With this tool, you can start, host, and graphically record a web meeting in seconds, all from your iPad.

detail of Join.Me's whiteboard on iPad

What is it?

Join.Me is a web conferencing tool (think WebEx, GoToMeeting, Adobe Connect, Zoom, and so on — there are lots.). This one has a hip, friendly vibe and is incredibly easy to use whether you’re on a desktop, a laptop, an iPad or other tablet, or a mobile device. Incredibly easy.

The thing that has catapulted Join.Me from ‘incredibly easy’ to ‘wow, just wow’ for me is its new whiteboard for iPad feature. I tested it today with some willing volunteers (thank you all, you know who you are) and I’m impressed.

With the whiteboard, you can draw, write, create shapes, and import images from Join.Me’s easily-accessible library or from your own photos on the iPad. You can share it while you’re drawing it, so viewers can see your whiteboard. You can share other documents, too, once you get them into Join.Me. You can draw right on the iPad’s screen and everyone can see it whether they are joining the meeting from a desktop, a laptop, an iPad, or a mobile device.

With one tap you can be in an audio conference along with the screen sharing, which means you can start, join, and participate in web meetings on your iPad and share your iPad’s screen. Yes, that means you can now graphically record web meetings on your iPad and have everyone see it. Easily.

What’s it good for?

I can see using this in several ways:

  • To share concept sketches or other documents with clients, annotating them in real time while we talk, even if I’m sitting in an airport or a hotel room or anywhere else.
  • To graphically record web meetings and have everyone be able to see it, even if I don’t have my giant Cintiq handy.
  • To quickly create rough sketches to capture ideas during a meeting.
Desktop view of Join.Me whiteboard

This is what it looks like on the computer when someone is sharing an iPad whiteboard.


Likes & Wishes

What I like about the whiteboard tool:

  • Infinite canvas: You can just keep sliding your work to the side and adding more. Viewers can pan and zoom independently of the presenter, too, so they can go back and check details anytime they need to.
  • Zoom: Totally necessary for any drawing app, in my view. The zoom isn’t as smooth as I would like and it takes a couple tries to zoom out sometimes, but there’s a handy framing button that jumps you back and forth.
  • Drawings are objects: Everything is treated like an object, which is nice because it can be resized, dragged, removed, recolored, and so on. You can pull a sticky note out of the Join.Me library, write on it, and then move and resize the whole note.
  • Layers: I also really like layers in my drawing apps. This one has rudimentary layers, allowing you to move objects in front of or behind other objects.
  • Library: The sketch library provided with the app is nice. I like that you can also bring in your own art — which means you can create your own library of stuff that you use over and over. It’s really easy to drop stuff into the whiteboard from the library, too.
  • Audio: During testing, I tapped the little phone icon in the top left corner and joined the call from my iPad. The sound quality on my end was great, and my partner in crime told me she could hear me loud & clear too.
Join.Me whiteboard with zoom

The sticky note background, car, clouds, and book cover were pulled in from the image library and my photo roll. The rest was drawn in the whiteboard itself.


What I wish:

  • It still isn’t a collaborative whiteboard; only one person can work on it at once. If you pass the presenter role to someone else, your whiteboard stays with you, and they have to start a new one or share another document, so in that sense it’s like any other web conference screen share. However, you can email the whiteboard to yourself in JPG, PDF, or (game-changer alert!) native Join.Me format, so someone else can load it into their copy of Join.Me and continue working on it. I’m a big fan of any iPad app that lets you move your content around. BIG fan.
  • Like any other iPad graphic recording tool, it does slow you down. It just takes longer to navigate around the space, draw and write things. I wouldn’t try to do detailed graphic recording while facilitating a meeting using this tool.
  • You can’t use the whiteboard from the desktop version of Join.Me, at least not that I can see. You can watch, but you can’t create and share a whiteboard. Since you can create and share your screen using any application you have on your computer, this isn’t a huge deal.
Join.Me on the iPhone

What it looks like on my iPhone (sideways).

Where do I get it?

The app is available on the app store. If you don’t need to run meetings, it’s free. If you want to host meetings, you’ll need to visit Join.Me on the web and get an account. There’s a basic, free one that lets you have up to 10 participants, and there are pro and enterprise levels too.

There’s also a Join.Me desktop application that’s only necessary if the person on the computer wants to present. If they’re just attending, they can do that right in a web browser without downloading anything. (Did I mention easy?)

A Sneak Peek at Results of The Grove’s Recent Survey: Five Minutes on Working Virtually

If you haven’t had a chance to take the five-minute survey yet and would like to, you can find it here.

The Grove recently launched a short survey on virtual work and remote meetings. Among other things, we asked hundreds of people who do virtual work about their biggest pain point: the one thing they wish would go away and just stop being a problem about working remotely.

The responses fall broadly into three categories. Respondents identified pain points related to technology, to people, and to the setting where the work is done. It may surprise you to learn that technology is not the category with the most pain points. The largest set of different pain points is related to people. In fact, the number of pain points having to do with people is almost twice as large as that in either of the other two categories. Note that this doesn’t say anything about how often a given point was cited; I’m not dealing with that here, just looking at unique responses. The image below is a compilation of the responses, sorted unscientifically by yours truly. (Click to see it bigger.)

List of pain points in remote work
Compilation of responses to the question: What is the most painful part of working remotely?

The pain points related to people have to do with how people feel in remote meetings, things people do or fail to do that make the work harder, the difficulty of making or maintaining interpersonal connections at a distance, and basic knowledge and skills around working remotely. I know I have struggled with most, if not all, of these issues in the past ten years of working virtually. Many of these pain points can be addressed through training (of facilitators and participants), making explicit agreements about how to work together and behave as a remote team, and extra time and effort involved in preparation. Sometimes, though, it seems as soon as a team gets one issue taken care of, another, hydralike, rears its annoying head.

Regarding technology, the agony is divided between tool-related issues and those dealing with connection (or lack thereof) when trying to communicate. One that we did not see, but that I expected, is overwhelm about the number of tools available. Does anyone else find it hard to keep up? I sometimes feel that if I just keep looking and keep testing, I will find the perfect tool for every task related to remote collaboration. I’m not saying I’ll find one tool that does everything. Rather, I’d love to find a set of tools that collectively do everything. Easily. Okay, maybe now I’m dreaming.

The setting we’re in when we do remote work accounts for the remainder of the pain. Real life issues, the consequences of not being physically in the same room, and the effects of having to be sitting at a computer are the main groups here. As with the other categories, some of the complaints can be addressed through group norms, different tools, or extra effort, but again I can empathize and have experienced all of these myself. What about you? Do you have a favorite, and how did you stop the pain?

If you’d like to get your voice in the mix, please hop on over and take the five-minute survey. It will remain open through June 30, 2015.

Graphic recording of web meetings with the iPad – Yes, you can!

“So can I graphically record a web meeting on my iPad?”

That’s a question I get asked a lot, and historically, it has had a complicated answer. For a while, the answer was “Not if you want anyone in the web meeting to see your graphic recording while you’re doing it, no.” Then it was, “Yes, but only if they’re on the same wireless network you’re on, and even then it’s a lot of setup.” After that it was, “Technically, yes, but realistically, no,” because although it was technically possible to share your iPad’s screen to a desktop and then share the desktop’s screen in a web meeting, it wasn’t easy, smooth, fast, or reliable. As of last week, the answer has changed again.

That’s because last week, Squirrels released Slingshot, the first really workable solution that I’ve seen for real-time graphic recording in a web meeting using an iPad. Is it perfect? Nope. Is it good enough? Yes, for some situations. Is it for everybody? Nope.

Screenshot of iPad

My quick iPad drawing (screen shot from iPad).
I’m zoomed in a little, which is why it looks a bit fuzzy.

How Does It Work?

Slingshot lets you host a web conference in a snap from your desktop computer or mobile device. If you’re hosting from your desktop, you can use Airplay (built into your iOS mobile device) to mirror your device’s screen to your computer, where it is automagically screen-shared with everyone in the web meeting. Once I had downloaded and installed Slingshot on my computer, it took about five minutes to launch a meeting, connect my iPad, and share my iPad’s screen with someone in the web conference. I launched a drawing app on the iPad (Brushes in this case) and started drawing, just as I would if I were taking notes. My remote-viewing partner in crime (in this case my partner in many other things, Craig Smith) reported that the drawing was very smooth, no delay, no jumping around.

Squirrels also makes an app called Reflector, which mirrors your iPad screen to the desktop just like Slingshot. With Reflector, you have to join a web conference with something like Skype, WebEx, Connect, or Join.Me, and then share your screen. Slingshot skips all that by blending Reflector’s mirroring capability with an easy-to-use web conferencing tool, so you only have one thing to set up.

Photo of computer and iPad showing Slingshot

The iPad, where I was drawing, mirroring into Slingshot.
You’re seeing the Slingshot app floating over the Slingshot web page.
Don’t worry that the iPad is plugged in; it doesn’t need to be. I was just running out of juice.

Sounds Great! So Why Isn’t It Perfect?

First, because of how the mirroring works. Not only does your drawing get mirrored, but everything on your screen gets mirrored too — the palettes, title bar, whatever you can see. But we could live with that. The thing that really gets in the way is that the zooming gets mirrored as well.

To get good results and fit a lot of stuff on one screen, you need to zoom in when graphic recording on the iPad. Which is fine, except that when someone else is watching the screen and sees the zooming without any context, it’s very disorienting. I would be very careful about using this to record a web conference just because of the mirrored zoom. I wish there were a way to turn that off and just show the graphic recording unfolding without the zooming. That would be pretty darn close to perfect.

Second, you can’t do it just from the iPad, without the desktop computer. You still need to join the meeting on a desktop computer running Slingshot, and then you connect the iPad in order to mirror it. I really wanted to be able to join the meeting on the iPad and share the screen from there, but that’s not how it works.

The third reason isn’t particular to Slingshot. It’s just that live graphic recording on the iPad is not for everyone, regardless of how it’s shared in the web meeting. It’s slower than recording on paper and it requires more concentration, which means you can miss things. It’s much easier to get sucked into what you’re doing and forget to listen, especially if you’re not completely familiar with the drawing app.

Last but not least, both times I set up iPad sharing, Slingshot on my desktop crashed as I connected the iPad the first time. Once I relaunched and reconnected the iPad, all was well.

However, at long last, when someone asks if it’s possible to use their iPad to record a web meeting, I can say, “Yes! Yes it is.” Thanks, Squirrels!

Virtual Meeting Tool: The Check-in Grid

Getting people comfortable in a virtual meeting can be a challenge, especially if you plan to use some of the more advanced features of your web conferencing tools. Even if that’s not in your agenda, it’s helpful to have folks take a minute to check in once the group has assembled. You’re familiar, I’m sure, with the awkward-silence-and-simultaneous-speaking method of going around the virtual room. How about trying a visual alternative in your next meeting? This one was shared with me by a student in one of my digital facilitation workshops.

The check-in grid is a quick, easy and fun way to avoid the awkward stumbling while still giving everyone a chance to have his or her voice heard. It also lets folks experience the group whiteboard feature of a web conferencing tool during a safe and low-stakes activity, so that later, when you ask them to dot vote or contribute to a group visual, they aren’t totally lost.

You’ll need to enable the collaborative whiteboard feature in your web conferencing tool. Some of them require you to do this when you set the meeting up, and others let you activate it once the meeting has begun. (See below for alternative ideas if your system just doesn’t have this feature.)

Start by drawing a grid on the collaborative whiteboard that has at least enough squares for each person to have one (including yourself). You can do this in advance of the meeting, or while people are gathering in the call, or right after you call the meeting to order when everyone is present.

the check in grid - it looks like a tic tac toe board.

Draw a simple grid.


Next, set the stage for participation by saying that you’d like to have the group do a visual check-in. When you give the signal, everyone will pick an empty square and use the drawing tools to draw a simple face that reflects how they are feeling right now. Alternatively, you could frame the instructions in one of these other ways:

Draw a simple face that shows…
• …how you are feeling about our progress so far.
• …how you are feeling right now about the issue we have come together to discuss (name the issue so it’s clear).
• …how your weekend went.

And so on. Explain that there will be a little pandemonium for a moment as people sort out which square to use. Point out that there are enough for everyone, so if two people start to use one square, one of them should just choose a different one instead.

Show people where the drawing tools are and how they work, if they don’t already know. You can invite everyone to make a test mark outside the grid if they want to practice.

When everyone is ready, tell them to go ahead. Let them sort out the squares themselves – it’s a mess at first, but it will work out. It’s okay if they talk. Wait until it looks like most people have chosen before drawing your own image in an unused square.

filled-in version of the check in grid

Makes you want to know what’s up with the cat person, doesn’t it?


When everyone has finished, start at the top left and go along the rows. Ask each artist to identify him or herself and say something about why they chose to draw what they did. Acknowledge each person’s contribution.

There you go! You’ve given everyone a chance to speak and share something about themselves, and you’ve established a speaking order that you can use throughout the meeting to help avoid talking over one another.

Bonus Points:
Once everyone is done drawing but before you go around for the verbal check-in, take a screen shot or download the image, open it in your drawing program, share your screen, and graphically record everyone’s remarks around the outside of the grid. Only do this if you can manage it very smoothly and quickly, or you will lose the good energy built up by the drawing.

No collaborative whiteboard? No problem!
Alternative #1: Ask everyone to draw a quick face on a scrap of paper, take a photo with their phone, and either upload it to the web conferencing tool (if that’s easy) or email it to you right away. Flip through the uploaded drawings in the web conference, or share your screen and open them one by one on your computer. Have each person explain as above.

Alternative #2: There are a lot of free shared whiteboarding tools that you can use for your meeting. Flockdraw is one. You just create a whiteboard and share the link, and everyone can draw together using its incredibly simple interface. There are many other options too — just keep searching until you find one that you like.

flockdraw screenshot

A co-conspirator and I created this in about fifteen seconds on our first Flockdraw visit.


Alternative #3: Instead of drawing a face, everyone can use the whiteboard type tool to write one word that describes how they are doing (or answers whatever question you have asked them).

Give it a try — let me know how it goes!